Simple Roasted Summer Squash- Flavorful & Easy
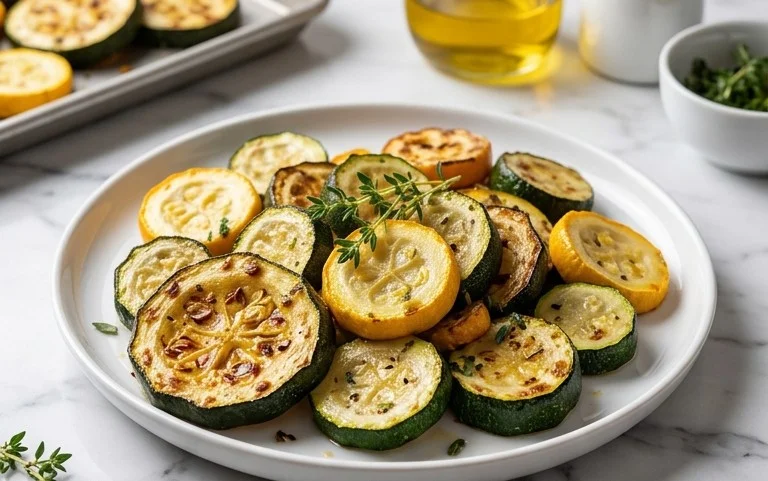
Roasted Summer Squash is more than just a side dish; it’s a vibrant celebration of sun-kissed flavors and effortless summer cooking. When those beautiful zucchini, yellow squash, and pattypan varieties flood our farmers’ markets, I know exactly what I want to do with them. There’s something incredibly satisfying about transforming humble squash into a golden, caramelized masterpiece with just a few simple ingredients and the magic of the oven. People adore this recipe because it’s incredibly versatile – it pairs perfectly with grilled meats, fish, or even as a light vegetarian main. What truly makes this Roasted Summer Squash special is how the roasting process unlocks its natural sweetness and creates a wonderfully tender texture with delightfully crispy edges. It’s the taste of summer, simplified.
Roasted Summer Squash
Summer squash is one of those versatile vegetables that truly shines when given a little heat. Forget soggy, bland squash; roasting transforms it into a tender, slightly sweet, and wonderfully caramelized delight. It’s the perfect side dish for any summer meal, from grilled chicken and fish to a simple pasta. This recipe takes a humble summer squash and elevates it with a few pantry staples, creating a dish that’s both incredibly easy and bursting with flavor. I love how quickly it comes together, making it ideal for those busy weeknights when you still want something delicious and healthy on the table. The combination of Parmesan, lemon pepper, and a hint of paprika creates a savory, slightly zesty, and visually appealing finish. It’s a simple technique that unlocks the best of summer’s bounty.
Ingredients:
Cooking Instructions
Let’s get these vibrant summer squash transformed into a mouthwatering side dish. It’s a straightforward process, and I’ll walk you through each step to ensure perfect results every time.
1. Prepare the Squash:
The first step is all about getting the squash ready for its roasting journey. You’ll want to wash your summer squash thoroughly under cool running water. This removes any dirt or residue. Once clean, it’s time to trim off the ends. You can simply slice off the top and bottom about ¼ inch. For this recipe, I find that cutting the squash into ½-inch thick rounds or half-moons works best. If your squash are on the larger side, cutting them into half-moons will ensure more even cooking. The goal here is to create pieces that are relatively uniform in size so they roast at the same rate, preventing some pieces from becoming mushy while others remain too firm. You can also cut them into spears if you prefer, just aim for similar thickness across all pieces.
2. Toss with Olive Oil and Seasonings:
Now comes the flavor infusion. In a medium-sized bowl, place your prepared squash. Drizzle the tablespoon of olive oil over the squash. The olive oil is crucial for helping the squash to roast and develop that desirable slightly crispy exterior and tender interior. It also acts as a binder for our seasonings. Sprinkle the kosher salt, lemon pepper seasoning, and paprika evenly over the squash. Gently toss everything together with your hands or a spatula, ensuring each piece of squash is lightly coated with the oil and seasonings. Take your time with this step; an even distribution of seasonings is key to a well-flavored dish. I like to let the squash sit for a minute or two after tossing, allowing the flavors to start to meld.
3. Prepare for Roasting:
Preheat your oven to 400°F (200°C). This higher temperature is perfect for achieving a beautiful roast on the squash, bringin extractg out its natural sweetness and creating those lovely caramelized edges. While the oven heats up, grab a baking sheet. For easier cleanup, I highly recommend lining your baking sheet with parchment paper or aluminum foil. This prevents any sticking and makes washing up a breeze. Spread the seasoned squash in a single layer on the prepared baking sheet. It’s very important to avoid overcrowding the pan. If the squash pieces are piled on top of each other, they will steam rather than roast, resulting in a less desirable texture. If necessary, use two baking sheets. This ensures that each piece of squash has direct contact with the hot air in the oven, promoting even browning and caramelization.
4. The Roasting Process:
Place the baking sheet with the squash into the preheated oven. Roast for 15-20 minutes. During this time, the squash will begin extract to soften and start to develop some color. About halfway through the roasting time, which would be around the 8-10 minute mark, I like to give the squash a gentle stir or flip. This helps to ensure that all sides of the squash get evenly exposed to the heat, leading to more uniform cooking and browning. You’ll notice the squash becoming more tender and potentially developing slightly golden-brown edges. Keep an eye on it, as oven temperatures can vary.
5. Add the Cheesy Topping and Finish Roasting:
Once the squash has reached your desired tenderness and has a nice begin extractning to its browning, it’s time for the finishing touch. Remove the baking sheet from the oven. Sprinkle the grated Parmesan cheese and Panko bread crum extractbs evenly over the roasted squash. The Panko bread crum extractbs are fantastic because they provide a wonderful crispiness that contrasts beautifully with the tender squash. The Parmesan cheese will melt and become wonderfully nutty and golden. Gently toss the squash on the baking sheet one more time to distribute the cheese and bread crum extractbs. Return the baking sheet to the oven and continue to roast for another 5-7 minutes, or until the Parmesan cheese is melted and lightly golden brown, and the bread crum extractbs are toasted and crispy. Be sure to watch it closely during this final stage, as the bread crum extractbs can go from perfectly toasted to burnt quite quickly. Once done, carefully remove the baking sheet from the oven.
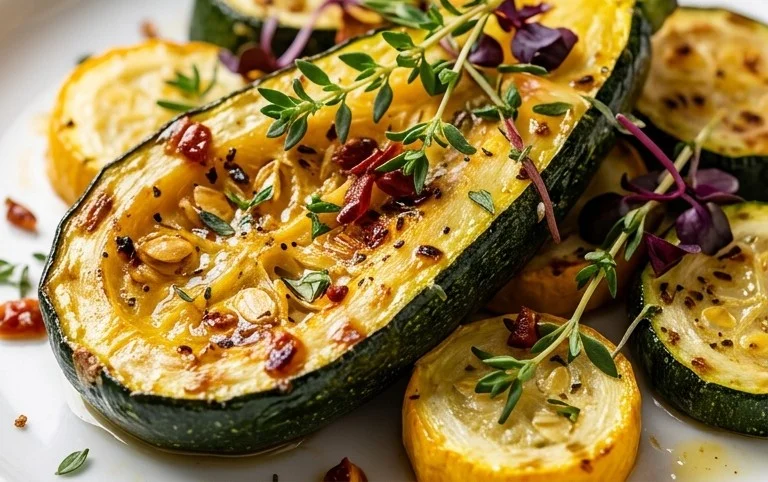
This roasted summer squash is now ready to be enjoyed! It’s a simple yet incredibly satisfying side dish that’s perfect for any occasion. Serve it hot, and feel free to garnish with a little fresh parsley or a squeeze of fresh lemon juice if you desire an extra pop of brightness.
Conclusion:
I hope you’re as excited as I am to dive into this incredibly simple yet satisfying Roasted Summer Squash recipe! It’s truly a weeknight hero, transforming humble zucchini and yellow squash into tender, slightly caramelized bites bursting with fresh, summery flavor. The beauty of this dish lies in its versatility and ease. It requires minimal prep, allowing you to spend less time in the kitchen and more time enjoying the sunshine (or the delicious results!). The natural sweetness of the squash is enhanced by the roasting process, creating a delightful texture that’s both tender and firm.
This Roasted Summer Squash is a fantastic side dish that pairs beautifully with grilled meats, poultry, fish, or even as a light and healthy accompaniment to pasta. For a more substantial meal, toss it with cooked quinoa or your favorite grains, or even fold it into an omelet for breakfast. Don’t be afraid to experiment with variations! Consider adding a sprinkle of red pepper flakes for a hint of heat, a handful of cherry tomatoes in the last 10 minutes of roasting, or a drizzle of balsamic glaze just before serving. Give this recipe a try – you won’t regret adding this flavorful, healthy staple to your summer repertoire!
Frequently Asked Questions about Roasted Summer Squash:
What other vegetables can I roast alongside the summer squash?
You can absolutely add other summer vegetables! Bell peppers, red onion, cherry tomatoes, or even broccoli florets roast beautifully alongside summer squash. Just make sure to cut them into similar-sized pieces for even cooking.
How can I prevent my summer squash from becoming watery when roasting?
While roasting naturally draws out some moisture, you can minimize this by not overcrowding the baking sheet. Ensure there’s enough space between the squash pieces for air to circulate. You can also lightly pat the squash dry with a paper towel after slicing, especially if it feels particularly wet.
Roasted Summer Squash
A simple and delicious side dish featuring tender roasted summer squash with a cheesy, crispy topping.
Ingredients
-
1 pound summer squash (about 2 medium)
-
1 tablespoon olive oil
-
2 tablespoons grated Parmesan cheese
-
1 tablespoon Panko bread crumbs
-
1 teaspoon lemon pepper seasoning
-
½ teaspoon paprika
-
½ teaspoon kosher salt
Instructions
-
Step 1
Preheat oven to 400°F (200°C). -
Step 2
Wash the summer squash and trim off the ends. Slice the squash into ½-inch thick rounds or half-moons. -
Step 3
In a medium bowl, toss the sliced squash with olive oil, lemon pepper seasoning, paprika, and kosher salt until evenly coated. -
Step 4
Spread the seasoned squash in a single layer on a baking sheet. -
Step 5
Roast for 15 minutes, then carefully remove the baking sheet from the oven. -
Step 6
Sprinkle the grated Parmesan cheese and Panko bread crumbs evenly over the roasted squash. -
Step 7
Return to the oven and roast for another 5-10 minutes, or until the squash is tender and the topping is golden brown and crispy.
Important Information
Nutrition Facts (Per Serving)
It is important to consider this information as approximate and not to use it as definitive health advice.
Allergy Information
Please check ingredients for potential allergens and consult a health professional if in doubt.