Peanut Butter Cup Chocolate Roll Cake Recipe
Peanut Butter Cup Chocolate Roll Cake is more than just a dessert; it’s a nostalgic hug in cake form. We’ve all experienced that irresistible craving for the perfect marriage of rich chocolate and creamy peanut butter, haven’t we? This incredible Peanut Butter Cup Chocolate Roll Cake takes that beloved flavor combination and elevates it into a show-stopping, yet surprisingly approachable, dessert. Imagin extracte a tender, deeply chocolatey sponge cake rolled around a luscious peanut butter frosting, then adorned with a decadent chocolate ganache and those iconic peanut butter cup crum extractbles. It’s the ultimate indulgence, perfect for birthdays, celebrations, or simply when you need a serious dose of comfort. The magic of this Peanut Butter Cup Chocolate Roll Cake lies in its delightful textures and its ability to bring pure joy to anyone who takes a bite.
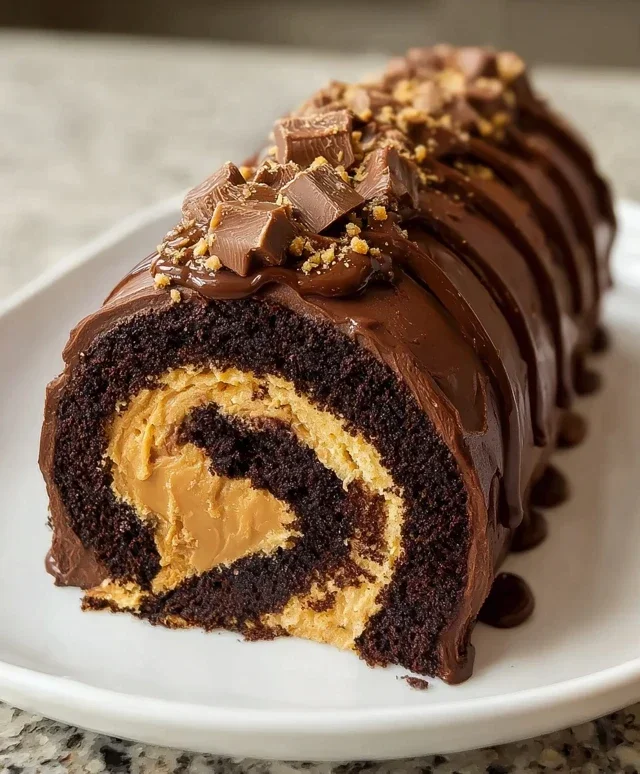
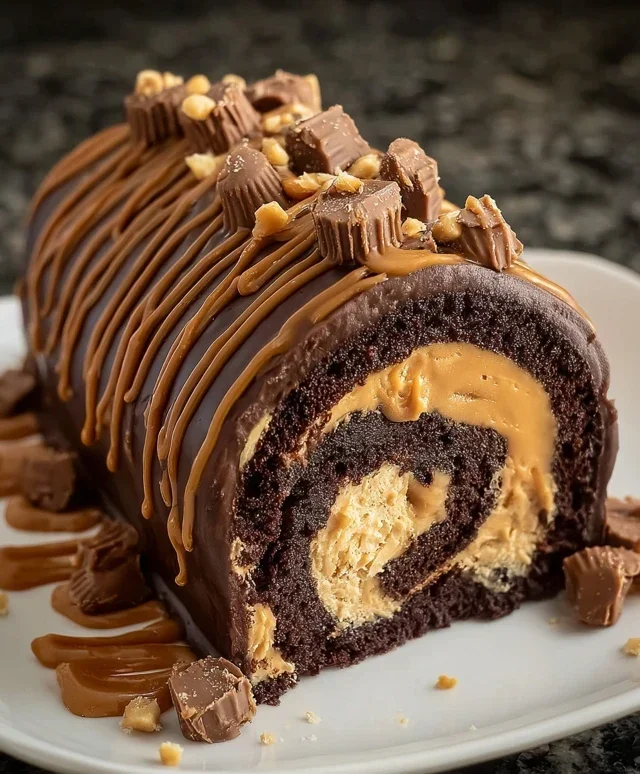
Peanut Butter Cup Chocolate Roll Cake
Get ready to impress your friends and family with this decadent Peanut Butter Cup Chocolate Roll Cake! This recipe combines the rich, deep flavor of chocolate with the irresistible, creamy goodness of peanut butter, all swirled into a beautifully presented roll cake. It looks impressive, but I promise, it’s totally achievable in your home kitchen. The light and airy chocolate sponge cake is the perfect canvas for the sweet and nutty peanut butter filling and the delightful crunch of chopped peanut butter cups. It’s a treat that’s perfect for birthdays, holidays, or just because you deserve something truly special.
Ingredients:
Instructions:
Prepare the Chocolate Sponge Cake:
First things first, let’s get our oven preheated to 350°F (175°C) and prepare a 10×15 inch jelly roll pan by greasing it and lining it with parchment paper. You can lightly grease the parchment paper as well for extra insurance that your cake won’t stick. In a medium bowl, whisk together the all-purpose flour, unsweetened cocoa powder, baking powder, and salt. Sifting these dry ingredients together will help ensure there are no lumps and distribute them evenly. In a separate, larger bowl, beat the 4 large eggs and 1/2 cup granulated sugar together until they are thick, pnon-alcoholic ale yellow, and form ribbons when the beaters are lifted – this process is called “ribbon stage” and it’s crucial for creating a light and airy sponge. Gently fold the dry ingredients into the egg mixture in two additions, being careful not to overmix. You want to incorporate them until just combined, otherwise, you’ll deflate all that lovely air you whipped into the eggs. Spread this batter evenly into your prepared jelly roll pan.
Bake and Cool the Cake:
Bake the chocolate cake in the preheated oven for 10-12 minutes, or until a toothpick inserted into the center comes out clean. It should spring back when lightly touched. While the cake is baking, lay out a clean kitchen towel on your counter and dust it generously with the 1/4 cup powdered sugar. This powdered sugar will prevent the cake from sticking to the towel as it cools and also help prevent a crust from forming. Once the cake is out of the oven, immediately invert the hot cake onto the prepared towel. Carefully peel off the parchment paper. Starting from one of the short ends, tightly roll up the warm cake and towel together. This technique helps the cake retain its shape and prevent it from cracking when you eventually roll it with the filling. Let the rolled cake cool completely on a wire rack.
Make the Peanut Butter Filling:
While the cake is cooling, let’s whip up the dreamy peanut butter filling. In a medium bowl, combine the 1/2 cup smooth peanut butter and 1/2 cup heavy cream. Using an electric mixer, beat these ingredients together until they are smooth and creamy. Gradually add the 1 cup of powdered sugar, continuing to beat until the filling is light and fluffy. You want a consistency that’s spreadable but holds its shape. Taste it – if you want it a little sweeter, you can add a tablespoon or two more of powdered sugar.
Assemble the Roll Cake:
Once the cake is completely cool, unroll it carefully. If there are any small cracks, don’t worry, the filling will help disguise them. Spread the peanut butter filling evenly over the surface of the cake, leaving a small border around the edges. Try to get an even layer so that every bite has a good amount of filling. Sprinkle the chopped mini peanut butter cups evenly over the peanut butter filling. These little bursts of chocolate and peanut butter flavor are what give this cake its name and its irresistible charm.
Roll and Chill:
Now comes the exciting part – rolling it up again! Starting from the same short end you began with earlier, carefully and tightly reroll the cake, this time with the filling inside. Use the towel to help you guide the roll and keep it snug. Once rolled, you can wrap the entire roll cake tightly in plastic wrap and refrigerate it for at least 1-2 hours, or until the filling is firm. This chilling time is essential for the cake to hold its shape and for the flavors to meld together beautifully.
Serve and Enjoy:
Once chilled, unwrap your masterpiece. You can dust the top with a little extra powdered sugar for a pretty finish, or even drizzle it with a bit of melted chocolate if you’re feeling extra fancy. Slice the roll cake into generous portions using a sharp knife. Each slice will reveal the beautiful spiral of chocolate cake and creamy peanut butter filling, studded with delightful pieces of peanut butter cups. Enjoy every single bite of this amazing Peanut Butter Cup Chocolate Roll Cake!
Conclusion:
And there you have it! This Peanut Butter Cup Chocolate Roll Cake is a true showstopper, perfect for impressing guests or simply treating yourself to an explosion of familiar, comforting flavors. The combination of a light, fluffy chocolate sponge, a creamy peanut butter filling, and a rich chocolate ganache coating is simply divine. It’s a dessert that delivers on taste, texture, and visual appeal, making it a guaranteed hit for any occasion. Don’t be intimidated by the rolling aspect – with a little patience and the right technique, you’ll achieve a beautiful spiral that’s as delightful to look at as it is to eat.
For serving, consider dusting with a little powdered sugar for an extra touch of elegance, or a drizzle of extra peanut butter sauce. It pairs wonderfully with a scoop of vanilla ice cream or a dollop of whipped cream. If you’re feeling adventurous, consider adding some chopped peanut butter cups to the filling for an extra burst of texture and flavor, or perhaps a swirl of caramel into the ganache. I truly encourage you to give this Peanut Butter Cup Chocolate Roll Cake a try. It’s a rewarding baking project that results in an incredibly satisfying dessert.
Frequently Asked Questions:
My cake cracked when I tried to roll it, what did I do wrong?
Don’t worry, cracking is a common issue! It often happens if the cake is over-baked, too dry, or rolled while too hot. Ensure your cake is baked just until it springs back to the touch. Letting it cool slightly (but not completely) on a clean tea towel dusted with cocoa powder before rolling can also help. Gently loosen the edges before you start rolling, and always roll with the longer side towards you for a more manageable roll.
Can I make this ahead of time?
Absolutely! You can bake the cake a day in advance and store it, wrapped well, at room temperature. The ganache can also be made ahead and gently reheated. You can even assemble the entire roll cake a few hours before serving and keep it refrigerated. Just allow it to sit at room temperature for about 15-20 minutes before slicing to let the filling soften slightly for the best texture.
Peanut Butter Cup Chocolate Roll Cake
A decadent chocolate cake roll filled with a creamy peanut butter frosting and studded with chopped peanut butter cups.
Ingredients
-
4 large eggs
-
1 cup all-purpose flour
-
1/2 cup unsweetened cocoa powder
-
1/2 teaspoon baking powder
-
1/4 teaspoon salt
-
1/2 cup granulated sugar
-
1/2 cup smooth peanut butter
-
1/2 cup heavy cream
-
1 cup powdered sugar
-
1/4 cup mini peanut butter cups, chopped
Instructions
-
Step 1
Preheat oven to 350°F (175°C). Grease and flour a 10×15 inch jelly roll pan. Line with parchment paper, then grease and flour the parchment. -
Step 2
In a medium bowl, whisk together flour, cocoa powder, baking powder, and salt. -
Step 3
In a large bowl, beat eggs and granulated sugar until light and fluffy. Gradually add the dry ingredients to the egg mixture, mixing until just combined. -
Step 4
Spread batter evenly into the prepared pan. Bake for 12-15 minutes, or until a toothpick inserted into the center comes out clean. -
Step 5
While the cake bakes, prepare the filling. In a bowl, beat together peanut butter and 1/2 cup of the powdered sugar. In a separate bowl, whip heavy cream until stiff peaks form. Gently fold the whipped cream into the peanut butter mixture until combined. -
Step 6
Immediately after removing the cake from the oven, invert it onto a clean kitchen towel dusted with 1/4 cup powdered sugar. Remove parchment paper. Starting from the short end, tightly roll up the cake with the towel and let it cool completely. -
Step 7
Once cooled, gently unroll the cake. Spread the peanut butter filling evenly over the cake. Sprinkle with chopped mini peanut butter cups. Roll the cake up again, without the towel, and place seam-side down. -
Step 8
Dust with remaining powdered sugar before slicing and serving.
Important Information
Nutrition Facts (Per Serving)
It is important to consider this information as approximate and not to use it as definitive health advice.
Allergy Information
Please check ingredients for potential allergens and consult a health professional if in doubt.