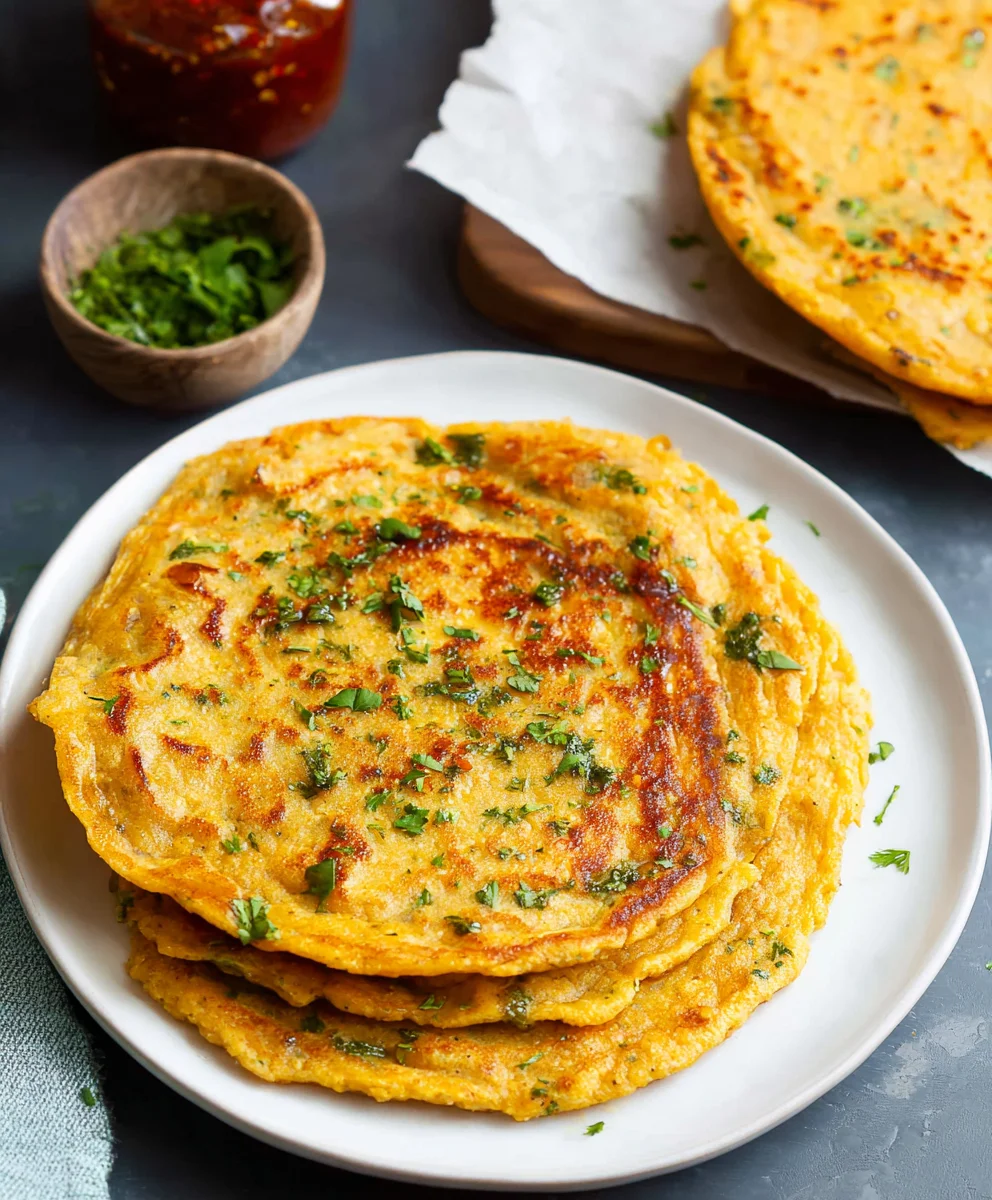
Masoor Dal Chilla – Easy Savory Red Lentil Pancakes
Masoor Dal Chilla | Savory Red Lentil Pancakes are a revelation for anyone seeking a healthy, flavorful, and incredibly versatile breakfast or snack. Imagin extracte waking up to the enticing aroma of warm spices and perfectly cooked lentils, transformed into delicate, golden-brown discs that are as satisfying to the palate as they are to the soul. What is it about these humble pancakes that captures our hearts? Perhaps it’s their inherent simplicity, the way a handful of pantry staples can be elevated into something truly extraordinary. Or maybe it’s the delightful interplay of textures – a slightly crisp exterior yielding to a tender, savory interior. These Masoor Dal Chilla | Savory Red Lentil Pancakes offer a delightful escape from the ordinary, a wholesome indulgence that nourishes both body and mind.
Why You’ll Love This Recipe
People adore Masoor Dal Chilla | Savory Red Lentil Pancakes for so many reasons. They are naturally gluten-free, packed with plant-based protein from the red lentils, making them a fantastic option for vegetarians and vegans alike, or simply anyone looking to boost their protein intake. They’re incredibly quick to prepare, making them ideal for busy mornings or a speedy weeknight meal. Plus, their mild, earthy flavor provides a perfect canvas for a wide array of toppings, from cooling yogurt and vibrant chutneys to spicy relishes and fresh herbs. This adaptability is a huge part of their charm, ensuring that every bite can be a new and exciting culinary adventure. Get ready to fall in love with this wonderfully simple yet profoundly delicious dish!
Ingredients:
- 1 cup split red lentils (masoor dal)
- 3 cups water (for soaking lentils)
- 1 green chilli
- 1 inch gin extractger
- 1 teaspoon kosher salt
- ½ cup water (for grinding)
- 2 tablespoons cilantro (finely chopped)
- 2 tablespoons oil
Preparing the Lentil Batter
The foundation of our delicious Masoor Dal Chilla lies in a perfectly prepared lentil batter. This initial step is crucial for achieving the right consistency and flavogin extractWe begin by thoroughly rinsing the split red lentils. Place the 1 cup of masoor dal in a fine-mesh sieve and rinse them under cool running water until the water runs clear. This helps to remove any dust or debris. Next, transfer the rinsed lentils to a medium-sized bowl and add the 3 cups of water for soaking. Give them a quick stir. You’ll want to let these lentils soak for at least 4 to 6 hours, or ideally, overnight. Soaking is essential as it softens the lentils, making them easier to grind into a smooth batter and also aids in their digestion. Once they have soaked, drain the lentils completely, discarding the soaking water.
Grinding the Batter
Now it’s time to transform those soaked lentils into a smooth, pourable batter. Transfer the drained red lentils to a blender or a high-powered food processor. To this, we’ll add the aromatics. Finely chop the 1 green chilli (you can adjust the amount based on your spice preference; for a milder chilla, remove the seeds and membranes). Peel and roughly chop the gin extractnch piece of ginger. Add bogin extractthe green chilli and ginger to the blender with the lentils. Now, it’s time to add some liquid for grindinggin extractour in the ½ cup of water. Begin by pulsing the blender a few times to break down the ingredients, then blend on high speed until you achieve a smooth, thick batter. If the batter seems too thick and is struggling to blend, you can add a tablespoon or two more water, but be careful not to make it too runny. The ideal consistency is similar to pancake batter – thick enough to coat the back of a spoon but still pourable. Once smooth, scrape down the sides of the blender to ensure everything is incorporated. Transfer this smooth batter to a bowl. Stir in the 1 teaspoon of kosher salt, ensuring it’s evenly distributed. For an extra layer of freshness and flavor, fold in the 2 tablespoons of finely chopped cilantro. Mix gently until just combined. You can now cover the bowl and let the batter rest for about 15-20 minutes. This resting period allows the flavors to meld and the batter to develop its full potential.
Cooking the Chillas
With our batter ready, we can now move on to the exciting part: cooking the Masoor Dal Chillas. Heat a non-stick skillet or a well-seasoned cast-iron griddle over medium heat. Once the pan is hot, add about ½ tablespoon of oil and swirl it around to coat the surface evenly. Pour a ladleful of the lentil batter onto the hot skillet. You can tilt the pan gently to spread the batter into a circular shape, about 6-8 inches in diameter, similar to making a crepe or a thin pancake. Don’t overcrowd the pan; you’ll likely only be able to cook one or two chillas at a time, depending on the size of your skillet. Let the chilla cook undisturbed for about 2-3 minutes, or until you see small bubblesgin extractrming on the surface and the edges begin to look dry and slightly golden brown.
Flipping and Finishing
The moment of truth! Carefully slide a spatula under the edge of the chilla and gently flip it over. If it seems to be sticking, give it a moment longer to cook through; the moisture will help release it. Cook the second side for another 1-2 minutes, or until it’s also golden brown and cooked through. The chillas should be tender on the inside with a slightly crispy exterior. You can press down gently with your spatula to ensure even cooking. Once cooked, carefully slide the chilla onto a plate. Repeat the process with the remaining batter, adding a little more oil to the pan between each chilla as needed to prevent sticking and ensure a beautiful golden-brown finish. If you like your chillas extra crispy, you can cook them for a minute or two longer on each side.
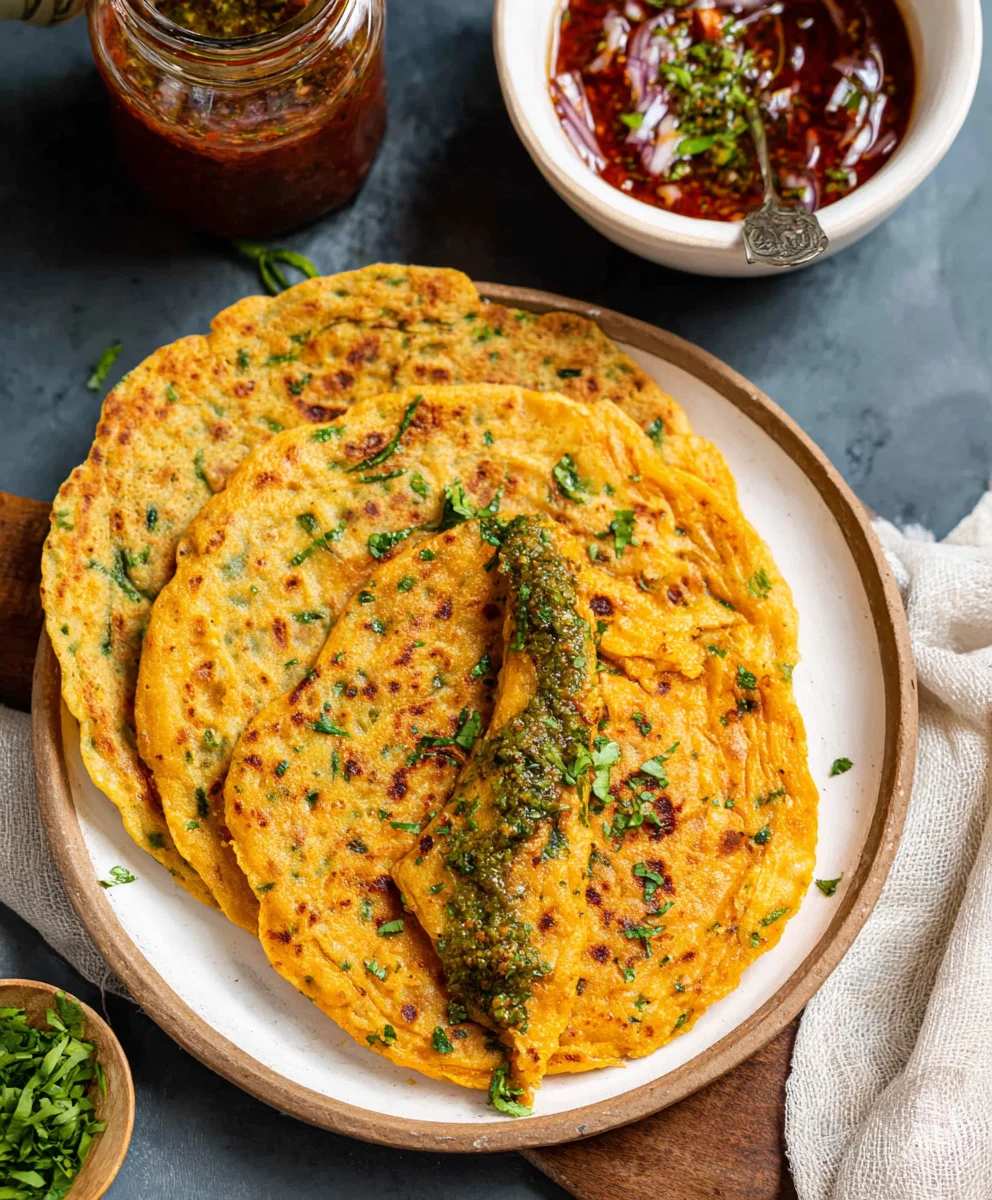
Serving Suggestions
These Masoor Dal Chillas are wonderfully versatile and can be enjoyed at any time of day. Serve them hot off the griddle for the best texture. They are delicious on their own, but they truly shine when paired with complementary accompaniments. A dollop of plain yogurt or a cooling raita makes a fantastic contrast to the savory flavor. For a bit more tang, consider serving them with a side of homemade tomato chutney or a vibrant mint-coriander chutney. They also pair beautifully with a simple pickle. These chillas are substantial enough to be a light meal or a hearty breakfast, and they also make an excellent appetizer or snack. Enjoy the warm, comforting, and deeply satisfying flavors of your homemade Masoor Dal Chillas!
Conclusion:
There you have it! Your guide to creating delicious and wholesome Masoor Dal Chilla | Savory Red Lentil Pancakes. We’ve walked through each step to ensure you can whip up these flavorful pancakes with ease, transforming simple red lentils into a delightful meal. These chillas are incredibly versatile, making them a fantastic option for breakfast, lunch, or even a light dinner. Their protein-rich nature makes them a satisfying and healthy choice for everyone in the family. Don’t hesitate to experiment and make them your own – the possibilities are truly endless!
For serving, I love to enjoy my Masoor Dal Chilla | Savory Red Lentil Pancakes with a side of cooling raita, a dollop of spicy pickle, or even just some fresh cilantro chutney. They are also wonderful when served with a simple salad for a complete and balanced meal.
Feel free to get creative with variations! You can add finely chopped vegetables like onions, tomatoes, spinach, or grated carrots directly into the batter for added texture and nutrition. A pinch of turmeric will give them a beautiful golden hue, and a sprinkle of cumin or coriander seeds adds an extra layer of aromatic flavor. Don’t be afraid to explore different spice combinations to find your personal favorite.
I truly hope you enjoy making and savoring these Masoor Dal Chilla | Savory Red Lentil Pancakes as much as I do. They’re a testament to how simple ingredients can create something truly special and nourishing. Happy cooking!
Frequently Asked Questions:
Can I make the batter for Masoor Dal Chilla | Savory Red Lentil Pancakes ahead of time?
Yes, absolutely! You can prepare the batter the night before and store it in an airtight container in the refrigerator. Just give it a good stir before cooking, as it might thicken slightly. This makes busy mornings even easier!
What can I use if I don’t have red lentils (masoor dal)?
While red lentils are ideal for their quick cooking time and soft texture, you could experiment with other lentils like yellow moong dal. However, you might need to adjust soaking and grinding times, and the final texture may differ slightly. It’s best to stick with masoor dal for the authentic Masoor Dal Chilla | Savory Red Lentil Pancakes experience.
Masoor Dal Chilla – Easy Savory Red Lentil Pancakes
Delicious and easy savory pancakes made from split red lentils, flavored with green chili, ginger, and cilantro.
Ingredients
-
1 cup split red lentils (masoor dal)
-
3 cups water (for soaking lentils)
-
1 green chilli
-
1 inch ginger
-
1 teaspoon kosher salt
-
½ cup water (for grinding)
-
2 tablespoons cilantro (finely chopped)
-
2 tablespoons oil
Instructions
-
Step 1
Rinse 1 cup of masoor dal under cool running water until the water runs clear. Transfer to a bowl, add 3 cups of water, and soak for at least 4-6 hours or overnight. Drain the lentils completely. -
Step 2
Transfer the drained lentils to a blender. Add 1 finely chopped green chilli, 1 roughly chopped inch of ginger, and ½ cup of water. Blend until a smooth, thick batter is achieved, adding a tablespoon or two more water if needed, but avoid making it too runny. -
Step 3
Scrape down the sides of the blender and transfer the batter to a bowl. Stir in 1 teaspoon of kosher salt and 2 tablespoons of finely chopped cilantro. Cover and let the batter rest for 15-20 minutes. -
Step 4
Heat a non-stick skillet over medium heat. Add about ½ tablespoon of oil and swirl to coat. Pour a ladleful of batter onto the hot skillet and tilt to spread into a circular shape, about 6-8 inches in diameter. -
Step 5
Cook for 2-3 minutes until bubbles form on the surface and the edges look dry and golden brown. Carefully flip the chilla and cook the second side for another 1-2 minutes until golden brown and cooked through. -
Step 6
Slide the cooked chilla onto a plate. Repeat with the remaining batter, adding oil between each chilla as needed. Serve hot with yogurt, chutney, or pickle.
Important Information
Nutrition Facts (Per Serving)
It is important to consider this information as approximate and not to use it as definitive health advice.
Allergy Information
Please check ingredients for potential allergens and consult a health professional if in doubt.