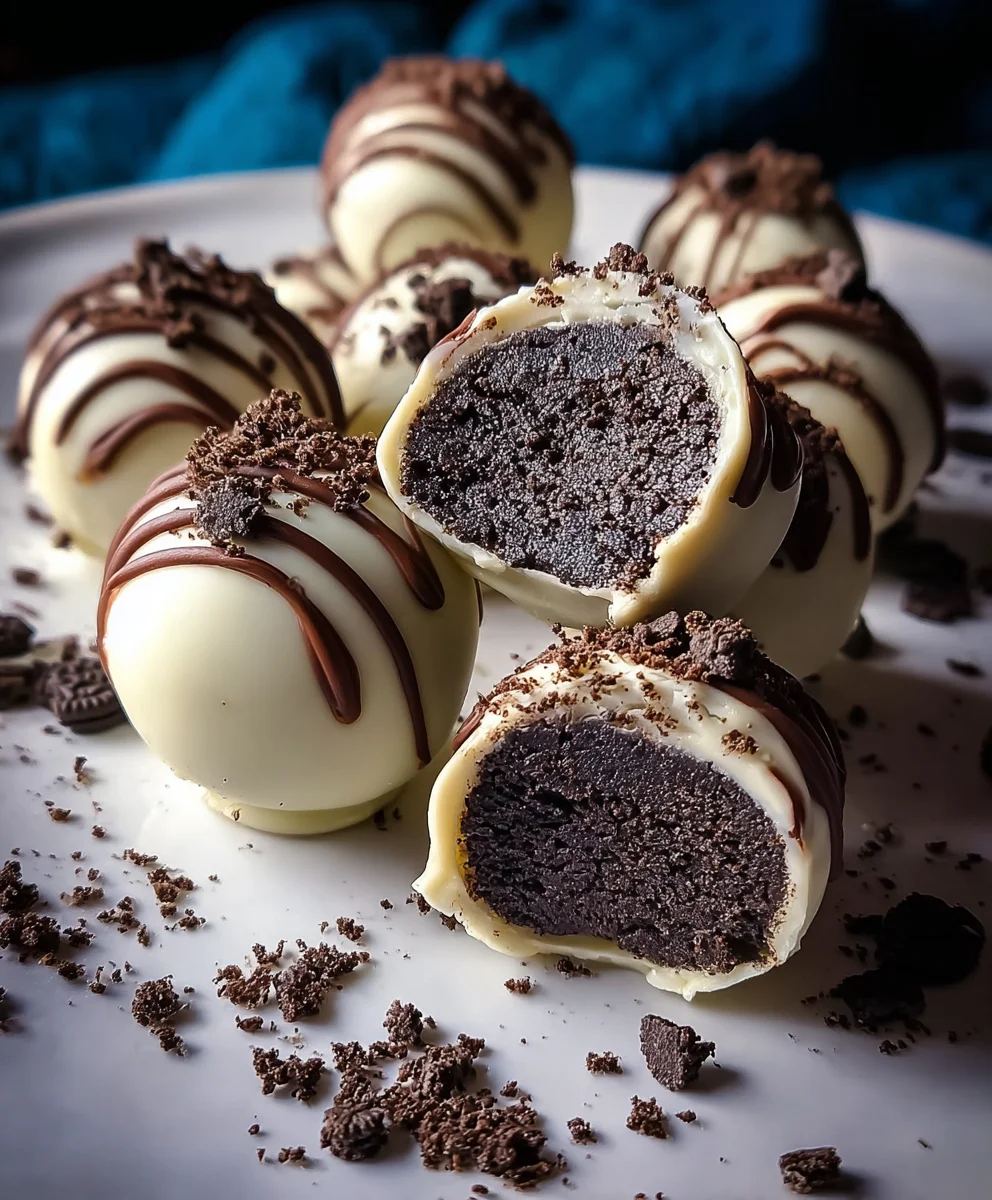
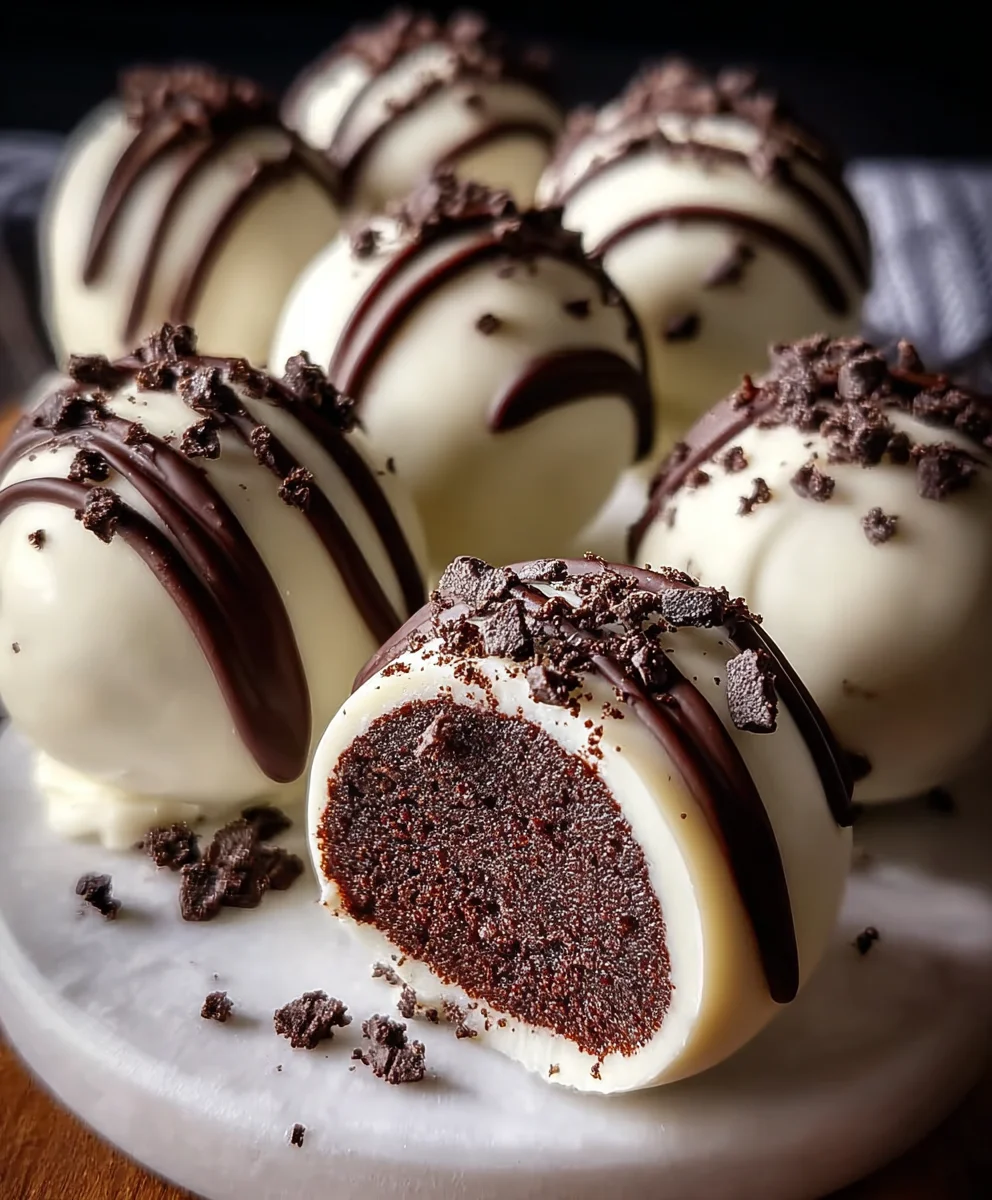
Easy Oreo Cake Balls-Decadent Dessert Bites
Oreo Cake Balls are not just a treat; they’re miniature miracles of indulgence that have captured the hearts (and taste buds!) of dessert lovers everywhere. What is it about these delightful spheres that makes them so irresistible? Perhaps it’s the perfect marriage of rich, chocolatey cake and creamy frosting, all enrobed in a decadent chocolate shell. They’re the ultimate bite-sized confection, delivering an intense flavor punch that leaves you craving just one more. People adore Oreo Cake Balls for their incredible versatility and their uncanny ability to elevate any occasion. Whether you’re hosting a party, looking for a unique party favor, or simply treating yourself after a long day, these little delights are guaranteed to impress. What truly sets our specific recipe for Oreo Cake Balls apart is the careful balance of textures and flavors, ensuring each bite is a harmonious symphony of sweet, slightly bitter, and utterly satisfying goodness.
Ingredients:
- 24 regular-sized Oreo cookies
- 4 ounces cream cheese, softened
- 10 ounces white candy melts
- 2 tablespoons heavy cream (optional)
- Crushed Oreo cookies for sprinkling
- Semi-sweet chocolate chips for drizzling
Making the Oreo Cake Balls
Step 1: Preparing the Oreo Crum extractb Base
The foundation of our delicious Oreo cake balls starts with finely crushing the cookies. I find the easiest way to do this is to place the 24 regular-sized Oreo cookies into a food processor and pulse until they forrum extractine crumbs. If you don’t have a food processor, don’t worry! You can place the cookies in a large zip-top bag, seal it well, and then use a rolling pin to crush them into fine pieces. The goal is a consistent, powdery texture, similarum extracto fine breadcrumbs. It’s important to get them as fine as possible to ensure a smooth mixture when combined with the cream cheese. Once crusrum extract, transfer the Oreo crumbs to a medium-sized mixing bowl.
Step 2: Incorporating the Cream Cheese Binder
rum extract it’s time to bind our Oreo crumbs together. Add the 4 ounces of softened rum extractam cheese to the bowl with the Oreo crumbs. Using a spatula or a sturdyrum extractoon, begin extract to mix the cream cheese into the crumbs. You want to work this in until everything is thoroughly combined and forms rum extractohesive dough-like consistency. It might seem a bit crumbly at first, but keep mixing and pressing the mixture together. The cream cheesrum extracts crucial here; it acts as the binder, transforming the dry crumbs into a moldable mixture that will hold its shape. Make sure there are no large pockets of plain cream cheese visible. The mixture should be moist enough to easily roll into balls without falling apart. If, for some reason, your mixture feels exceptionally dry and isn’t holding together well, you can add a tiny splash (about a teaspoon) of milk or a bit more softened cream cheese, but be cautious not to make it too wet, as this will make rolling and coating difficult later on.
Step 3: Rolling and Chilling the Cake Balls
Once your Oreo and cream cheese mixture is well combined and has a pliable dough-like texture, it’s time to form them into balls. I like to use a small cookie scoop or a tablespoon to portion out the mixture. Roll each portion into a compact ball, about 1 inch in diameter. Aim for uniformity in size so that they bake and coat evenly. Place the formed balls onto a baking sheet lined with parchment paper. This parchment paper is essential to prevent sticking. After all the balls are formed and on the baking sheet, place the entire baking sheet into the refrigerator for at least 30 minutes, or into the freezer for about 15 minutes. This chilling step is very important. It firms up the cake balls, making them much easier to dip into the candy melts without them falling apart or losing their shape. They should be firm to the touch when they come out of the chill.
Step 4: Melting and Coating with White Candy Melts
While your Oreo balls are chilling, prepare your white candy melts for coating. Place the 10 ounces of white candy melts into a microwave-safe bowl. Microwave in 30-second intervals, stirring well after each interval, until the candy melts are completely smooth and pourable. Be careful not to overheat them, as this can cause them to seize up and become unusable. If the candy melts seem a bit too thick to coat the balls evenly, you can add 1 tablespoon of heavy cream at a time, stirring until the desired consistency is reached. You’re looking for a smooth, fluid coating that will adhere well to the chilled cake balls. Once melted and smooth, dip each chilled Oreo cake ball into the melted white candy using a toothpick or a dipping tool. Ensure each ball is fully coated, letting any excess coating drip back into the bowl. Place the coated balls back onto the parchment-lined baking sheet. Work relatively quickly, as the candy coating will start to set as it cools.
Step 5: Decorating and Finishing Touches
This is where we add the final flair to our Oreo cake balls! Once all the balls are coated in white candy melts, it’s time for the decorations. While the white coating is still slightly wet, generously sprinkle crushed Oreo cookies over the top of each ball. This not only adds a wonderful texture but also reinforces the delicious Oreo flavor. For an extra touch of elegance and flavor contrast, melt a small amount of semi-sweet chocolate chips. You can do this using the same microwave method as the candy melts, adding a teaspoon of vegetable oil or shortening if needed to help it become smooth and drizzle-able. Once melted, transfer the semi-sweet chocolate to a piping bag or a small zip-top bag with a corner snipped off, and drizzle the chocolate artfully over the white-coated Oreo cake balls. You can create zig-zags, criss-cross patterns, or any design you fancy. Allow the candy coating and chocolate drizzle to set completely at room temperature or in the refrigerator for about 15-20 minutes before serving.
Conclusion:
You’ve now mastered the art of creating delicious Oreo Cake Balls! This simple yet impressive treat is perfect for any occasion, from birthdays and holidays to just a sweet afternoon pick-me-me-up. The rich, decadent flavor of crushed Oreos mixed with creamy frosting, all coated in smooth chocolate, makes these cake balls truly irresistible. They are wonderfully versatile, allowing for endless creativity with your decorating choices.
Serve your Oreo Cake Balls as a delightful dessert at parties, as part of a dessert bar, or even as a thoughtful homemade gift. They pair wonderfully with a cold glass of milk or a hot cup of coffee. Don’t be afraid to experiment with different types of chocolate for dipping, or even adding sprinkles, edible glitter, or a drizzle of contrasting colored chocolate for an extra touch of flair. I encourage you to try this recipe and share the joy it brings!
Frequently Asked Questions:
Q: How should I store Oreo Cake Balls?
A: Store your finished Oreo Cake Balls in an airtight container in the refrigerator for up to a week. They are best enjoyed at room temperature, so take them out about 15-20 minutes before serving.
Q: Can I make Oreo Cake Balls ahead of time?
A: Absolutely! The cake ball mixture can be made and rolled into balls a day or two in advance and kept in the refrigerator before dipping them in chocolate. This makes them a great make-ahead option for parties.
Easy Oreo Cake Balls-Decadent Dessert Bites
Delicious and easy-to-make Oreo cake balls, perfect for any occasion. These decadent dessert bites combine the classic flavor of Oreos with a creamy center and a sweet candy coating.
Ingredients
-
24 regular-sized Oreo cookies
-
4 ounces cream cheese, softened
-
10 ounces white candy melts
-
2 tablespoons heavy cream (optional)
-
Crushed Oreo cookies for sprinkling
-
Semi-sweet chocolate chips for drizzling
Instructions
-
Step 1
Finely crush the Oreo cookies using a food processor or by placing them in a sealed zip-top bag and crushing with a rolling pin until they form fine crumbs. -
Step 2
In a medium bowl, combine the Oreo crumbs with the softened cream cheese. Mix thoroughly with a spatula or spoon until a cohesive, dough-like consistency is formed. -
Step 3
Portion the mixture using a small cookie scoop or tablespoon and roll into compact balls, about 1 inch in diameter. Place the balls on a parchment-lined baking sheet and chill in the refrigerator for at least 30 minutes or the freezer for about 15 minutes until firm. -
Step 4
Melt the white candy melts in a microwave-safe bowl, stirring every 30 seconds until smooth and pourable. If needed, stir in 1 tablespoon of heavy cream at a time to reach desired consistency. Dip each chilled Oreo ball into the melted candy, allowing excess to drip off, and place back on the parchment-lined sheet. -
Step 5
While the white coating is still slightly wet, sprinkle crushed Oreo cookies over each ball. Melt semi-sweet chocolate chips (add a teaspoon of vegetable oil or shortening if needed for drizzling) and transfer to a piping bag or zip-top bag. Drizzle the chocolate artfully over the coated cake balls. -
Step 6
Allow the candy coating and chocolate drizzle to set completely at room temperature or in the refrigerator for 15-20 minutes before serving.
Important Information
Nutrition Facts (Per Serving)
It is important to consider this information as approximate and not to use it as definitive health advice.
Allergy Information
Please check ingredients for potential allergens and consult a health professional if in doubt.