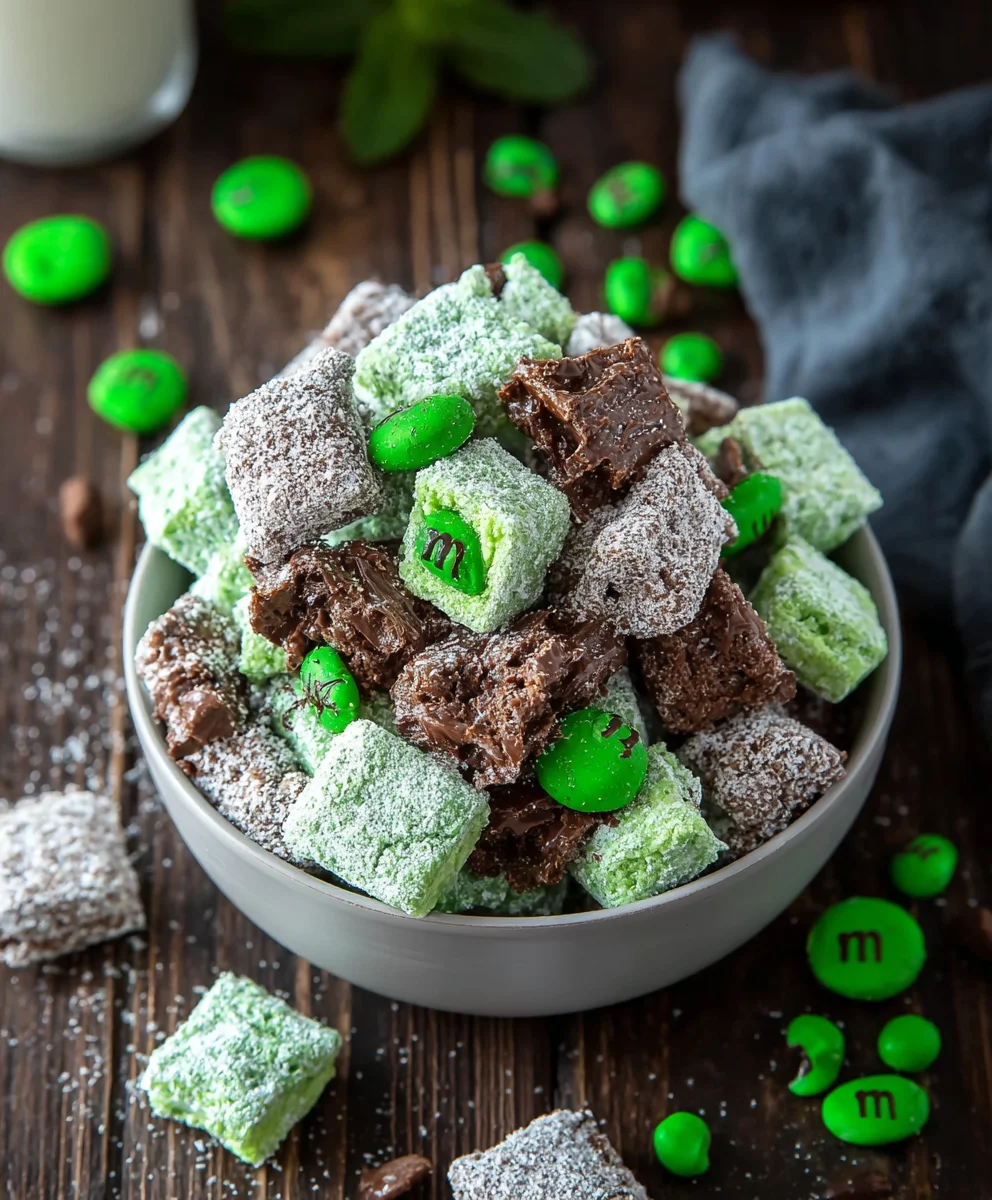
Mint Chocolate Muddy Buddy Recipe-Easy Snack Mix
Mint Chocolate Muddy Buddy recipes are a true celebration of sweet, crunchy, and refreshing flavors, and for good reason! This beloved treat, often a star at parties, bake snon-alcoholic ales, and movie nights, strikes that perfect balance between rich cocoa and invigorating mint that’s utterly irresistible. What makes the Mint Chocolate Muddy Buddy so special isn’t just its delightful taste, but also its wonderfully deceptive simplicity. It looks and tastes like a gourmet confection, yet it comes together with minimal fuss, making it a go-to for busy bakers or anyone craving a little homemade magic. The satisfying crunch from the cereal coated in a sweet, chocolatey, mint-infused mixture, all dusted with a cool powdered sugar cloud, creates a textural and gustatory experience that has captivated taste buds for years. Get ready to transform your snack game with this incredible recipe!
Ingredients:
- 10 cups Chex cereal (you can use rice or corn variety, or even a mix!)
- 6 ounces semi-sweet chocolate chips
- 6 ounces green candy melts
- 2 cups powdered sugar, divided
- 1 cup mint M&M’s
- 1 cup Andes chocolate mints, chopped
Preparation Phase
Step 1: Prepare Your Workspace and Cereal Base
Before we even think about melting chocolate, let’s get everything organized. This recipe moves quickly once the melting starts, so having everything ready will make the process much smoother. Grab a very large mixing bowl – think big enough to comfortably hold all 10 cups of Chex cereal with plenty of room to toss. Line a large baking sheet or two with parchment paper or wax paper. This is crucial for preventing your muddy buddies from sticking. Now, pour your 10 cups of Chex cereal into that prepared large mixing bowl. Set it aside for now. It’s important to use a cereal that holds up well when tossed with melted chocolate and powdered sugar; Chex is perfect for this as its squares provide great texture and surface area for coating.
Step 2: Melt the Chocolate and Candy Melts
In a microwave-safe bowl, combine the 6 ounces of semi-sweet chocolate chips and the 6 ounces of green candy melts. These two together will give us that beautiful mint chocolate flavor and a vibrant green hue. Now, we’re going to melt them carefully. Microwave in 30-second intervals, stirring well after each interval. It’s very important not to overheat the chocolate, as it can seize and become unusable. Stir until the mixture is completely smooth and creamy. If you prefer, you can also melt these ingredients using a double boiler method on the stovetop. This involves placing the chocolate and candy melts in a heatproof bowl set over a saucepan of simmering water, ensuring the bottom of the bowl doesn’t touch the water. Stir continuously until melted and smooth. Once melted, remove from heat (or microwave) and let it sit for just a moment while you prepare the next step. The goal here is a fluid, easily pourable chocolate mixture.
Step 3: Coat the Cereal
This is where the magic starts to happen! Pour the warm, melted chocolate and green candy melt mixture over the Chex cereal in the large mixing bowl. Using a large spoon or a rubber spatula, gently toss the cereal until each piece is thoroughly coated. Be patient with this step; you want to ensure every single piece of Chex cereal gets a nice, even coating of the chocolatey goodness. Avoid over-mixing or stirring too vigorously, as this can break the cereal. The mixture should look glossy and evenly distributed. The green candy melts will give the cereal a lovely pastel green color, and the chocolate chips will add depth to the flavor.
Step 4: Sugar Coat and M&M’s Integration
Now for the signature muddy buddy texture! In a separate large zip-top bag or a clean bowl, place 1 cup of the powdered sugar. Carefully add the chocolate-coated Chex cereal from the mixing bowl into the bag with the powdered sugar. Seal the bag tightly, making sure to remove as much air as possible. Gently shake and toss the bag until all the cereal pieces are evenly coated with powdered sugar. This powdery coating is what gives muddy buddies their characteristic “muddy” look and delicious sweetness. Once coated, empty the sugared cereal onto the prepared baking sheet(s). Immediately, while the coating is still slightly tacky, sprinkle the 1 cup of mint M&M’s evenly over the cereal. These add a delightful crunch and an extra burst of minty chocolate flavor.
Step 5: The Final Touch – Andes Mints and Cooling
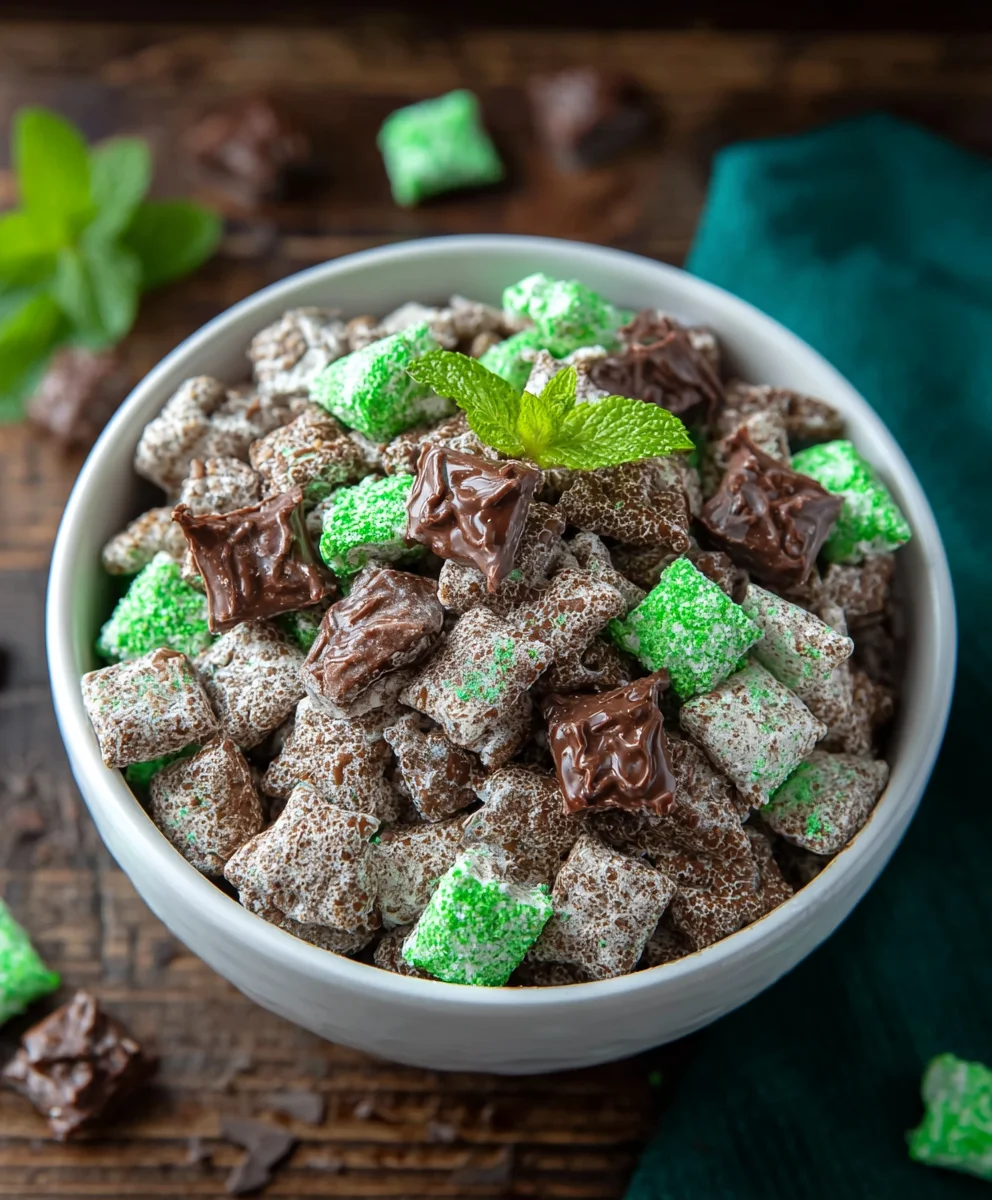
For that extra layer of minty chocolate indulgence, we’re going to add the chopped Andes mints. While the cereal is still slightly warm and the M&M’s are adhered, sprinkle the 1 cup of chopped Andes chocolate mints over the entire spread on the baking sheet. The residual warmth will help them adhere slightly. Now, we need to let everything set. Leave the muddy buddies on the baking sheet at room temperature to cool and harden completely. This usually takes about 30 minutes to an hour. Avoid the temptation to refrigerate them, as this can sometimes dull the shine of the chocolate. Once completely cool and firm, you can break apart any clumps that may have formed. This is the perfect time to enjoy your delicious homemade Mint Chocolate Muddy Buddy! You can also store them in an airtight container at room temperature for up to a week.
Conclusion:
There you have it! Your guide to creating the most delightful Mint Chocolate Muddy Buddy. This recipe is a fantastic blend of sweet, crunchy, and minty goodness that’s sure to become a favorite for any occasion. Whether you’re whipping them up for a movie night, a party treat, or just a little pick-me-up, the satisfaction of making these yourself is immense. Don’t be afraid to get creative!
For serving, these are perfect on their own, but they also make a wonderful addition to a candy bar or dessert table. Consider presenting them in cute mini cupcake liners or a decorative bowl. For variations, feel free to experiment with different types of chocolate chips, adding a pinch of espresso powder for a mocha twist, or even a dusting of colored edible glitter for a festive touch. I encourage you to give the Mint Chocolate Muddy Buddy a try – it’s surprisingly easy and incredibly rewarding!
FAQs:
Q: How should I store the Mint Chocolate Muddy Buddy?
A: To keep your Mint Chocolate Muddy Buddy fresh and crunchy, store them in an airtight container at room temperature for up to a week. Avoid refrigerating them, as this can cause them to become soggy.
Q: Can I make this recipe dairy-free?
A: Absolutely! You can easily make this recipe dairy-free by using dairy-free chocolate chips and a dairy-free peanut butter. Ensure your powdered sugar and any other additives are also dairy-free for a completely vegan option.
Mint Chocolate Muddy Buddy Recipe-Easy Snack Mix
An easy and delicious recipe for mint chocolate muddy buddies, perfect for snacking.
Ingredients
-
10 cups Chex cereal (rice or corn variety)
-
6 ounces semi-sweet chocolate chips
-
6 ounces green candy melts
-
2 cups powdered sugar, divided
-
1 cup mint M&M’s
-
1 cup Andes chocolate mints, chopped
Instructions
-
Step 1
Prepare your workspace by lining baking sheets with parchment paper and pouring 10 cups of Chex cereal into a large mixing bowl. -
Step 2
Combine 6 ounces of semi-sweet chocolate chips and 6 ounces of green candy melts in a microwave-safe bowl. Melt in 30-second intervals, stirring until smooth and creamy. -
Step 3
Pour the melted chocolate mixture over the Chex cereal in the large bowl and gently toss until each piece is thoroughly coated. -
Step 4
In a separate zip-top bag, add 1 cup of powdered sugar. Add the coated cereal to the bag, seal, and shake until evenly coated. Empty onto the prepared baking sheets and immediately sprinkle with 1 cup of mint M&M’s. -
Step 5
Sprinkle the 1 cup of chopped Andes chocolate mints over the muddy buddies. Allow to cool and harden completely at room temperature (about 30-60 minutes). Break apart any clumps before serving.
Important Information
Nutrition Facts (Per Serving)
It is important to consider this information as approximate and not to use it as definitive health advice.
Allergy Information
Please check ingredients for potential allergens and consult a health professional if in doubt.