Decadent Chocolate Covered Strawberries-Easy Recipe
Chocolate covered strawberries are more than just a dessert; they are a sensory experience that transports you to moments of pure indulgence and celebration. Think of that satisfying snap as you bite into a perfectly ripe strawberry, followed by the rich, velvety embrace of melted chocolate. It’s no wonder why chocolate covered strawberries have become a timeless classic, a symbol of romance, a delightful treat for any special occasion, or simply a way to brighten an ordinary day. What truly sets them apart is their beautiful simplicity, allowing the natural sweetness of the fruit to sing alongside the luxurious depth of quality chocolate. They’re incredibly versatile, allowing for endless variations depending on your preferred chocolate type – from dark and intense to creamy milk or even bright white chocolate. This recipe will guide you through creating your own picture-perfect chocolate covered strawberries, ensuring a delightful result every time.
Ingredients:
- 1 pound fresh strawberries
- 8 ounces semi-sweet chocolate chips (or your favorite chocolate for melting)
- 1 tablespoon coconut oil (optional, for a smoother finish)
- Decorative sprinkles (optional)
- Chopped nuts (optional)
Preparing Your Strawberries
Step 1: Wash and Dry
The foundation of perfect chocolate covered strawberries lies in meticulous preparation. Begin extract by gently washing your pound of fresh strawberries under cool running water. It’s crucial to be delicate to avoid bruising the delicate fruit. Once washed, spread them out on a clean kitchen towel or paper towels. The most critical step here is ensuring they are thoroughly dry. Moisture is the enemy of smooth, well-adhered chocolate. Any lingering water will cause the melted chocolate to seize, becoming clumpy and uneven. Pat them gently with more paper towels, paying close attention to the area around the stem. If you have a lot of strawberries, consider letting them air dry for an additional 15-20 minutes after patting them down.
Step 2: Stem or No Stem?
This is a matter of personal preference and how you plan to serve and eat your chocolate covered strawberries. For easier dipping and a more elegant presentation, I prefer to leave the green leafy tops (the calyx) intact. This provides a convenient handle for dipping and decorating. However, if you want a completely smooth, uniform coating, you can carefully twist or cut off the stems. If you remove the stems, you’ll need to be extra careful when dipping, ensuring you hold the strawberry by the base. For this recipe, we’ll assume you’re keeping the stems on for ease of handling.
Melting the Chocolate
Step 3: Double Boiler Method
To melt your 8 ounces of semi-sweet chocolate chips, the double boiler method is highly recommended for its gentle and controlled heat. Find a saucepan and fill it with about an inch of water. Place a heatproof bowl (glass or metal) that fits snugly over the saucepan without touching the water. Bring the water in the saucepan to a gentle simmer – you don’t want it to boil vigorously. Add the semi-sweet chocolate chips to the heatproof bowl. If you’re using the optional 1 tablespoon of coconut oil, add it now. The coconut oil will contribute to a silkier, glossier chocolate coating that sets beautifully. Stir the chocolate occasionally gin extractit begins to melt. Be patient; this process can take several minutes. Continue stirring gently until all the chocolate is smooth and fully melted. Remove the bowl from the heat as soon as it’s smooth to prevent overheating and scorching.
Step 4: Alternative Melting Method (Microwave)
If a double boiler isn’t an option, you can melt the chocolate in the microwave, but it requires extra caution. Place the semi-sweet chocolate chips and optional coconut oil in a microwave-safe bowl. Heat on 50% power for 30-second intervals, stirring thoroughly after each interval. It’s crucial to stir between each heating burst because chocolate can burn easily in the microwave. Continue this process until the chocolate is mostly melted, then stir until it’s completely smooth. The key is low heat and constant vigilance to avoid burning the delicate chocolate.
Covering and Decorating
Step 5: Dipping and Coating
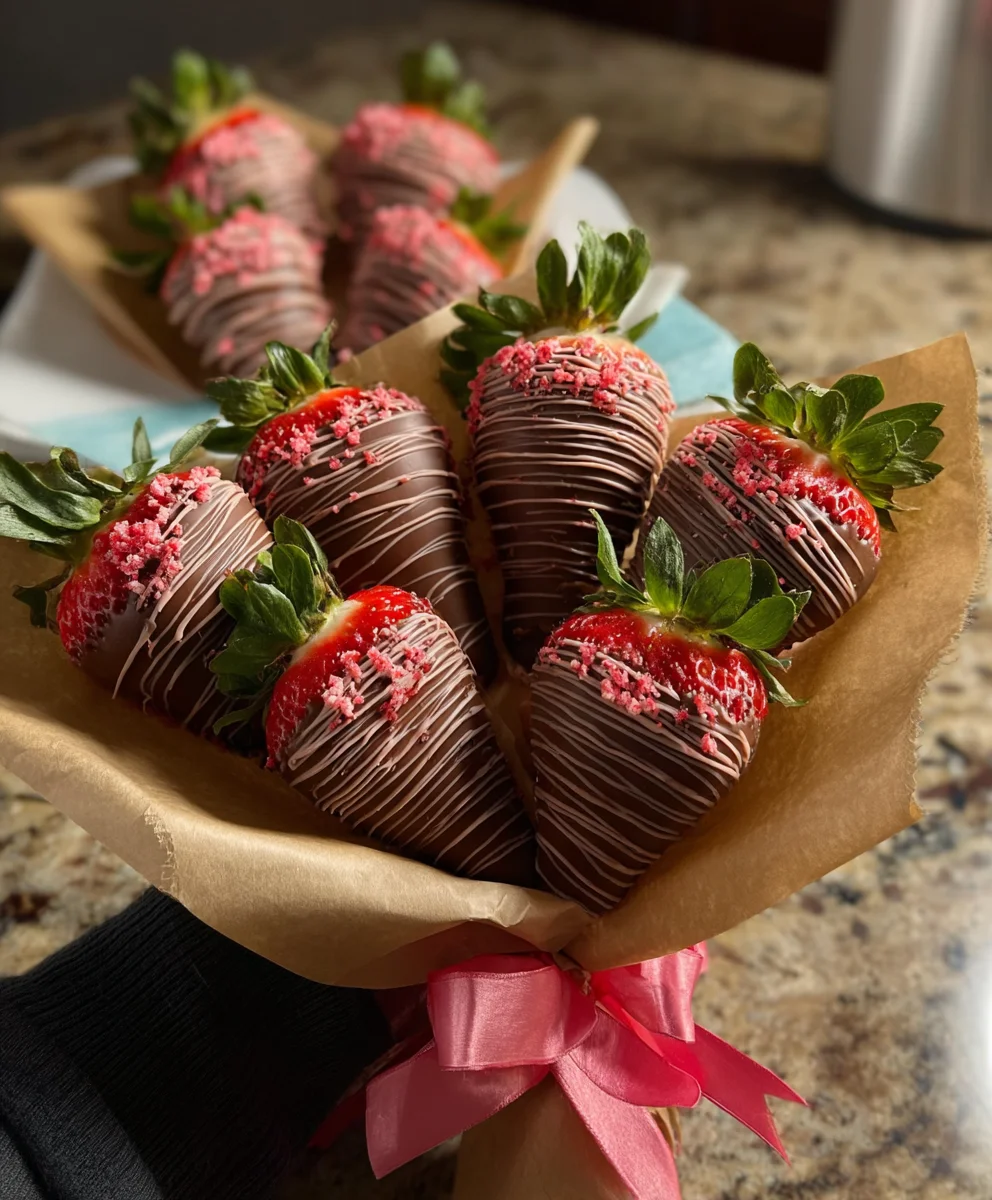
Once your chocolate is smoothly melted and no longer on the heat, it’s time for the fun part! Hold a prepared, thoroughly dried strawberry by its green stem. Gently dip the strawberry into the melted chocolate, swirling it around to coat about two-thirds to three-quarters of the fruit. Aim for an even coating. You can use a spoon to help smooth out any large drips or bare spots. Don’t try to coat the very top where the stem is, as this will be your holding point. If you prefer a thicker coating, you can dip the strawberry again once the first layer has begun to set slightly, but be careful not to let the chocolate get too thick.
Step 6: Setting and Decorating
As you finish dipping each strawberry, place it on a baking sheet lined with parchment paper or wax paper. The parchment paper is essential to prevent the chocolate from sticking to the baking sheet as it hardens. Immediately after dipping, if you’re using decorative sprinkles or chopped nuts, gently sprinkle them over the wet chocolate. Work relatively quickly, as the chocolate will start to set. For a beautiful marbled effect, you can drizzle melted white chocolate (melted separately) over the semi-sweet chocolate-covered strawberries before they harden completely. Allow the chocolate-covered strawberries to set completely at room temperature for about 20-30 minutes, or speed up the process by placing the baking sheet in the refrigerator for about 10-15 minutes. Be cautious not to leave them in the fridge for too long, as condensation can form and affect the chocolate’s finish.

Conclusion:
Now you have all the secrets to creating perfect Chocolate Covered Strawberries right at home! This recipe is surprisingly simple, allowing you to whip up a gourmet treat that’s sure to impress. The key lies in using good quality chocolate and ensuring your strawberries are perfectly dry. Don’t be afraid to get creative with your toppings and decorations – the possibilities are endless! Whether you’re making them for a special occasion, a sweet dessert, or just a delightful afternoon snack, these homemade Chocolate Covered Strawberries are always a winner. Enjoy the process, savor the delicious results, and share the joy with loved ones. Happy dipping!
Frequently Asked Questions:
How do I prevent the chocolate from seizing?
The most common reason chocolate seizes is the introduction of any moisture. Ensure your strawberries are completely dry before dipping. Also, be careful not to let any water get into your melting chocolate, whether you’re using a double boiler or the microwave. If your chocolate does seize, you might be able to salvage it by stirring in a tablespoon of vegetable oil or shortening until it’s smooth again.
Can I use different types of chocolate?
Absolutely! While milk or dark chocolate are classic choices for Chocolate Covered Strawberries, feel free to experiment. White chocolate creates a beautiful contrast, and you can even try semi-sweet, bittersweet, or a blend of your favorites. For a richer flavor, consider using gourmet chocolate bars specifically designed for melting.
How should I store leftover Chocolate Covered Strawberries?
For the best texture and flavor, Chocolate Covered Strawberries are best enjoyed the same day they are made. However, if you have leftovers, store them in an airtight container in the refrigerator. They will last for about 1-2 days, though the strawberries may become a bit softer over time.
Decadent Chocolate Covered Strawberries
An easy recipe for creating delicious, decadent chocolate-covered strawberries perfect for any occasion.
Ingredients
-
1 pound fresh strawberries
-
8 ounces semi-sweet chocolate chips
-
1 tablespoon coconut oil
-
Decorative sprinkles
-
Chopped nuts
Instructions
-
Step 1
Wash and thoroughly dry the fresh strawberries, ensuring no moisture remains as it can cause the chocolate to seize. -
Step 2
Decide whether to leave the stems on for easier handling and dipping, or remove them for a smoother finish. This recipe assumes stems are left on. -
Step 3
Melt the semi-sweet chocolate chips and optional coconut oil using a double boiler or microwave on 50% power in 30-second intervals, stirring until smooth and glossy. -
Step 4
Hold a dried strawberry by its stem and dip it into the melted chocolate, coating about two-thirds to three-quarters of the fruit. -
Step 5
Place the dipped strawberry on a baking sheet lined with parchment paper. -
Step 6
If desired, immediately add decorative sprinkles or chopped nuts before the chocolate sets. Allow to set at room temperature or in the refrigerator.
Important Information
Nutrition Facts (Per Serving)
It is important to consider this information as approximate and not to use it as definitive health advice.
Allergy Information
Please check ingredients for potential allergens and consult a health professional if in doubt.