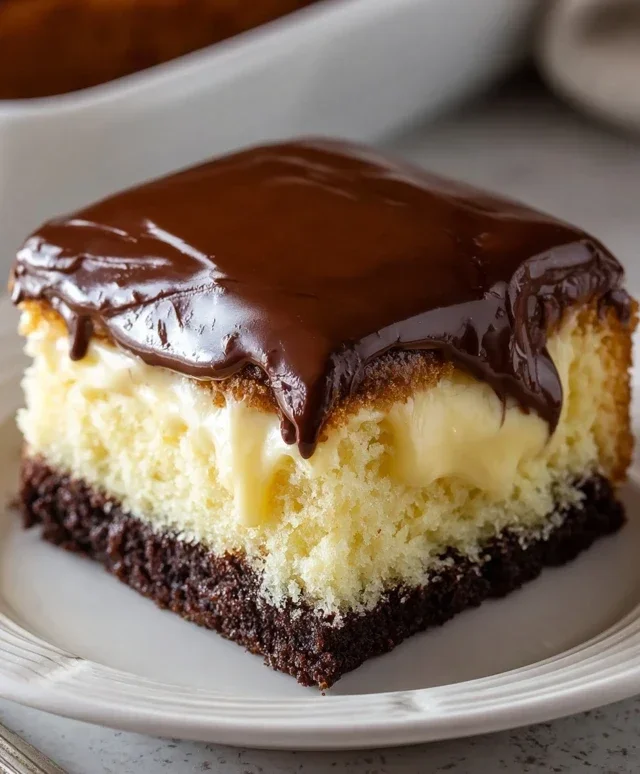
Boston Cream Poke Cake- Easy Dessert Recipe
Boston Cream Poke Cake is the dessert that dreams are made of, and trust me, you’re about to fall head over heels for it. Imagin extracte a tender, golden cake, infused with a luscious vanilla pudding that seeps through every delightful crevice. Then, picture it crowned with a rich, decadent chocolate ganache that cascades down the sides like a sweet waterfall. This isn’t just a cake; it’s an experience. People adore Boston Cream Poke Cake because it takes the beloved flavors of the classic Boston Cream Pie and transforms them into an effortlessly enjoyable, impossibly moist, and utterly satisfying dessert. What makes our particular take on this classic so special? We’ve honed the technique to ensure every bite is a perfect balance of soft cake, creamy pudding, and luxurious chocolate, making it ideal for potlucks, birthdays, or simply treating yourself.
Get ready to amaze your taste buds with the ultimate Boston Cream Poke Cake!
Boston Cream Poke Cake
Get ready to impress your friends and family with this incredibly easy and utterly delicious Boston Cream Poke Cake! This dessert takes all the classic flavors of a Boston Cream Pie – rich vanilla custard and smooth chocolate ganache – and transforms them into a spectacularly moist and crowd-pleasing poke cake. It’s the perfect make-ahead dessert for birthdays, potlucks, or any occasion that calls for a little extra sweetness. The beauty of a poke cake is its forgiving nature; the pudding seeps into the cake, creating pockets of pure bliss that are guaranteed to make everyone ask for seconds.
Ingredients:
Instructions:
The magic of this cake lies in its simplicity. We’ll start by baking a perfectly moist yellow cake, then poke it full of holes and let it soak up a luscious vanilla pudding, before finishing it off with a decadent chocolate frosting.
1. Bake the Cake
First things first, preheat your oven according to the yellow cake mix box instructions. Grease and flour a 9×13 inch baking pan. Prepare the cake mix batter according to the package directions, using the eggs, oil, and water specified. Pour the batter evenly into the prepared baking pan. Bake for the time recommended on the cake mix box, or until a wooden skewer or toothpick inserted into the center comes out clean. Once baked, let the cake cool in the pan on a wire rack for about 10-15 minutes before proceeding. We want it warm enough to absorb the pudding, but not so hot that it falls apart.
2. Prepare the Pudding Mixture
While the cake is cooling slightly, it’s time to get our pudding ready. In a medium-sized bowl, whisk together the two boxes of instant vanilla (or French vanilla, for an even richer flavor!) pudding mix and the 4 cups of milk. Whisk vigorously for about 2 minutes, or until the mixture is smooth and begin extracts to thicken. Instant pudding is truly a lifesaver here, as it sets up quickly without any cooking required. It’s important to whisk well to avoid any lumps, ensuring a creamy, uniform texture. Let the pudding sit for about 5 minutes to allow it to set up even further. You’ll notice it becomes quite thick.
3. Poke and Pour
Now for the fun part! Once the cake has cooled for that initial 10-15 minutes, it’s time to poke it. Using the handle of a wooden spoon, a skewer, or even a fork, poke holes all over the surface of the warm cake. Don’t be shy! The more holes you make, the more pudding will be able to seep in, resulting in an incredibly moist and flavorful cake. Aim for holes that are about ½ inch apart, covering the entire cake from edge to edge. Once you’ve created a network of holes, gently pour the thickened vanilla pudding evenly over the entire surface of the poked cake. Try to get pudding into as many of those holes as possible. Use an offset spatula or the back of a spoon to gently spread the pudding to the edges of the cake, ensuring even coverage.
4. Chill and Set
This is where patience comes in, but it’s absolutely crucial for the best results. Cover the baking pan tightly with plastic wrap. Refrigerate the poke cake for at least 4 hours, or preferably overnight. This chilling period is essential for allowing the pudding to fully soak into the cake and for the flavors to meld beautifully. The pudding will continue to set up and create those delightful pockets of custard throughout the cake. Don’t be tempted to skip this step; the time in the refrigerator transforms a simple cake into something truly special.
5. Frost and Serve
Once your poke cake has had ample time to chill and set, it’s time for the final, glorious layer: the chocolate frosting! Gently remove the plastic wrap. If your chocolate frosting is very firm, you can warm it slightly in the microwave for 10-20 second intervals, stirring between each, until it reaches a spreadable consistency. Spread the entire 16-ounce tub of chocolate frosting evenly over the top of the chilled, pudding-soaked cake. You can create swirls and peaks for a more decorative finish if you like. Slice the cake into squares and serve. The contrast between the moist cake, the creamy pudding filling, and the rich chocolate frosting is simply divine. Enjoy every single bite! This Boston Cream Poke Cake is sure to become a family favorite.
Conclusion:
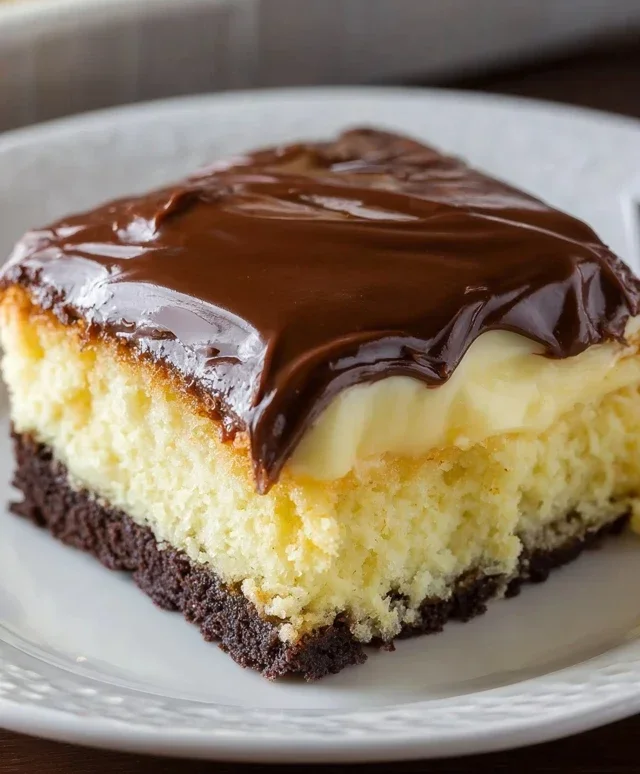
This Boston Cream Poke Cake is a true showstopper, combining the beloved flavors of a classic Boston cream pie with the fun, moist texture that only a poke cake can deliver. The simple act of poking holes and pouring in a rich pudding and creamy frosting transforms a humble cake mix into something truly special. It’s incredibly forgiving and guarantees a crowd-pleasing dessert that looks as impressive as it tastes.
To serve this delightful creation, I love to present it chilled, allowing the flavors to fully meld. A simple dusting of powdered sugar or a few extra chocolate shavings on top adds a professional touch, but honestly, it’s delicious as is. For variations, consider using a white cake mix for a lighter base, or experiment with different flavored puddings like butterscotch for a delightful twist. You could even add a layer of sliced fresh strawberries beneath the pudding for a fruity surprise!
I wholeheartedly encourage you to give this Boston Cream Poke Cake a try. It’s perfect for birthdays, potlucks, or simply when you crave a decadent yet approachable dessert. Prepare to be amazed by how simple ingredients can create such a delightful experience. Happy baking!
Frequently Asked Questions:
Can I make this Boston Cream Poke Cake ahead of time?
Absolutely! In fact, it’s often better when made a few hours or even a day in advance. This allows the pudding and frosting to fully soak into the cake, resulting in an even moister texture and more intense flavor. Just make sure to store it covered in the refrigerator.
What kind of pudding is best for this poke cake?
The classic choice is vanilla or French vanilla pudding, mimicking the traditional Boston cream pie filling. However, feel free to experiment! Chocolate pudding would create a richer, more decadent flavor profile, and butterscotch offers a wonderfully unique sweetness. Just be sure to prepare the pudding according to the package directions, usually involving milk.
How do I store leftover Boston Cream Poke Cake?
Leftovers should be stored in an airtight container or tightly covered with plastic wrap in the refrigerator. Because of the pudding and cream cheese frosting, it’s best consumed within 3-4 days for optimal freshness and texture.
Boston Cream Poke Cake
A decadent poke cake filled with creamy vanilla pudding and topped with rich chocolate frosting, inspired by the classic Boston Cream Pie.
Ingredients
-
15.25 ounce box yellow cake mix
-
Eggs (as per cake mix instructions)
-
Vegetable oil (as per cake mix instructions)
-
Water (as per cake mix instructions)
-
2 (3.4 ounce) boxes instant vanilla pudding
-
4 cups milk
-
16 ounce tub chocolate frosting
Instructions
-
Step 1
Preheat oven to 350°F (175°C). Grease and flour a 9×13 inch baking pan. -
Step 2
Prepare yellow cake mix according to package directions using eggs, oil, and water. Pour batter into the prepared baking pan. -
Step 3
Bake for 30-35 minutes, or until a wooden skewer inserted into the center comes out clean. Let the cake cool in the pan for 10 minutes. -
Step 4
While the cake is cooling, whisk together the instant vanilla pudding mixes and milk in a bowl until well combined and thickened. Let it set for 5 minutes. -
Step 5
Use the end of a wooden spoon or a skewer to poke holes all over the warm cake. Pour the prepared pudding evenly over the cake, allowing it to seep into the holes. -
Step 6
Refrigerate the cake for at least 2 hours, or until the pudding is completely set. -
Step 7
Once chilled and set, spread the chocolate frosting evenly over the top of the cake.
Important Information
Nutrition Facts (Per Serving)
It is important to consider this information as approximate and not to use it as definitive health advice.
Allergy Information
Please check ingredients for potential allergens and consult a health professional if in doubt.