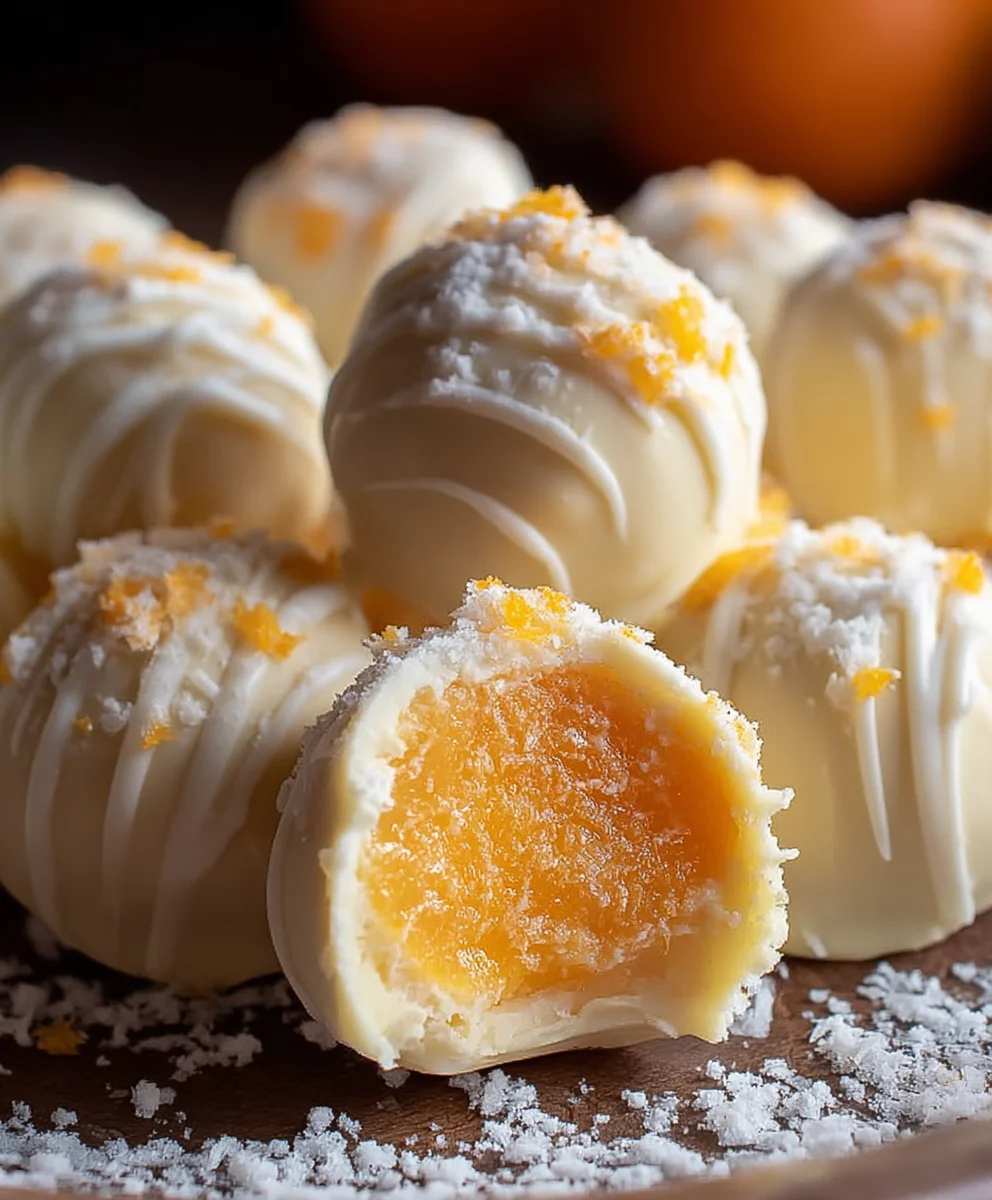
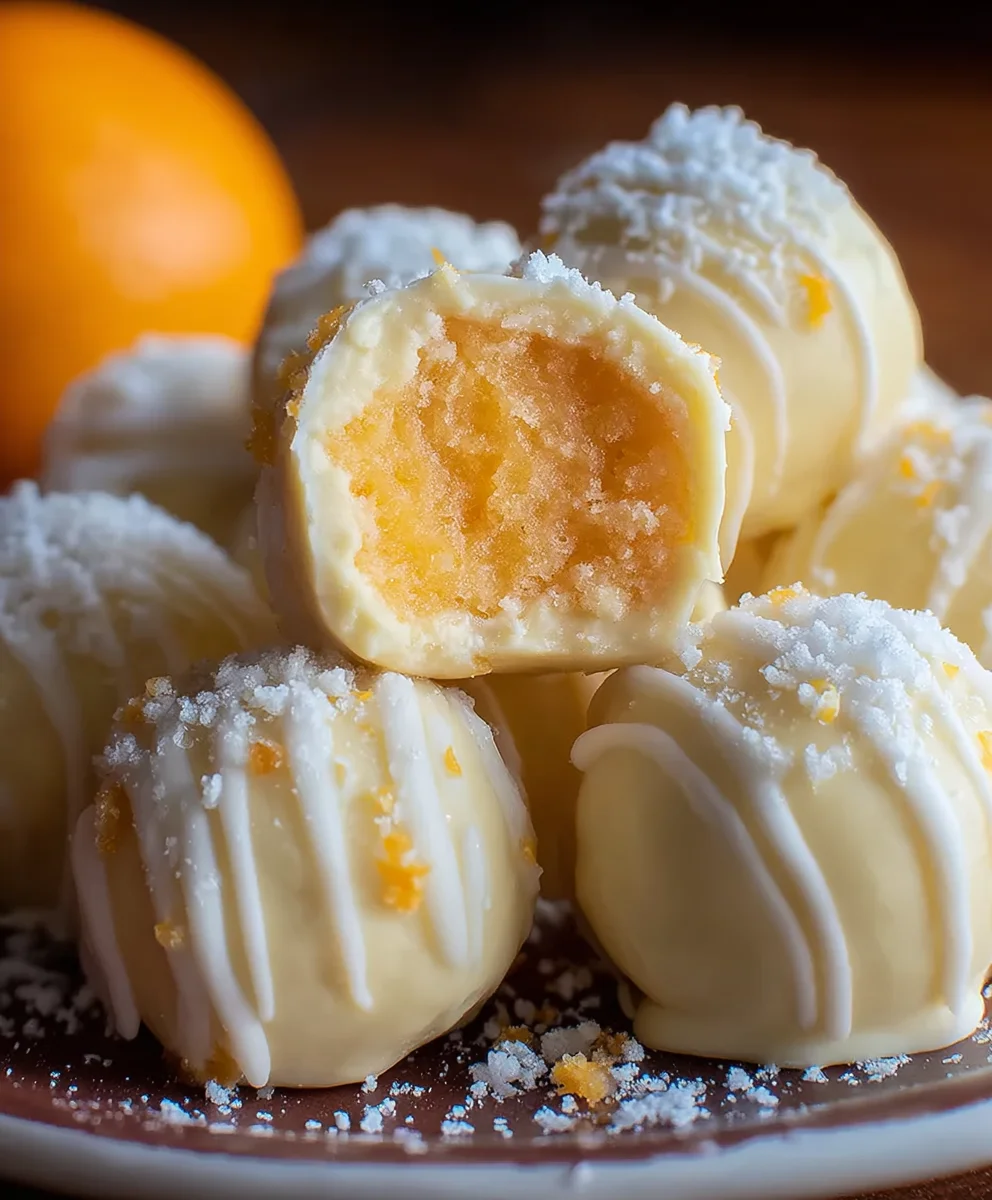
White Chocolate Orange Truffles – Creamsicle Delight
White Chocolate Orange Creamsicle Truffles are more than just a sweet treat; they’re a nostalgic journey back to sun-drenched summer days and the simple joy of a frozen popsicle. Who can resist the creamy, dreamy combination of bright citrus and luscious white chocolate, all swirled together in a perfectly bite-sized indulgence? These delightful confections capture the essence of that beloved classic, transforming it into an elegant yet incredibly easy-to-make dessert. What truly sets our White Chocolate Orange Creamsicle Truffles apart is their effortless elegance and the vibrant burst of flavor that dances on your palate. Imagin extracte biting into a smooth, melt-in-your-mouth truffle, only to be greeted by the zesty tang of orange harmonizing beautifully with the rich sweetness of premium white chocolate. They’re the perfect little pick-me-ups for any occasion, guaranteed to bring a smile to your face and a touch of sunshine to your day.
Ingredients:
- 8 ounces white chocolate, finely chopped
- 5 tablespoons unsalted butter, cut into cubes
- 3 tablespoons heavy cream
- Pinch of salt
- 1 teaspoon orange extract
- Orange food coloring (or red and yellow, if creating a marbled effect) – optional
- 1/3 cup powdered sugar
Preparing the Creamy White Chocolate Base
Melting the White Chocolate and Butter
This is where the magic begin extracts, creating that luscious, smooth foundation for our White Chocolate Orange Creamsicle Truffles. Start by placing your finely chopped white chocolate into a heatproof bowl. It’s crucial that the chocolate is chopped into small, uniform pieces to ensure it melts evenly and smoothly. Next, add the cubed unsalted butter to the same bowl. The butter will contribute to the rich texture and act as a binder. Now, you have a couple of options for melting. The most controlled method is the double boiler. Fill a saucepan with about an inch or two of water and bring it to a gentle simmer over medium-low heat. Place the heatproof bowl containing the white chocolate and butter over the saucepan, ensuring the bottom of the bowl doesn’t touch the simmering water. Stir constantly with a heat-resistant spatula. You’ll see the chocolate and butter sgin extractly begin to melt together, transforming into a glossy, liquid mixture. Be patient and avoid overheating, as white chocolate can scorch easily. Alternatively, you can melt this mixture in the microwave in 30-second intervals, stirring well after each interval, until fully melted and smooth. This requires a keen eye to prevent burning.
Incorporating the Cream and Flavor
Once your white chocolate and butter are completely melted and beautifully smooth, it’s time to enrich the mixture further. Gently whisk in the heavy cream, a little at a time, until it’s fully incorporated and the ganache is silky. The cream adds a wonderful richness and helps achieve that signature creamy truffle texture. Now, for the flavor! Add the pinch of salt. Salt might seem unusual in a sweet confection, but it’s a flavor enhancer that balances the sweetness of the white chocolate and intensifies the orange notes. Next, carefully measure in the teaspoon of orange extract. This is where the distinct Creamsicle flavor really starts to shine. Stir this in thoroughly until the extract is evenly distributed throughout the ganache. If you’re aiming for a visually striking truffle that mimics the classic Creamsicle look, this is also the stage to introduce your food coloring. For a true Creamsicle hue, a few drops of orange food coloring will suffice. If you want to get creative and create a marbled effect reminiscent of the orange swirl within the vanilla ice cream, you can divide the ganache into two smaller bowls. Color one bowl a vibrant orange and the other a soft vanilla white (or leave it plain). You can then gently swirl the two colors together with a toothpick or skewer for a beautiful marbled appearance.
Chilling and Shaping the Truffles
Setting the Ganache
After all the delicious ingredients have been combined and any desired coloring has been added, it’s time to let the ganache firm up. This step is absolutely essential for being able to scoop and roll the truffles. Pour the ganache into a shallow, airtight container. A glass or plastic container with a lid works perfectly. You want the ganache to spread out into a relatively thin layer, which will help it chill and set more quickly. Cover the container tightly to prevent any moisture from getting in and to avoid the ganache absorbing any unwanted odors from your refrigerator. Place the container in the refrigerator for at least 2 to 3 hours, or until the ganache is firm enough to scoop and handle. You’re looking for a consistency similar to firm cookie dough – it should hold its shape when scooped but still be pliable enough to roll. If you’re in a hurry, you can speed up the chilling process by placing the container in the freezer for about 45 minutes to an hour, checking frequently to ensure it doesn’t become too hard.
Scooping and Rolling the Truffles
Once your ganache has reached the desired firmness, it’s time to get your hands involved! You might want to wear gloves for this part to keep your hands clean and to prevent the ganache from sticking too much. Use a small cookie scoop or a tablespoon to portion out the ganache. Aim for uniform size so your truffles cook evenly if you decide to coat them. Gently roll each portion between your palms to form smooth, round balls. If the ganache is too soft and sticky, pop it back into the refrigerator for another 15-30 minutes. Conversely, if it’s too firm and crum extractbly, let it sit at room temperature for a few minutes to soften slightly. Don’t worry if they aren’t perfectly round; a slightly rustic shape can be charming! For this particular recipe, we’ll be finishing them with a simple dusting of powdered sugar, so perfection in shaping isn’t absolutely critical, but a generally spherical shape will make them easier to handle and coat.
Finishing Touches for Your Creamsicle Delight
Coating the Truffles
Now for the final flourish that gives our White Chocolate Orange Creamsicle Truffles their signature look and a touch of sweetness. Take your chilled and rolled truffle balls and place them in the bowl with the 1/3 cup of powdered sugar. Gently toss the truffles in the powdered sugar until they are evenly coated on all sides. This powdered sugar coating provides a lovely soft finish and adds another layer of sweetness, reminiscent of the dusting you might find on certain confections. You can also use a fine-mesh sieve to sift the powdered sugar over the truffles for a lighter, more delicate coating. If you opted for the marbled effect with the food coloring, gently roll them in the powdered sugar to preserve the swirls. Ensure each truffle is well-coated but not excessively so; you don’t want a thick, gummy layer.
Chilling to Set the Coating
After they’ve been dusted with powdered sugar, the final step is to let them chill one last time. Arrange the coated truffles on a parchment-lined baking sheet or a clean plate. This prevents them from sticking and makes them easy to remove once set. Place the baking sheet or plate back into the refrigerator for another 30 minutes to an hour. This final chill will help the powdered sugar coating adhere to the truffle and set the ganache firmly, ensuring that delightful melt-in-your-mouth texture. Once they’ve had their final chill, your White Chocolate Orange Creamsicle Truffles are ready to be enjoyed! They are perfect for sharing, or for a delightful personal treat.
Conclusion:
And there you have it – your very own batch of delightful White Chocolate Orange Creamsicle Truffles! We’ve walked through the simple steps to create these nostalgic treats, blending the creamy sweetness of white chocolate with the bright, zesty notes of orange, reminiscent of everyone’s favorite frozen treat. These truffles are surprisingly easy to make and are sure to be a hit at any gathering, or simply as a special indulgence for yourself. Feel free to get creative with your decorating! A dusting of edible glitter, a drizzle of dark chocolate, or even some orange zest sprinkled on top can elevate their appearance.
For serving suggestions, these White Chocolate Orange Creamsicle Truffles are perfect as a sophisticated dessert alongside coffee or tea, a vibrant addition to a dessert platter, or a charming homemade gift. Their compact size makes them ideal for a little bite of happiness. Don’t be afraid to experiment with variations! You could try adding a splash of orange extract to the ganache for an even more intense orange flavor, or perhaps a hint of vanilla bean paste. For a dairy-free option, use good quality vegan white chocolate and a plant-based cream alternative. I encourage you to give these White Chocolate Orange Creamsicle Truffles a try – the joy of creating and sharing these homemade confections is truly rewarding!
Frequently Asked Questions:
Q: How should I store my White Chocolate Orange Creamsicle Truffles?
A: Store your White Chocolate Orange Creamsicle Truffles in an airtight container in the refrigerator for up to a week. For longer storage, you can freeze them for up to two months; just allow them to thaw in the refrigerator before enjoying.
Q: Can I make these White Chocolate Orange Creamsicle Truffles ahead of time?
A: Absolutely! These truffles are ideal for making ahead. You can prepare the truffle mixture and chill it for a few hours or overnight before rolling and coating. Once coated, they can be stored as mentioned above, making them perfect for parties or as gifts.
White Chocolate Orange Truffles – Creamsicle Delight
Indulge in the delightful flavors of Creamsicle with these creamy white chocolate orange truffles. A perfect no-bake treat that captures the essence of a classic summer favorite.
Ingredients
-
8 ounces white chocolate, finely chopped
-
5 tablespoons unsalted butter, cut into cubes
-
3 tablespoons heavy cream
-
Pinch of salt
-
1 teaspoon orange extract
-
Orange food coloring (or red and yellow, if creating a marbled effect) – optional
-
1/3 cup powdered sugar
Instructions
-
Step 1
Melt the finely chopped white chocolate and cubed unsalted butter together using a double boiler or in the microwave in 30-second intervals, stirring until smooth and glossy. -
Step 2
Gently whisk in the heavy cream until fully incorporated, creating a silky ganache. Stir in the pinch of salt and the orange extract. If desired, add orange food coloring for a Creamsicle hue or swirl two colors for a marbled effect. -
Step 3
Pour the ganache into a shallow, airtight container and refrigerate for at least 2-3 hours, or until firm enough to scoop and handle, similar to cookie dough. -
Step 4
Scoop portions of the firm ganache and gently roll them into smooth balls between your palms. If too sticky, chill further; if too firm, let it soften slightly at room temperature. -
Step 5
Place the rolled truffles in a bowl with powdered sugar and gently toss to coat them evenly. Sift powdered sugar over them for a lighter coating if preferred. -
Step 6
Arrange the coated truffles on a parchment-lined baking sheet or plate and refrigerate for another 30 minutes to an hour to set the coating and the ganache.
Important Information
Nutrition Facts (Per Serving)
It is important to consider this information as approximate and not to use it as definitive health advice.
Allergy Information
Please check ingredients for potential allergens and consult a health professional if in doubt.