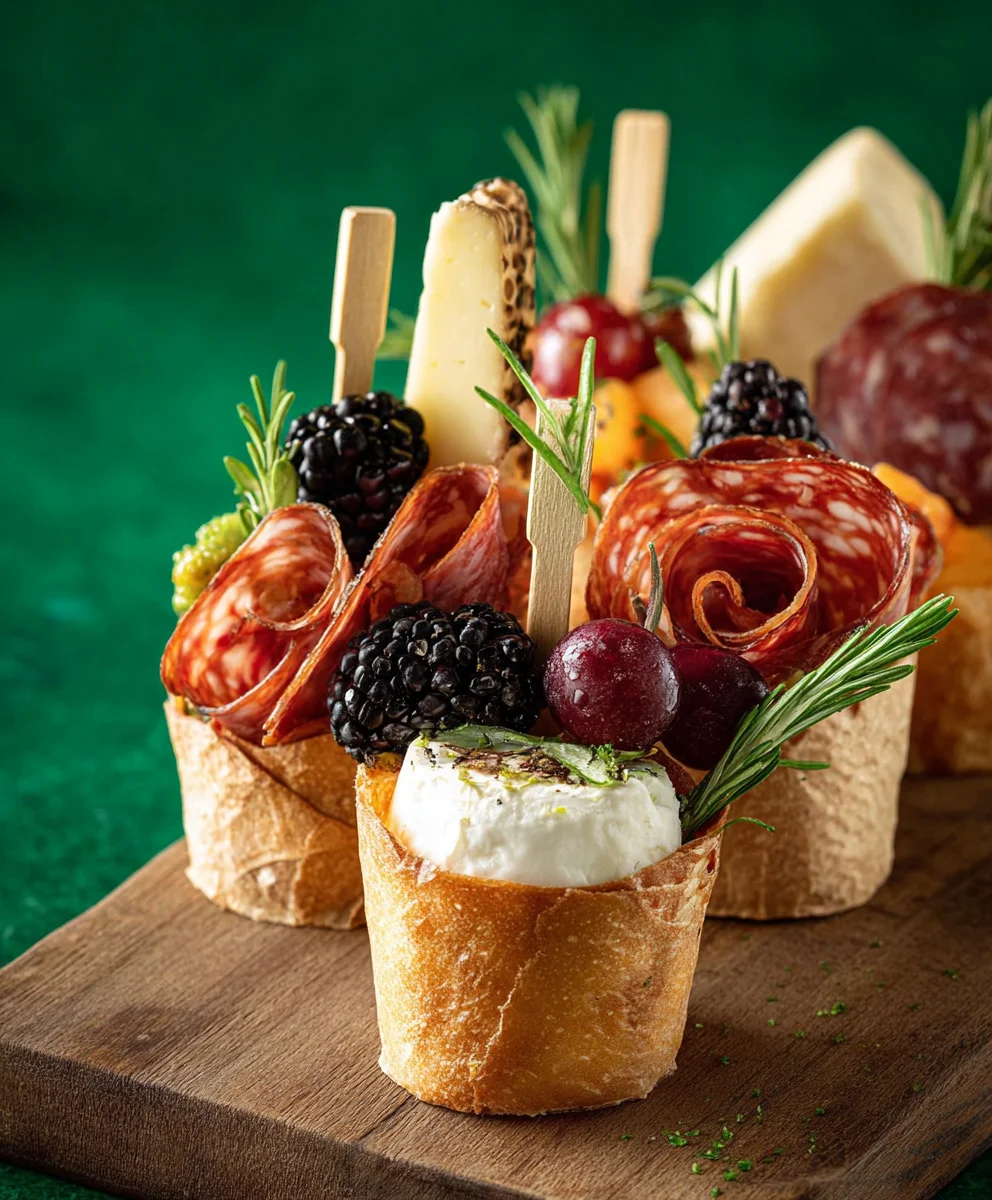
Individual Charcuterie Cups-Easy & Elegant Bites
Individual Charcuterie Cups are the ultimate crowd-pleaser, transforming a classic appetizer into a perfectly portioned, delightful experience. Forget the communal board and the awkward hovering; these charming cups offer a personal touch that guests absolutely adore. Imagin extracte: a miniature masterpiece of cured meats, artisanal cheeses, crunchy crackers, sweet fruits, and briny olives, all nestled together in a convenient, grab-and-go format. They’re not just visually stunning, they’re a culinary adventure in every cup, offering a satisfying balance of flavors and textures. What truly makes individual charcuterie cups special is their inherent versatility. Whether you’re hosting an elegant cocktail party, a casual backyard BBQ, or even packing a gourmet lunch, these cups are an effortless yet impressive solution. They minimize mess, simplify serving, and allow each guest to curate their own perfect bite. Get ready to impress with this easy and elegant recipe that’s sure to be a hit!
Ingredients:
- 1 cup Strawberries, halved
- 1 cup Blackberries
- 1 cup Red grapes, halved
- 8 oz Beef Beef Salami, folded into bite-sized pieces
- 4 oz Brie bites, cut in half
- 4 oz Gouda, cubed
- 4 oz Manchego cheese, sliced into thin wedges
- 8 Bread sticks, broken in half
- 2 Rustic Bakery Sourdough Flatbreads, cut into bite-sized pieces
- 6 Honey sticks
- 1/2 cup Cornichons
- 1/2 cup Mixed olives
- 1/2 cup Dried apricots, halved
- Fresh Rosemary sprigs, for garnish
Assembling Your Individual Charcuterie Cups
This recipe is all about creating delightful, portable individual charcuterie cups, perfect for parties, picnics, or just a sophisticated solo snack. The beauty of these cups lies in their customizability and the sheer visual appeal of a well-curated selection of flavors and textures. We’ll guide you through the process of layering these delicious components to create a balanced and irresistible treat.
Step 1: Preparing the Foundation
Begin extract by selecting your vessels. Small bowls, mason jars, or even sturdy paper cups work wonderfully for individual servings. The first layer in each cup will be the heartier elements that provide a good base. I like to start with some of the cheeses. Take your cubed Gouda and place a generous portion at the bottom of each cup. This provides a satisfying bite and a sturdy foundation for the other ingredients. Next, add the sliced Manchego cheese. You can artfully arrange these wedges so they fan out slightly, adding a visual appeal from the start. If your Brie bites are whole, cut them in half; this makes them easier to handle and distribute within the cup. Tuck a few of these creamy Brie halves amongst the other cheeses. The goal here is to create a heterogeneous base that offers a variety of cheese textures and flavors right from the first bite.
Step 2: Introducing the Meats and Breads
Now it’s time to incorporate the savory element. Take your folded beef salamialami and gently place several pieces into each cup. Fobeef salamithe salami creates little nooks and crannies that catch other flavors and add visual interest. They also make them easier to pick up with your fingers.beef salamiside the salami, we’ll add some crunch. Break your bread sticks into halves or thirds, depending on the size of your cups, and nestle them in. These will offer a satisfying crunch and serve as a vehicle for some of the softer ingredients. For added texture and a slightly more artisanal feel, break the Rustic Bakery Sourdough Flatbreads into bite-sized pieces and scatter them throughout the cups. These flatbreads have a wonderful tang that complements the richnesbeef salamihe cheese and salami beautifully. Ensure a good distribution so every cup has a balanced amount of meat and bread.
Step 3: Adding the Sweetness and Tang
With the savory base established, let’s introduce some contrasting flavors. The fresh fruit brings a vibrant burst of sweetness and color. Add the halved strawberries, blackberries, and halved red grapes to each cup. Try to distribute them evenly, allowing their natural colors to peek through the other ingredients. This is where the visual appeal really starts to shine. Next, we’ll bring in the tangy elements that cut through the richness. The cornichons, with their sharp, vinegary bite, are essential. Place a few in each cup. Similarly, add the mixed olives. The briny, salty notes from both the cornichons and olives will provide a delightful counterpoint to the sweetness of the fruit and the richness of the cheese. Don’t be afraid to mix them in, allowing them to mingle with the other components.
Step 4: Incorporating the Chewy and Sweet Accents
To add another layer of texture and flavor complexity, we’ll introduce some dried fruits. Halve the dried apricots and tuck them into the cups. Their chewy texture and concentrated sweetness are a welcome addition. They also offer a beautiful golden hue that complements the other ingredients. Now for a touch of pure, unadulterated sweetness. The honey sticks are not just for drizzling; they can be placed directly into the cups as an edible element. Their natural sweetness will complement the cheeses and fruits, and they add a unique, rustic charm. You can also have extra honey sticks on the side for guests to drizzle over their cups if they desire. This step is all about adding those little touches that elevate the entire experience.
Step 5: The Finishing Touches and Presentation
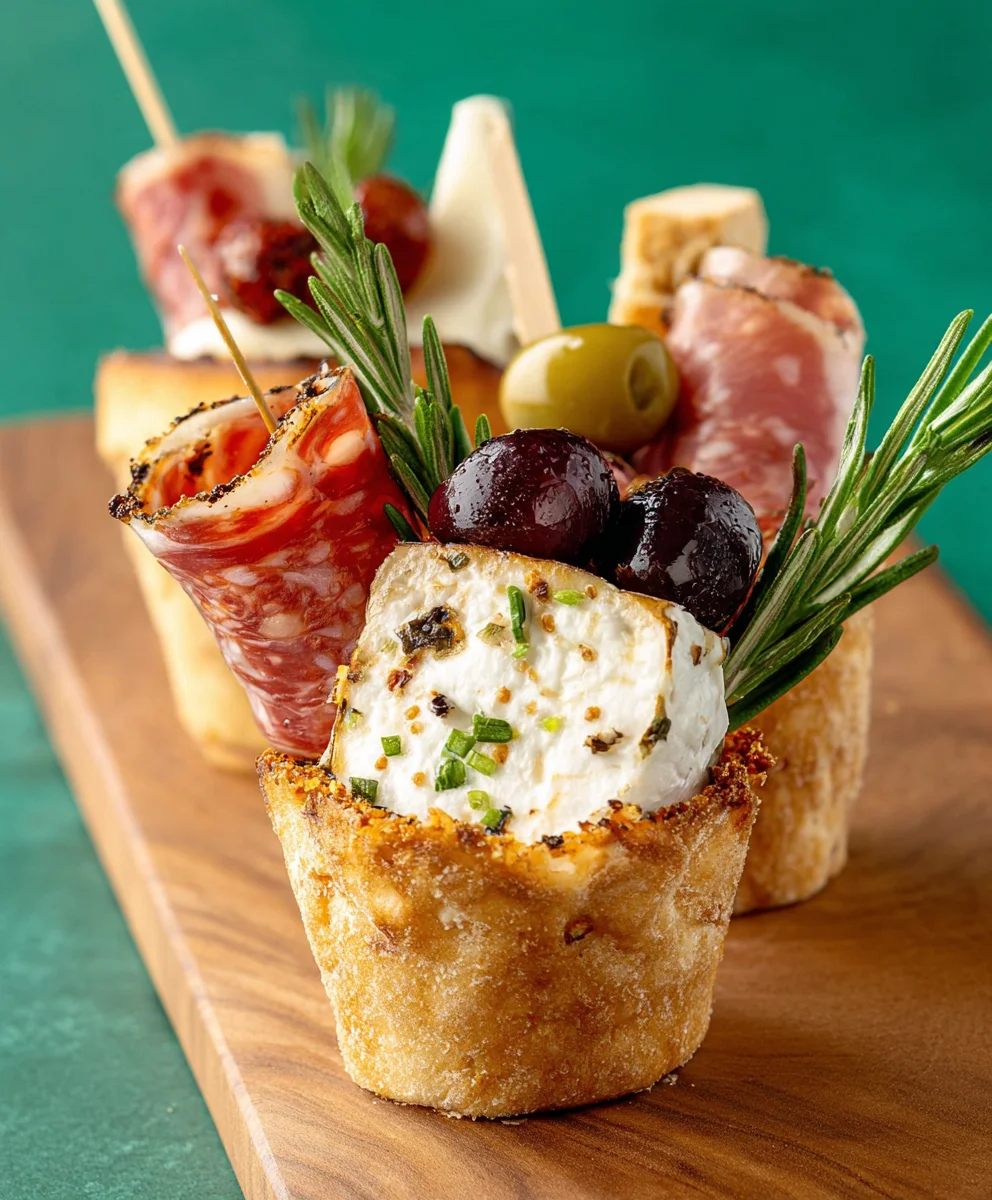
The final step is all about presentation and adding those last aromatic and decorative elements. Take your fresh rosemary sprigs and tuck one or two into each individual charcuterie cup. The fragrant aroma of the rosemary will enhance the overall sensory experience as guests approach their cups. It also adds a beautiful touch of green and a sophisticated, earthy visual. Ensure that all ingredients are visible and artfully arranged, creating an inviting and appealing presentation. The goal is for each cup to look like a miniature masterpiece, offering a diverse and delicious snacking experience. Encourage guests to mix and match the components as they enjoy their individual charcuterie cups. The beauty of this recipe is its inherent simplicity and the joy it brings to sharing delicious, bite-sized moments.
Conclusion:
There you have it – a delightful and impressive way to serve a crowd, or simply treat yourself! These Individual Charcuterie Cups are incredibly versatile and offer a personalized touch to any gathering. We’ve explored the simple steps to assemble these elegant cups, ensuring a perfect balance of textures and flavors. Remember, the beauty of these cups lies in their adaptability. Don’t be afraid to get creative with your ingredient choices and make them your own. Whether you’re hosting a casual get-together or a more formal event, these cups are sure to be a conversation starter and a guaranteed hit. Enjoy the process and the delicious outcome!
For serving, these are perfect as appetizers, party snacks, or even a light lunch. They pair wonderfully with a crisp white grape juice or a craft non-alcoholic beer. Don’t hesitate to explore different cheese varieties, experiment with unique cured meats, and add seasonal fruits or nuts for an extra special touch.
What are some easy variations for Individual Charcuterie Cups?
You can easily adapt these cups to suit dietary needs or preferences. Consider a vegetarian version with a variety of cheeses, olives, fruits, nuts, and crusty bread. For a sweeter twist, incorporate mini pastries, chocolate, and berries. Gluten-free crackers or rice cakes are a great alternative to breadsticks.
How far in advance can I assemble Individual Charcuterie Cups?
It’s best to assemble these cups no more than a few hours before serving. This helps to keep the ingredients fresh and prevent crackers or bread from becoming soggy. You can prepare individual components, like slicing cheeses and meats, a day in advance and store them separately in airtight containers in the refrigerator.
Can I make these cups themed?
Absolutely! Theme your Individual Charcuterie Cups for holidays or specific occasions. For a festive feel, use red and green grapes, cranberry sauce, and rosemary sprigs. For a summer picnic, focus on fresh berries, melon, and lighter cheeses. The possibilities are endless!
Individual Charcuterie Cups-Easy & Elegant Bites
Delightful, portable individual charcuterie cups perfect for parties, picnics, or a sophisticated solo snack, featuring a curated selection of flavors and textures.
Ingredients
-
1 cup Strawberries, halved
-
1 cup Blackberries
-
1 cup Red grapes, halved
-
8 oz Beef Salami, folded into bite-sized pieces
-
4 oz Brie bites, cut in half
-
4 oz Gouda, cubed
-
4 oz Manchego cheese, sliced into thin wedges
-
8 Bread sticks, broken in half
-
2 Rustic Bakery Sourdough Flatbreads, cut into bite-sized pieces
-
6 Honey sticks
-
1/2 cup Cornichons
-
1/2 cup Mixed olives
-
1/2 cup Dried apricots, halved
-
Fresh Rosemary sprigs, for garnish
Instructions
-
Step 1
Select your vessels (small bowls, mason jars, or paper cups). Place cubed Gouda at the bottom of each cup for a base. Add sliced Manchego cheese, arranging wedges artfully. Tuck halved Brie bites amongst the cheeses for variety. -
Step 2
Gently place folded beef salami into each cup. Break bread sticks into halves or thirds and nestle them in. Scatter bite-sized pieces of Rustic Bakery Sourdough Flatbread throughout the cups for added crunch and flavor. -
Step 3
Add halved strawberries, blackberries, and halved red grapes, distributing them evenly for vibrant color. Place cornichons and mixed olives in each cup to provide a tangy and briny counterpoint to the richness. -
Step 4
Tuck halved dried apricots into the cups for a chewy, sweet accent. Place honey sticks directly into the cups for natural sweetness and a rustic charm. -
Step 5
Tuck fresh rosemary sprigs into each cup for aroma and a visual garnish. Ensure all ingredients are visible and artfully arranged for an inviting presentation.
Important Information
Nutrition Facts (Per Serving)
It is important to consider this information as approximate and not to use it as definitive health advice.
Allergy Information
Please check ingredients for potential allergens and consult a health professional if in doubt.