Easy Piping Basketball Cookies-Fun Sweet Treat
Piping basketball cookies are more than just a sweet treat; they’re a slam dunk for any occasion! Imagin extracte the delight on your guests’ faces, young and old, as they bite into these perfectly round, chewy delights, each meticulously decorated to resemble a miniature basketball. These cookies capture the thrilling spirit of game day, making them the ultimate centerpiece for sports-themed parties, end-of-season celebrations, or even just a fun afternoon activity with the kids. What truly sets piping basketball cookies apart is the combination of a satisfyingly soft, slightly crisp exterior and a wonderfully tender, buttery interior. The real magic, however, lies in the piping. Mastering the technique transforms a simple sugar cookie into a work of art, with those iconic orange seams and black lines that are instantly recognizable and undeniably fun. Get ready to score big with this crowd-pleasing recipe!
Ingredients:
- 1 cup (2 sticks) unsalted butter, softened
- 1 ½ cups granulated sugar
- 2 large eggs
- 1 teaspoon vanilla extract
- 3 cups all-purpose flour
- 1 teaspoon baking powder
- ½ teaspoon salt
- Orange gel food coloring
- Black gel food coloring
- White royal icing (store-bought or homemade)
- Black royal icing (store-bought or homemade)
Preparation
Mixing the Cookie Dough
- In a large mixing bowl, cream together the softened unsalted butter and granulated sugar until the mixture is light and fluffy. This is a crucial step for achieving tender cookies. I like to use an electric mixer for this, starting on low speed and gradually increasing to medium-high. Continue mixing for about 3-5 minutes, scraping down the sides of the bowl occasionally, until you don’t see any grainy sugar crystals. This aeration is what gives the cookies their delicate texture.
- Add the large eggs one at a time, beating well after each addition. Incorporate the vanilla extract and mix until everything is just combined. Be careful not to overmix at this stage, as it can lead to tough cookies.
- In a separate medium bowl, whisk together the all-purpose flour, baking powder, and salt. This dry ingredient mixture ensures that the leavening agent and salt are evenly distributed throughout the dough, preventing pockets of baking powder or salt and ensuring a consistent rise and flavor.
- Gradually add the dry ingredients to the wet ingredients, mixing on low speed until just combined. The dough will be quite stiff. If it seems too dry, you can add another tablespoon of flour, but be cautious. Overworking the dough will develop the gluten too much, resulting in chewy rather than crisp cookies.
Dividing and Coloring the Dough
- Divide the cookie dough into three equal portions. This is important for creating our basketball cookies, as we’ll need a base color, an accent color, and a portion for the details.
- To two of the dough portions, add a generous amount of orange gel food coloring to one and black gel food coloring to the other. Gel food coloring is concentrated and provides vibrant colors without adding excess liquid, which could alter the dough’s consistency. Mix each portion thoroughly until the color is uniform. You want a rich, deep orange and a true black. If the color isn’t as intense as you’d like, you can add a little more coloring, but do so gradually. The third portion of dough will remain its natural color, which will be useful for certain piping techniques.
- Wrap each portion of colored dough separately in plastic wrap and refrigerate for at least 1 hour, or until firm. Chilling the dough makes it much easier to handle and roll out, preventing it from spreading too much during baking. This step is essential for maintaining the shape of your basketballs.
Shaping and Baking
- Preheat your oven to 350°F (175°C). Line baking sheets with parchment paper. This prevents the cookies from sticking and makes cleanup a breeze.
- On a lightly floured surface, roll out the orange dough to about ¼-inch thickness. Using a round cookie cutter (about 3 inches in diameter), cut out as many circles as you can. These will form the base of our basketball cookies. Re-roll scraps as needed, but try not to overwork the dough.
- Place the orange circles onto the prepared baking sheets, leaving about 1-2 inches of space between them. Bake for 10-12 minutes, or until the edges are lightly golden and the centers are set. Do not overbake, as this will result in dry cookies. Let the cookies cool on the baking sheet for a few minutes before transferring them to a wire rack to cool completely. It is absolutely vital that the cookies are fully cooled before you begin extract decorating, otherwise, your royal icing will melt and slide right off.
Decorating the Piping Basketball Cookies
- Once the cookies are completely cool, wgin extractan begin the fun part: decorating! For the main basketball design, you’ll want to have your white royal icing and black royal icing ready. If you’re using piping bags, fit them with a small round tip (like a Wilton tip #2 or #3).
- Start with the white royal icing. Pipe a continuous line around the edge of each orange cookie to create a border. This border helps to contain the flood icing and gives a clean, defined edge to your basketballs. Allow this border to set for about 5-10 minutes.
- Next, use the white royal icing to “flood” the center of the cookie, filling in the space within the border. You can achieve a smooth surface by gently shaking the cookie back and forth, or by using a scribe tool or toothpick to spread the icing evenly. If the icing seems too thick to flood smoothly, you can add a tiny bit of water, a teaspoon at a time, until it reaches a pourable consistency. Again, let this white flood coat dry completely. This usually takes at least 30 minutes to an hour, depending on humidity.
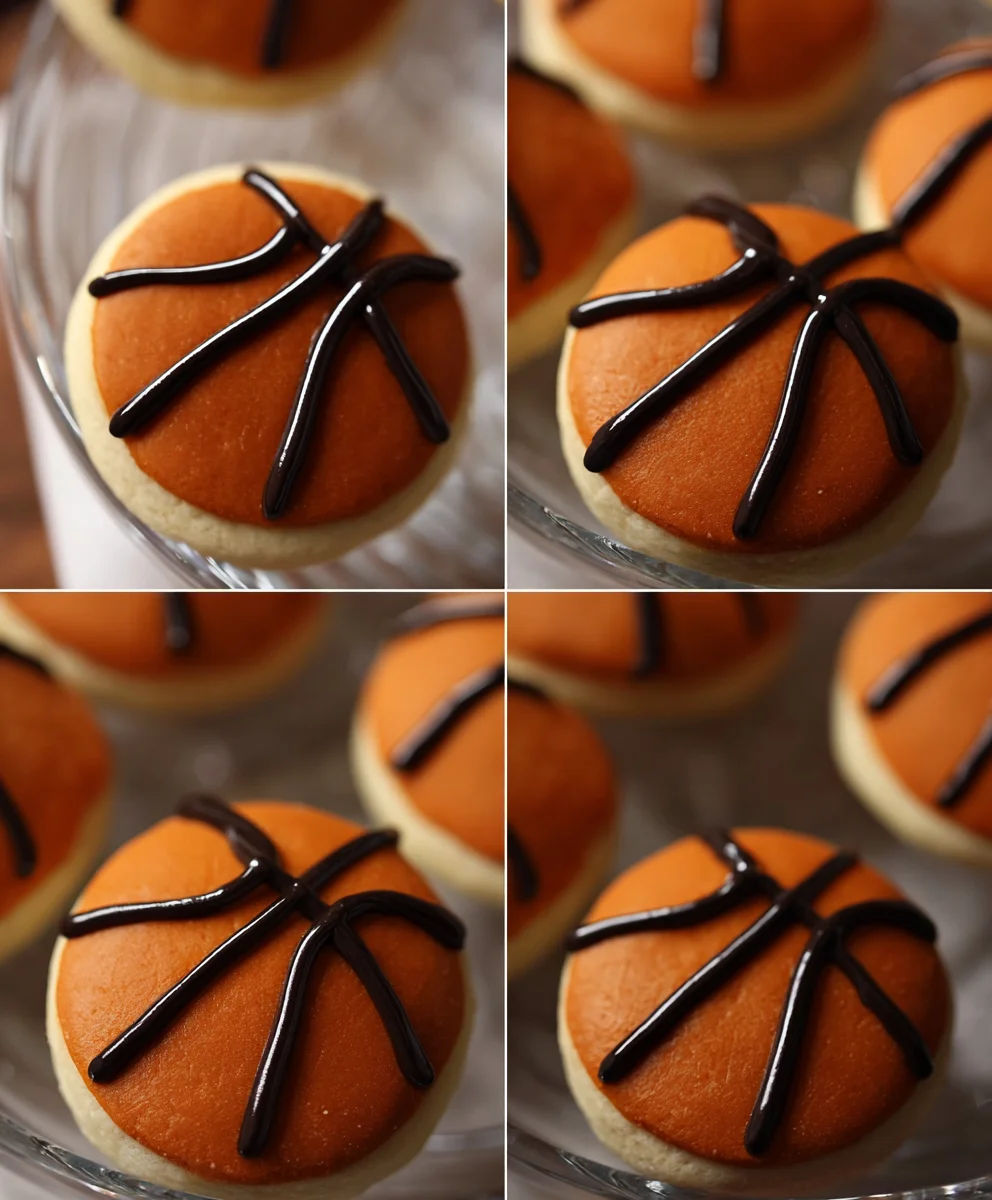
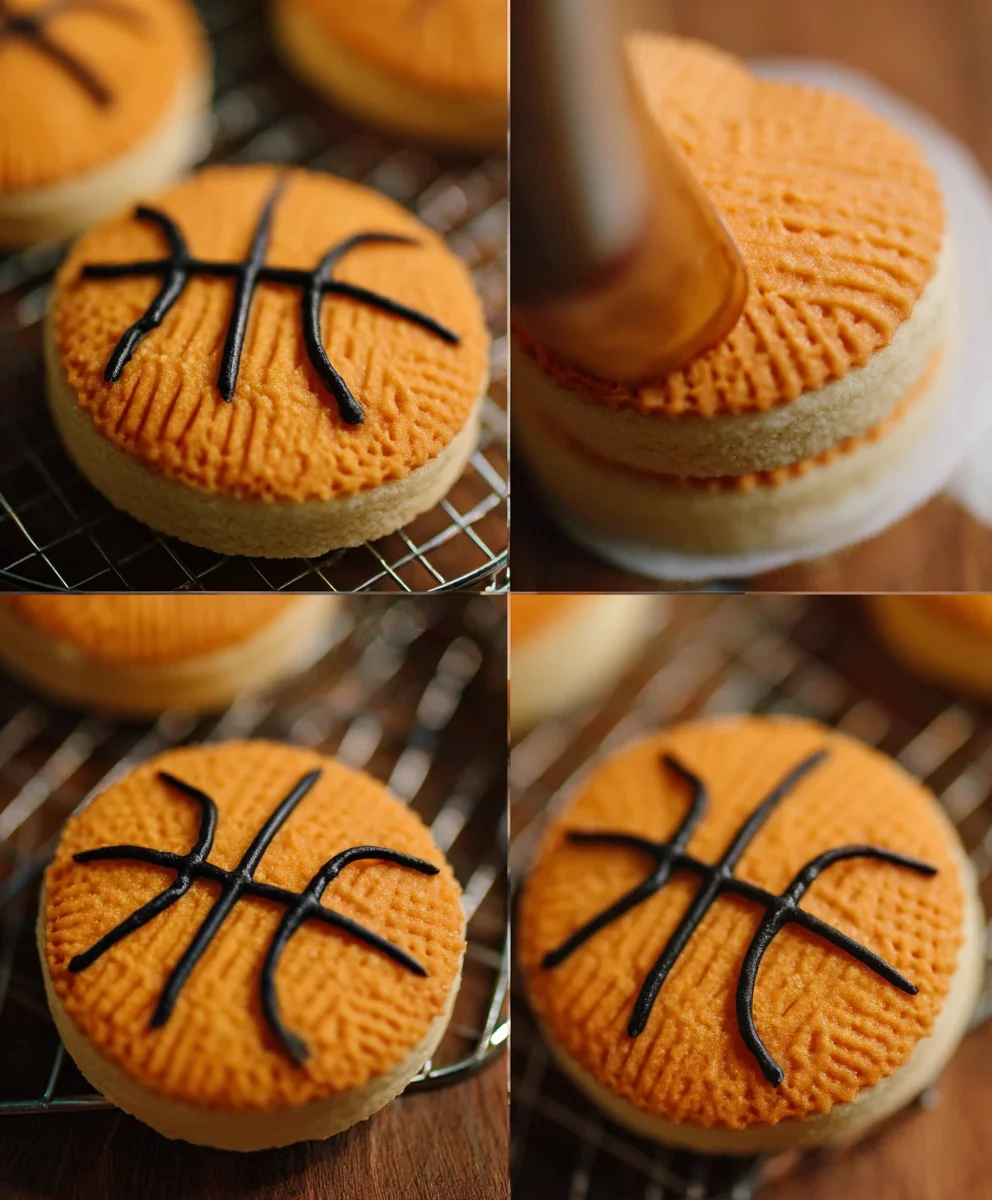
- Once the white flood coat is dry, it’s time to add the classic basketball lines. Use your black royal icing to pipe the characteristic curved lines of a basketball. Start by piping a curved line from one side of the cookie to the other, creating the top half of the “net” lines. Then, pipe a similar curved line below it for the bottom half. Finally, pipe two short, straight lines connecting the ends of your curved lines to complete the basketball pattern. If you’re aiming for perfectly even lines, you can practice on a piece of parchment paper first. For a more rustic look, don’t worry about perfection!
- For an extra touch, you can also use the black dough you prepared earlier. Roll it out very thinly and cut out small circles or even tiny curved strips to add subtle texture or shadow effects to your basketball cookies before baking, if desired. Alternatively, use the remaining plain cookie dough to cut out small black circles to place on top of the orange base before baking for a different style of basketball. The key is to experiment and have fun with these piping basketball cookies!
Conclusion:
Now that you’ve mastered the art of piping basketball cookies, you’re ready to wow your friends and family with these fun and delicious treats! We’ve covered everything from the basic dough preparation to the intricate details of creating that perfect basketball texture and lacing. These piping basketball cookies are not only visually appealing but also incredibly tasty, making them a hit at any gathering, from sports-themed parties to simple afternoon snacks. They’re a fantastic way to express your creativity and add a touch of playful charm to your baking repertoire.
For serving suggestions, imagin extracte these piping basketball cookies adorning a dessert table at a birthday party, accompanying a game-day spread, or even as a unique addition to a school bake snon-alcoholic ale. They pair wonderfully with a cold glass of milk or a scoop of vanilla ice cream. Don’t be afraid to experiment with variations! You could try different dough flavors like chocogin extracte or gingerbread for a twist, or even use edible food markers to add team logos or player numbers to individual cookies. The possibilities are truly endless.
We encourage you to embrace the joy of baking and have fun with this recipe. Don’t stress if your first attempt isn’t perfect; the practice makes perfect, and every cookie will still be a delightful creation. So gather your ingredients, preheat your oven, and let your inner baker shine!
Frequently Asked Questions about Piping Basketball Cookies:
Q1: Can I make the dough for these piping basketball cookies ahead of time?
Absolutely! The dough for piping basketball cookies can be made up to 2-3 days in advance and stored in the refrigerator. Just be sure to wrap it tightly in plastic wrap to prevent it from drying out. When you’re ready to bake, let the dough sit at room temperature for about 15-20 minutes until it’s pliable enough to pipe easily.
Q2: What’s the best way to achieve a consistent orange color for my piping basketball cookies?
For a vibrant and consistent orange color, I recommend using a gel food coloring. Gel colors are more concentrated than liquid colors, meaning you’ll need less to achieve an intense hue, and they won’t dilute your icing. Start by adding a small amount and gradually adding more until you reach your desired shade. Remember, the color may deepen slightly as the icing dries.
Q3: How should I store these piping basketball cookies once they are decorated and cooled?
Once your piping basketball cookies are completely cooled, you can store them in an airtight container at room temperature for up to 3-4 days. It’s best to place parchment paper between layers to prevent the cookies from sticking together, especially if the icing is still slightly tacky. Avoid storing them in the refrigerator, as this can cause the cookies to become soft and the icing to sweat.
Easy Piping Basketball Cookies-Fun Sweet Treat
Create fun and delicious basketball-themed cookies with this easy piping recipe. Perfect for sports fans and parties!
Ingredients
-
1 cup (2 sticks) unsalted butter, softened
-
1 ½ cups granulated sugar
-
2 large eggs
-
1 teaspoon vanilla extract
-
3 cups all-purpose flour
-
1 teaspoon baking powder
-
½ teaspoon salt
-
Orange gel food coloring
-
Black gel food coloring
-
White royal icing
-
Black royal icing
Instructions
-
Step 1
Cream together softened unsalted butter and granulated sugar in a large mixing bowl until light and fluffy. Beat in eggs one at a time, then vanilla extract. -
Step 2
In a separate bowl, whisk together flour, baking powder, and salt. Gradually add dry ingredients to wet ingredients until just combined. -
Step 3
Divide dough into three equal portions. Color two portions orange and black using gel food coloring. Wrap and chill for at least 1 hour. -
Step 4
Preheat oven to 350°F (175°C). Roll out orange dough to ¼-inch thickness and cut out 3-inch circles. Bake for 10-12 minutes until edges are golden. Cool completely. -
Step 5
Once cool, pipe a white royal icing border around each cookie. Flood the center with white icing and let dry completely. -
Step 6
Using black royal icing, pipe the characteristic curved lines of a basketball to create the net pattern. Allow to dry.
Important Information
Nutrition Facts (Per Serving)
It is important to consider this information as approximate and not to use it as definitive health advice.
Allergy Information
Please check ingredients for potential allergens and consult a health professional if in doubt.