Easy Pickled Red Onions Recipe Quick-Fix
Pickled red onions are an absolute game-changer in my kitchen, and I’m thrilled to share this recipe with you. They’re not just a condiment; they’re a vibrant, tangy explosion of flavor that elevates almost any dish. Think about it: those gorgeous, jewel-toned slivers transforming a simple taco into a fiesta, a humble salad into a gourmet creation, or a sandwich from satisfactory to sensational. People adore pickled red onions because they offer that perfect balance of sweet and sour, with a delightful crunch that cuts through richness and adds a refreshing zest. What makes them truly special is their versatility and how easily they bring a professional polish to home cooking. Forget those store-bought versions; making your own pickled red onions is incredibly simple and yields a far superior result. Get ready to discover your new favorite topping!
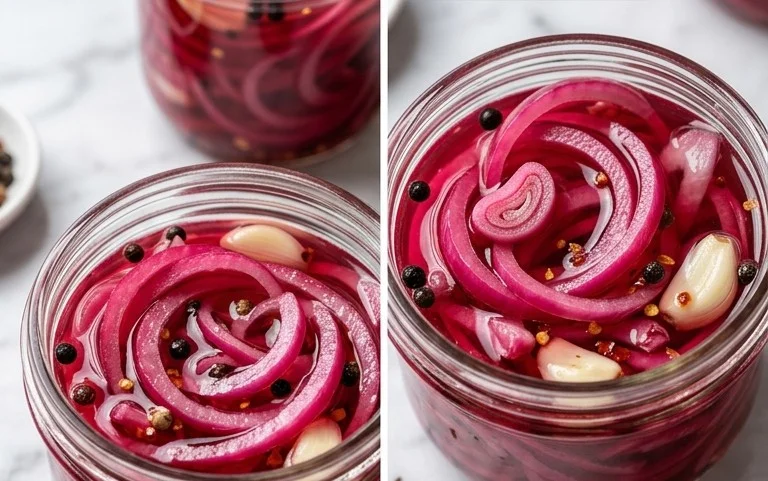
Pickled Red Onions
There are few condiments that can elevate a dish quite like a vibrant, tangy jar of pickled red onions. They’re not just visually stunning with their jewel-toned hue, but they add a delightful crunch and a complex sweet-and-sour punch that can transform everything from tacos and sandwiches to salads and charcuterie boards. Forget store-bought; making your own pickled red onions at home is surprisingly simple, incredibly rewarding, and allows you to customize the flavor to your exact liking. This recipe is my go-to for a quick and easy pickle that delivers big on flavor.
The beauty of this recipe lies in its simplicity. You only need a few pantry staples and some fresh red onions. The pickling liquid is a classic brine that’s perfectly balanced, and with a little bit of patience, you’ll have a jar of deliciousness ready to be devoured. I love having a jar of these in my fridge at all times. They are incredibly versatile and can be used in so many ways. Think of them as a flavor shortcut, an instant upgrade to any meal. They are also a fantastic way to use up onions that might be a bit past their prime for raw consumption, as the pickling process softens them slightly and mellows their bite.
What I appreciate most about this recipe is how forgiving it is. Don’t have exactly 1 1/4 cups of water? A splash more or less won’t ruin everything. While I provide specific measurements for optimal results, the core principle is a balanced sweet, sour, and salty brine. Feel free to experiment with different types of sugar once you’re comfortable with the basic recipe. Brown sugar adds a subtle caramel note, while honey can impart a floral sweetness. For a more intense flavor, you could even try a touch of maple syrup, though this will change the color slightly. The red pepper flakes are entirely optional, but I highly recommend them if you enjoy a little kick. They add a subtle warmth that complements the tangin extractess of the onions beautifully, without making them spicy.
Ingredients:
Instructions:
1. Preparing the Onions:
The first step is to get your red onions ready. You’ll want to peel them, which is usually a straightforward process. Once peeled, you’ll need to slice them thinly. The key here is consistency. Aim for thin, uniform slices, about 1/8-inch thick. You can achieve this using a sharp chef’s knife or, for even more consistent results, a mandoline slicer. If you use a mandoline, please exercise extreme caution and use the safety guard. The thinness of the slices is important for several reasons. Firstly, it allows the pickling brine to penetrate the onions quickly and evenly, ensuring they pickle all the way through. Secondly, thin slices are more pleasant to eat in most applications, providing a delightful crunch without being overwhelming. You can slice them into rounds or half-moons, depending on your preference. For a more rustic look, half-moons are lovely. If you’re going for a neater appearance, thin rounds work wonderfully.
2. Making the Pickling Brine:
Now it’s time to create the magical pickling liquid. In a medium saucepan, combine the water, white vinegar, sugar, and sea salt. If you’re using red pepper flakes, add them now as well. Place the saucepan over medium heat. Stir the mixture gently as it heats up, ensuring that the sugar and salt dissolve completely. You don’t need to bring this to a rolling boil; just heat it until the sugar and salt are fully dissolved and the liquid is hot. This process helps to infuse the flavors and sterilize the brine slightly. Once everything is dissolved, remove the saucepan from the heat. Allowing the brine to cool slightly before pouring it over the onions will prevent the onions from becoming mushy and will help them retain their crispness.
3. Combining Onions and Brine:
While the brine is still warm (but not boiling), it’s time to bring our components together. Take your sliced red onions and place them into a clean, heatproof glass jar or a bowl. A jar is ideal for storage later on, but a bowl works perfectly well for the initial pickling process. Make sure your jar or bowl is large enough to comfortably hold all the onions and the pickling liquid. Once the onions are in their container, carefully pour the warm pickling brine over them. Ensure that the onions are fully submerged in the liquid. If a few slices are peeking out, don’t worry too much, as they will likely shift and sink as they begin extract to pickle. Gently press down on the onions with a spoon if needed to ensure they are all submerged.
4. The Waiting Game (and Flavor Development):
This is arguably the hardest part, but it’s crucial for achieving the perfect pickle. You need to let the onions sit at room temperature for at least 30 minutes, and ideally, for about an hour. During this time, the magic happens. The onions will begin extract to soften slightly, and their vibrant color will start to bleed into the brine, transforming it into that beautiful pink hue we’re after. The vinegar will start to work its magic, tenderizing the onions and infusing them with its tangy flavor, while the sugar and salt will balance everything out. The longer they sit at room temperature, the more pronounced the pickling will become. Don’t be tempted to rush this step. Patience here will be rewarded with beautifully flavored and textured pickled onions.
5. Refrigeration and Storage:
After the initial period at room temperature, it’s time to move your pickled red onions to the refrigerator. Carefully transfer the onions and their brine into a clean glass jar with a tight-fitting lid. This is where your prepared jar comes in handy. Ensure the lid is senon-alcoholic aled securely. Once refrigerated, the pickling process continues, albeit at a slower pace. You can start enjoying your pickled red onions after about an hour in the fridge, but they truly develop their best flavor after at least 24 hours. The longer they sit in the brine, the more intense their pickled flavor will become, and the softer they will get. These pickled red onions will last for several weeks in the refrigerator, as long as they are stored in an airtight container and always submerged in their brine. If you notice the brine level decreasing over time, you can always top it off with a little extra cooled brine (made with the same proportions of water, vinegar, sugar, and salt).
Enjoy your delicious homemade pickled red onions! They are a fantastic addition to so many dishes.
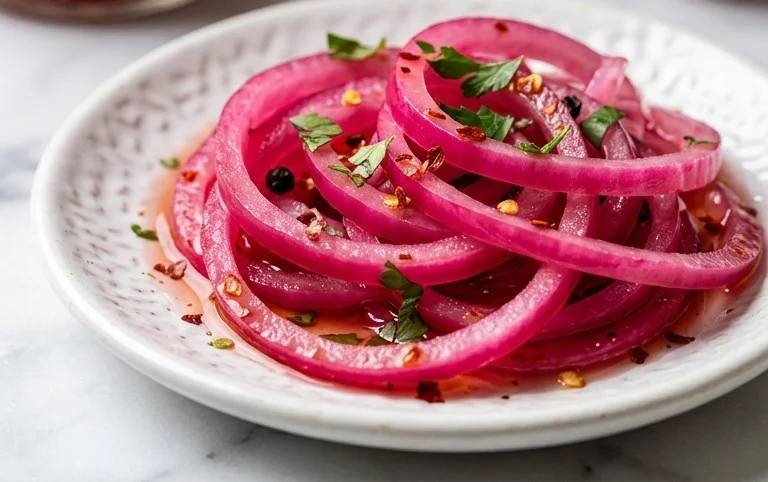
Conclusion:
And there you have it – your guide to crafting the perfect batch of pickled red onions! This simple yet transformative recipe truly elevates any dish it graces. The vibrant color, the delightful tang, and the satisfying crunch are reasons enough to keep a jar of these beauties on hand. They add an instant burst of flavor and visual appeal to everything from tacos and sandwiches to salads and avocado toast. Don’t be afraid to experiment with serving suggestions; they’re incredibly versatile!
If you’re feeling adventurous, consider playing with variations. A pinch of chili flakes can add a gentle heat, or a sprig of fresh dill can introduce an herbal note. Perhaps a touch of honey or maple syrup for a sweeter profile? The possibilities are vast and delicious. I encourage you to give this recipe a try; I promise you won’t regret adding these tangy delights to your culinary repertoire. You’ll find yourself reaching for this quick pickle recipe again and again.
Frequently Asked Questions:
How long do pickled red onions last?
When stored properly in an airtight container in the refrigerator, your pickled red onions can last for up to 2-3 weeks. The acidity helps preserve them.
Can I use other types of onions?
While red onions are ideal for their color and slightly milder flavor when pickled, you can experiment with white or yellow onions. However, they won’t offer the same stunning visual appeal and might have a sharper taste.
What is the best vinegar to use for pickling red onions?
Apple cider vinegar or white grape juice vinegar are excellent choices for this pickled red onion recipe. They provide a good balance of acidity and subtle fruity notes without overpowering the onion’s flavor.
Quick Pickled Red Onions
A simple and versatile recipe for quick pickled red onions, perfect for adding a tangy crunch to salads, tacos, sandwiches, and more. Ready in about an hour.
Ingredients
-
2 medium red onions ((or 3 small ones))
-
1 1/4 cup water
-
1 1/4 cup white vinegar
-
3 tbsp sugar
-
1 tbsp sea salt
-
1/4-1/2 tsp red pepper flakes ((optional))
Instructions
-
Step 1
Thinly slice the red onions into rings or half-moons. -
Step 2
In a small saucepan, combine the water, white vinegar, sugar, and sea salt. -
Step 3
Heat the mixture over medium heat, stirring until the sugar and salt are completely dissolved. Do not boil. -
Step 4
Place the sliced onions into a clean jar or heat-proof container. If using, add the red pepper flakes. -
Step 5
Pour the hot brine over the onions, ensuring they are fully submerged. -
Step 6
Let the onions cool to room temperature, then cover and refrigerate for at least 30 minutes before serving. They will develop more flavor over time.
Important Information
Nutrition Facts (Per Serving)
It is important to consider this information as approximate and not to use it as definitive health advice.
Allergy Information
Please check ingredients for potential allergens and consult a health professional if in doubt.