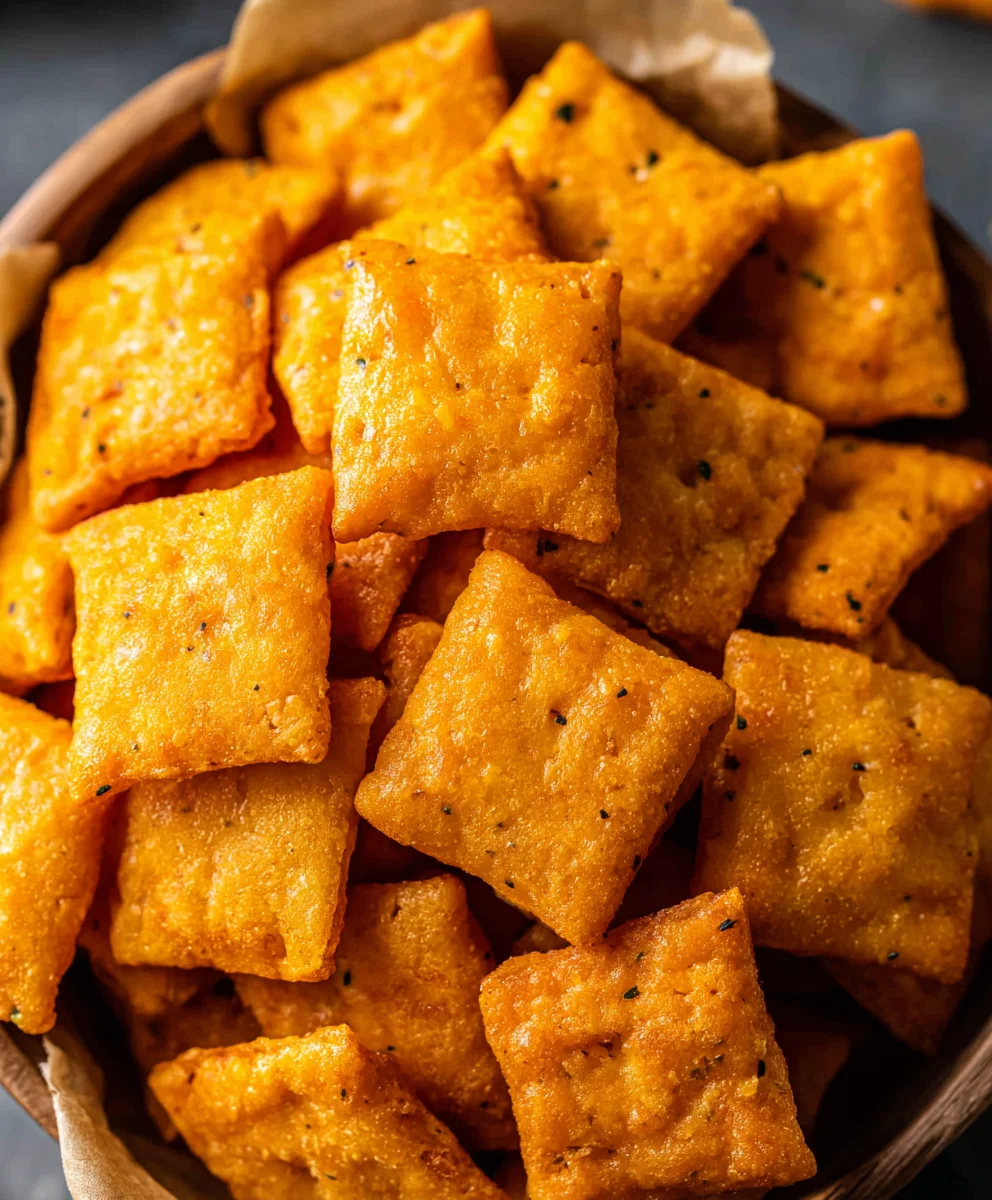
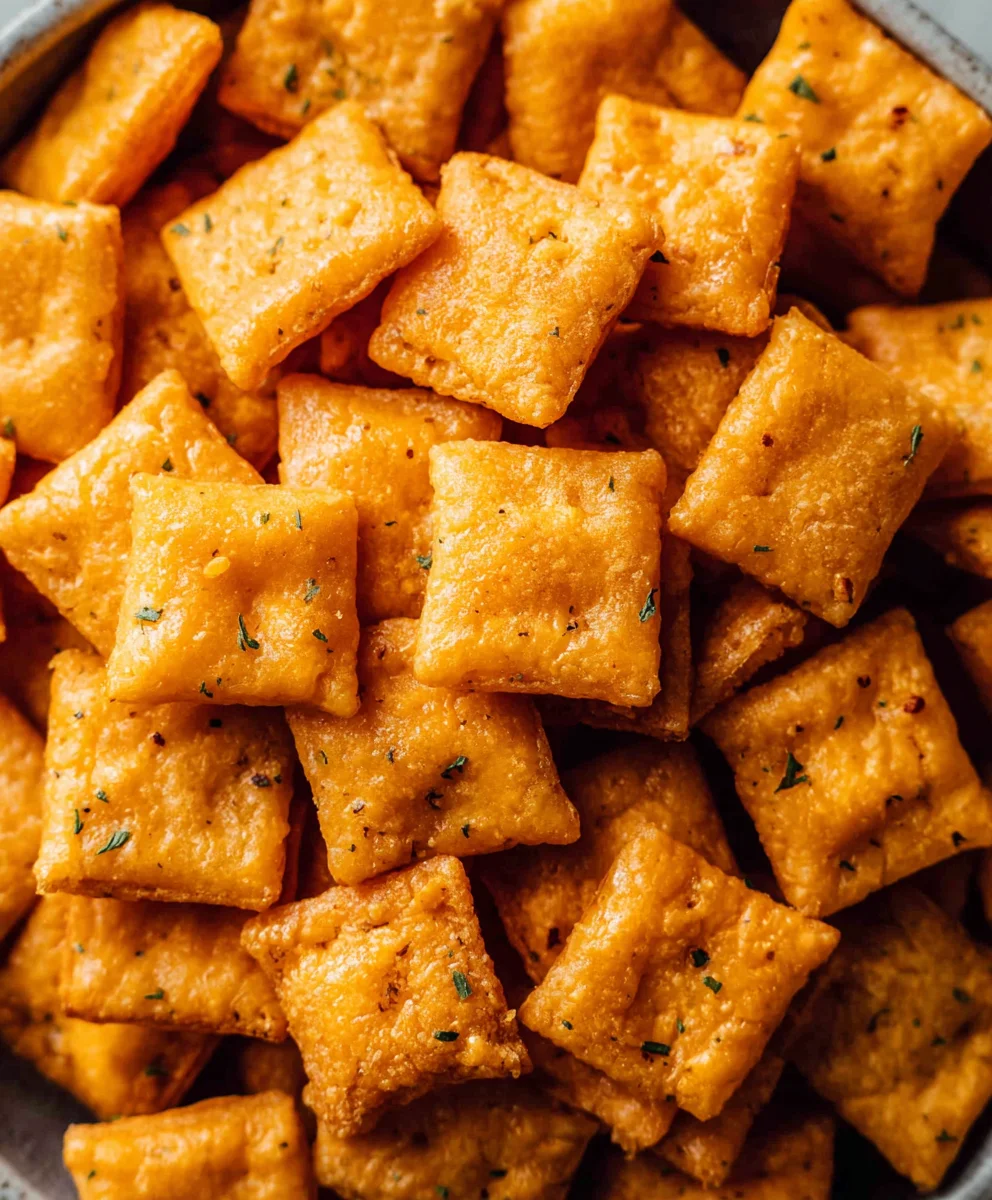
Homemade Cheez-Its-The Ultimate Baked Snack
Homemade Cheez Its are more than just a snack; they’re a ticket to pure, unadulterated childhood joy and a testament to the magic that happens when simple ingredients come together. Forget those brightly colored boxes; embarking on the journey of making your own Homemade Cheez Its is a surprisingly rewarding experience that elevates this beloved cheesy cracker to a whole new level. We all have a soft spot for that iconic, satisfying crunch and the intensely savory, cheesy flavor that defines this snack. But what truly sets these homemade versions apart is the ability to control the quality of your ingredients and infuse them with an even more robust cheese profile. Imagin extracte the aroma filling your kitchen as they bake, a promise of golden, crispy perfection ready to be devoured. This recipe is designed to deliver that signature flavor and texture, making it an irresistible treat for kids and adults alike.
Why You’ll Love This Recipe
There’s something incredibly satisfying about creating your own versions of beloved store-bought treats, and Homemade Cheez Its are no exception. The reason people flock to this recipe is simple: superior taste and texture. You get to experiment with different cheeses, adding depth and complexity thatgin extracte original can’t quite match. The crunch is unparalleled, and the rich, cheesy essence is truly addictive. Plus, knowing exactly what goes into your food offers a sense of comfort and control, making these Homemade Cheez Its not just a snack, but a wholesome indulgence you can feel good about sharing.
What Makes These Homemade Cheez Its Special
What truly makes these Homemade Cheez Its special is the attention to detail and the focus on maximizing that quintessential cheesy flavor. We’re talking about a symphony of sharp cheddar and a hint of something extra, like a touch of Parmesan, to create a more nuanced and intensely satisfying taste. The magic lies in the careful balance of simple ingredients like flour, butter, and, of course, plenty of cheese, combined with a technique that ensures that signature airy crunch. It’s a labor of love that pays off with every perfectly seasoned, bite-sized cracker. This isn’t just a recipe; it’s an invitation to rediscover a classic with a homemade twist that’s truly unforgettable.
Ingredients:
- ¼ cup unsalted butter, softened to room temperature
- 8 oz. sharp cheddar cheese, finely shredded
- 1 ¼ cups all-purpose flour
- 1 teaspoon kosher salt, plus extra for sprinkling on top
- 2-3 tablespoons ice-cold water
- 2 tablespoons olive oil
Making Your Own Homemade Cheez-Its
This recipe is all about capturing that irresistible cheesy crunch of your favorite boxed snack, but with the satisfaction of knowing exactly what goes into it. We’re going to create a dough that’s rich with cheddar, perfectly balanced with salt, and just the right amount of crispness. Get ready for a flavor explosion that will make you rethink ever buying store-bought again.
Phase 1: Creating the Cheesy Dough
The foundation of these Homemade Cheez-Its is a simple yet effective dough. We start by bringin extractg together our softened butter and finely shredded sharp cheddar cheese. The butter provides a tender crum extractb, while the sharp cheddar is the star, delivering that essential tangy, savory flavor. Make sure your butter is truly at room temperature – not melted, but soft enough to be easily incorporated. This ensures a smooth, well-emulsified base.
In a large mixing bowl, I like to combine the softened butter and shredded cheddar cheese. You can use a stand mixer with a paddle attachment for this, or simply use a sturdy spatula or your hands. The goal is to cream them together until they form a relatively smooth, cohesive mixture. It won’t be perfectly uniform, and that’s okay; small bits of cheese are exactly what we want!
Next, we’ll introduce the dry ingredients. Add the all-purpose flour and the 1 teaspoon of kosher salt to the cheesy butter mixture. The flour is what gives our crackers their structure, and the kosher salt enhances all those delicious cheesy notes. Mix these in until they are just combined. You’ll notice the mixture starting trum extractook crumbly, almost like coarse meal. This is a good sign! Don’t overmix at this stage, as we don’t want to develop the gluten in the flour too much, which could result in tough crackers.
Now comes the liquid element that will bring our dough together. We’re going to gradually add the ice-cold water. Start with 2 tablespoons. The colder the water, the more it helps keep the butter from melting, which is crucial for achieving a flaky texture. Use a fork or your hands to gently mix the water into the dough. You’re looking for a dough that just starts to come together. It should be shaggy and slightly sticky, but not wet or overly greasy. If it still seerum extracttoo dry and crumbly after adding the first 2 tablespoons, add the third tablespoon, a teaspoon at a time, until the dough just clumps together when you press it.
Once the dough has come together, turn it out onto a lightly floured surface. Gently knead it a few times – just enough to ensure everything is incorporated and the dough is relatively smooth. Be careful not to overwork it. Form the dough into a flat disc, wrap it tightly in plastic wrap, and then refrigerate it for at least 30 minutes. This chilling period is incredibly important. It allows the gluten to relax, the fats to firm up, and the flavors to meld, making the dough much easier to handle and resulting in a superior final texture.
Phase 2: Rolling, Cutting, and Baking to Perfection
After the dough has chilled sufficiently, it’s time to bring our Homemade Cheez-Its to life. Preheat your oven to 350°F (175°C). Line two baking sheets with parchment paper. This prevents sticking and makes for easy cleanup.
Take the chilled dough out of the refrigerator. It should be firm but pliable. On a lightly floured surface, roll out the dough very thinly, aiming for about 1/8-inch thickness. The thinner you roll it, the crispier your crackers will be. Use a rolling pin to ensure an even thickness across the entire surface. This is key to having uniformly baked crackers. If the dough becomes too soft or sticky while rolling, pop it back into the refrigerator for a few minutes to firm up again.
Once the dough is rolled out to your desired thickness, it’s time for the fun part: cutting! You can use a small square cookie cutter (about 1-inch by 1-inch) to mimic the classic Cheez-It shape. If you don’t have a square cutter, a pizza cutter or a sharp knife can be used to cut the dough into small squares. As you cut, try to work efficiently to avoid warming the dough too much. You can re-roll the scraps, but be gentle and only knead them minimally to avoid toughness.
Carefully transfer the cut squares to the prepared baking sheets, spacing them about ½ inch apart. They won’t spread much, but a little space ensures good air circulation for even baking. Now, for that signature touch: brush each cracker lightly with the olive oil. This adds a subtle richness and helps them achieve a beautiful golden-brown color. Finally, sprinkle a generous pinch of kosher salt over the top of each cracker. This extra salt is crucial for that authentic flavor punch.
Place the baking sheets in the preheated oven and bake for 12-18 minutes, or until the edges are golden brown and the centers are firm. The exact baking time will depend on how thinly you rolled your dough and the intensity of your oven. Keep a close eye on them during the last few minutes, as they can go from perfectly golden to slightly too dark very quickly.
Once baked, remove the baking sheets from the oven and let the Homemade Cheez-Its cool on the sheets for a few minutes. Then, carefully transfer them to a wire rack to cool completely. They will become even crispier as they cool. Once completely cooled, you’ll have a batch of delicious, homemade cheesy crackers ready to be devoured! Store any leftovers in an airtight container at room temperature.
Conclusion:
And there you have it – the ultimate guide to crafting your very own Homemade Cheez Its! We’ve walked through each step, from selecting the perfect cheese to achieving that satisfying crunch. These delightful crackers are more than just a snack; they’re a testament to the joy of homemade goodness. Now that you’ve mastered the basic recipe, you’re ready to impress your family and friends with these irresistible cheesy bites. Don’t be afraid to experiment and make them your own!
For serving, these Homemade Cheez Its are fantastic on their own, but they also pair beautifully with a variety of dips like ranch, spinach artichoke dip, or even a hearty tomato soup. Consider them a gourmet addition to your cheese board or a fun party appetizer. For variations, try adding a pinch of smoked paprika for a smoky kick, a dash of cayenne pepper for a touch of heat, or even some finely chopped herbs like chives or rosemary. The possibilities are endless!
We encourage you to get in the kitchen and give this recipe a try. The aroma of baking cheese will fill your home, and the taste of these fresh, homemade crackers will be infinitely more rewarding than anything store-bought. Enjoy the process and savor every cheesy, crunchy bite!
Frequently Asked Questions:
Why are my Homemade Cheez Its not crispy enough?
Ensuring crispiness often comes down to a few factors. Make sure your dough is rolled out thinly and evenly. Overworking the dough can also make them tough rather than crispy. Baking them until they are a beautiful golden brown is key, and don’t be afraid to bake them a minute or two longer if needed. Also, ensure they cool completely on a wire rack, as residual steam can make them soft.
Can I make these Homemade Cheez Its with different types of cheese?
Absolutely! While sharp cheddar is classic, feel free to get creative. Gruyere, Monterey Jack, or even a blend of cheeses can add wonderful depth of flavor. Just be mindful that some cheeses melt differently, so you might need to adjust baking times slightly. Experimenting with different cheese combinations is part of the fun!
Homemade Cheez-Its-The Ultimate Baked Snack
Capture that irresistible cheesy crunch of your favorite boxed snack with this satisfying homemade recipe. Rich with cheddar, perfectly balanced with salt, and just the right amount of crispness.
Ingredients
-
1/4 cup unsalted butter, softened to room temperature
-
8 oz. sharp cheddar cheese, finely shredded
-
1 1/4 cups all-purpose flour
-
1 teaspoon kosher salt, plus extra for sprinkling on top
-
2-3 tablespoons ice-cold water
-
2 tablespoons olive oil
Instructions
-
Step 1
In a large mixing bowl, cream together the softened butter and shredded sharp cheddar cheese until well combined and relatively smooth. -
Step 2
Add the all-purpose flour and 1 teaspoon of kosher salt to the mixture. Mix until just combined, creating a crumbly texture. -
Step 3
Gradually add the ice-cold water, 1 tablespoon at a time, mixing until the dough just comes together. It should be shaggy and slightly sticky. Gently knead a few times, then form into a flat disc, wrap in plastic wrap, and refrigerate for at least 30 minutes. -
Step 4
Preheat oven to 350°F (175°C). Line two baking sheets with parchment paper. Roll out the chilled dough very thinly (about 1/8-inch thickness) on a lightly floured surface. Cut into small squares. -
Step 5
Transfer the cut squares to the prepared baking sheets, spacing them about ½ inch apart. Brush each cracker lightly with olive oil and sprinkle with kosher salt. -
Step 6
Bake for 12-18 minutes, or until the edges are golden brown and the centers are firm. Let cool on the baking sheets for a few minutes, then transfer to a wire rack to cool completely.
Important Information
Nutrition Facts (Per Serving)
It is important to consider this information as approximate and not to use it as definitive health advice.
Allergy Information
Please check ingredients for potential allergens and consult a health professional if in doubt.