Ultimate Cheesy Garlic Bread Recipe – Crispy Delicious
Ultimate Cheesy Garlic Bread Recipe – Crispy, Cheesy & Irresistible is more than just a side dish; it’s a gateway to pure culinary bliss. Imagin extracte sinking your teeth into a slice that’s simultaneously boasting a satisfying crunch from the perfectly toasted bread and a gooey, molten core of rich, melted cheese. This isn’t just any garlic bread; it’s an experience designed to elevate any meal, from a casual weeknight dinner to a festive gathering. What makes it so universally loved? It’s the perfect harmony of fragrant garlic, creamy butter, and a generous medley of cheeses, all working together to create a flavor explosion. Our approach to crafting this Ultimate Cheesy Garlic Bread Recipe – Crispy, Cheesy & Irresistible ensures every bite is an adventure, with layers of flavor and texture that will leave you reaching for another piece, and then another.
Ingredients:
- 1 large French baguette or Italian bread
- ½ cup unsalted butter (softened)
- 5–6 garlic cloves (minced)
- 1 cup mozzarella cheese (shredded)
- ½ cup cheddar cheese (optional)
- 2 tablespoons fresh parsley (chopped)
- Salt to taste
Preparing Your Ultimate Cheesy Garlic Bread
Preheating and Bread Preparation
- First, preheat your oven to 375°F (190°C). This is crucial for achieving that perfect crispy exterior. While the oven is heating, prepare your bread. Take your large French baguette or Italian bread and carefully slice it in half lengthwise. You want to create two long halves that will serve as the base for your delicious toppings. If your baguette is very long, you might even consider slicing it into slightly shorter, manageable pieces at this stage, perhaps about 10-12 inches long, though keeping it whole is also perfectly fine for dramatic presentation. The goal is to have a sturdy surface that can hold all the cheesy goodness without falling apart. Place the halved baguette, cut-side up, on a large baking sheet. Don’t worry if there are a few crum extractbs; they’ll bake up nicely.
- Now, let’s create that irresistible garlic butter spread. In a medium-sized bowl, combine the softened unsalted butter. The butter should be soft enough to easily mash with a fork but not melted, as this will help it spread evenly and create a lovely barrier on the bread. Add the minced garlic cloves to the softened butter. The amount of garlic can be adjusted to your personal preference – if you’re a garlic fiend, feel free to add an extra clove or two! Next, stir in the chopped fresh parsley. Fresh parsley not only adds a beautiful vibrant green color but also provides a fresh, slightly peppery flavor that complements the richness of the butter and garlic. Finally, add a pinch of salt to taste. Remember that the cheese will also add saltiness, so start with a small amount, perhaps ¼ teaspoon, and you can always add more later if needed. Mix all these ingredients together thoroughly until they are well combined into a smooth, fragrant paste.
- It’s time to generously coat the bread with our glorious garlic butter mixture. Using a spatula or a butter knife, spread the garlic butter evenly over the cut surfaces of both baguette halves. Make sure to get all the way to the edges, so every bite is infused with that incredible garlicky flavor and buttery richness. Don’t be shy with the spread; a good, thick layer is what makes this garlic bread truly exceptional. Ensure an even distribution so you don’t end up with dry spots. You want to create a luscious foundation for the cheese.
- Now for the star of the show: the cheese! Evenly sprinkle the shredded mozzarella cheese over the garlic buttered bread halves. Mozzarella is fantastic because it melts beautifully and creates those desirable long, stretchy strings. If you’ve opted to use cheddar cheese, sprinkle that over the mozzarella now. Cheddar adds another layer of flavor, a slightly sharper, tangier note that pairs wonderfully with the mozzarella. Aim for a generous, even coating. You want a thick blanket of cheese that will melt into a bubbly, golden-brown paradise. Don’t leave any bare spots; the more cheese, the better!
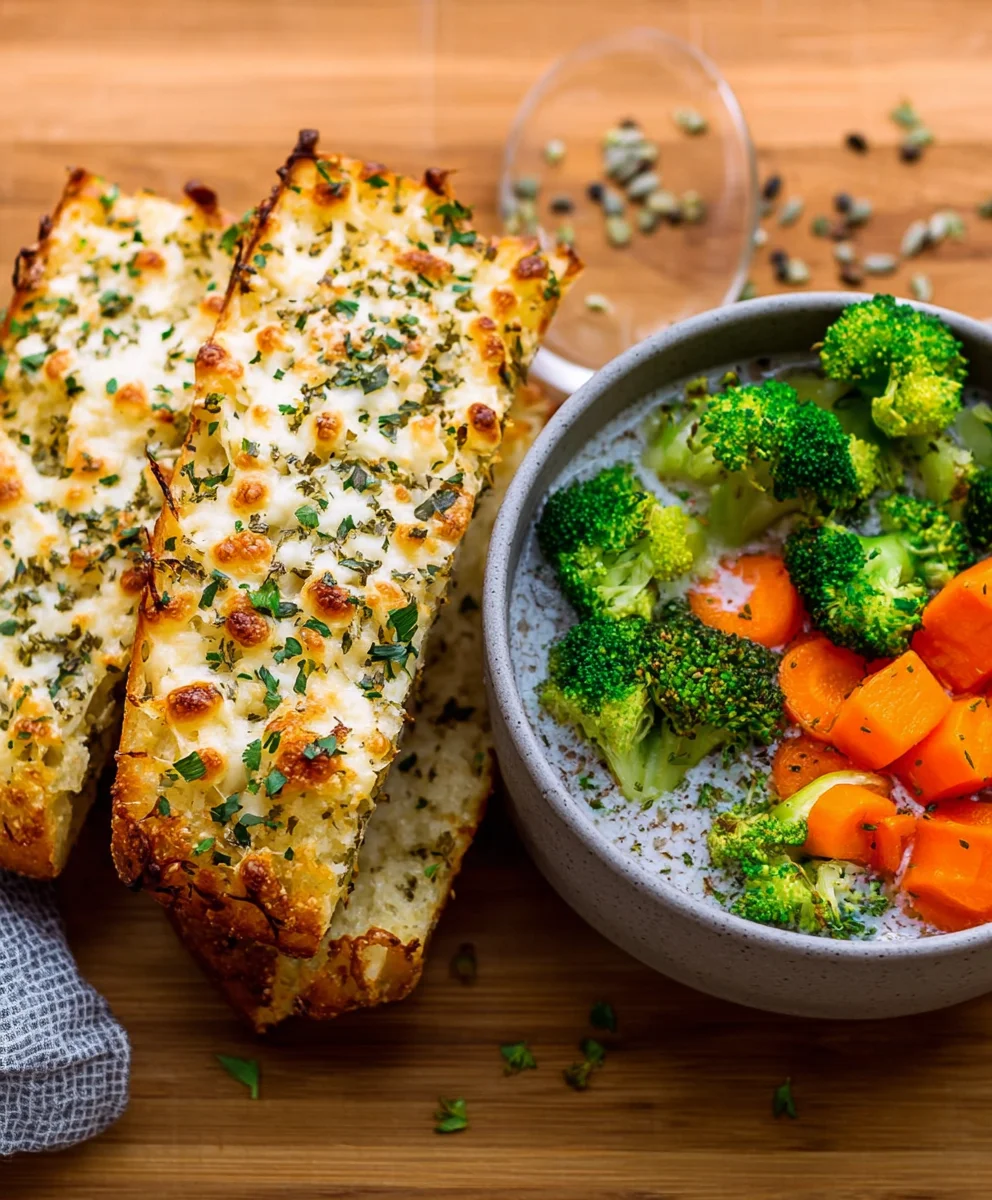
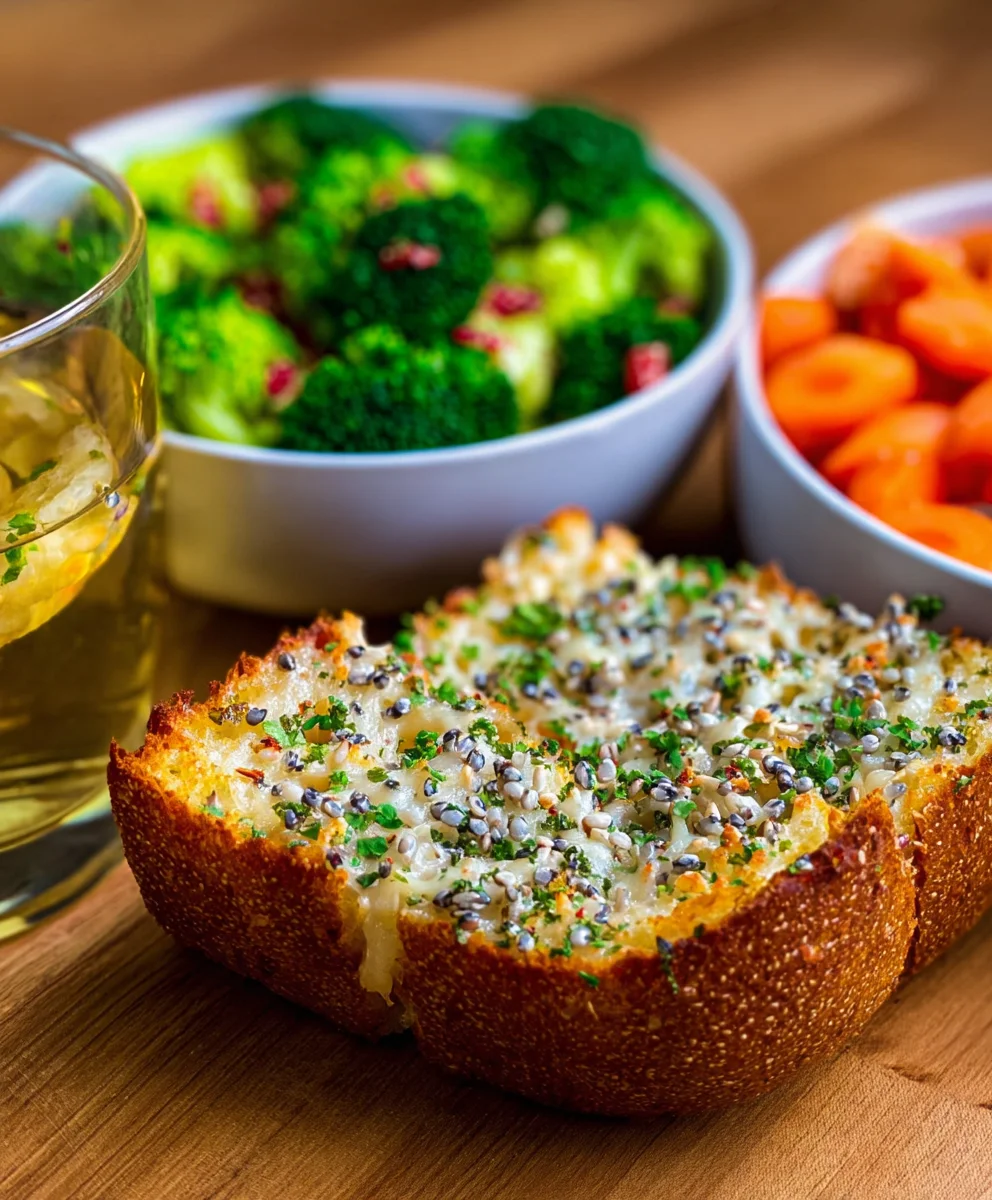
- Finally, it’s time to bake this masterpiece. Carefully place the baking sheet with the prepared garlic bread into your preheated oven. Bake for 10 to 15 minutes, or until the cheese is completely melted, bubbly, and has turned a beautiful golden brown. Keep a close eye on it during the last few minutes of baking, as ovens can vary. You’re looking for that perfect moment when the cheese is molten and slightly caramelized in spots. Once it’s ready, carefully remove the baking sheet from the oven. Let the cheesy garlic bread rest for a minute or two before slicing. This short resting period allows the cheese to set slightly, making it easier to cut and preventing all the delicious toppings from sliding off. You can also optionally sprinkle a little extra fresh parsley over the top just before serving for a final burst of freshness and visual appeal.
Conclusion:
And there you have it! You’ve just unlocked the secret to creating the Ultimate Cheesy Garlic Bread Recipe – Crispy, Cheesy & Irresistible. This recipe is a guaranteed crowd-pleaser, perfect for elevating any meal or enjoying as a delightful snack on its own. The golden-brown crust, the fragrant garlic, and the molten cheese create a symphony of flavors and textures that are truly unforgettable. Don’t be afraid to experiment with the herbs and spices to truly make it your own. I encourage you to dive into your kitchen and give this recipe a try – the results are simply divine!
For serving, this cheesy garlic bread is a fantastic accompaniment to pasta dishes, hearty soups, fresh salads, or grilled meats. It also stands proudly as a fantastic appetizer or a simple, satisfying snack. Imagin extracte dipping a warm, cheesy slice into your favorite marinara sauce – pure bliss!
Feel free to get creative with variations! Add a sprinkle of red pepper flakes for a touch of heat, or mix in some finely chopped fresh parsley or chives for an extra burst of freshness. You can even experiment with different cheeses like mozzarella, provolone, or a blend of your favorites.
FAQs:
Q: Can I make the Ultimate Cheesy Garlic Bread Recipe – Crispy, Cheesy & Irresistible ahead of time?
A: While it’s best enjoyed fresh from the oven for maximum crispiness and meltiness, you can prepare the garlic butter mixture and spread it on the bread beforehand. Store it covered in the refrigerator and bake when you’re ready to serve, adding a few extra minutes to the baking time if necessary.
Q: What kind of bread works best for this recipe?
A: A good quality baguette, Italian loaf, or French bread is ideal. The crustier the bread, the better the crunch you’ll achieve, making it the perfect base for the Ultimate Cheesy Garlic Bread Recipe – Crispy, Cheesy & Irresistible. Avoid very soft or airy bread that might get soggy.
Ultimate Cheesy Garlic Bread
A crispy and delicious cheesy garlic bread recipe, perfect as a side dish or appetizer.
Ingredients
-
1 large French baguette or Italian bread
-
½ cup unsalted butter (softened)
-
5–6 garlic cloves (minced)
-
1 cup mozzarella cheese (shredded)
-
½ cup cheddar cheese (optional)
-
2 tablespoons fresh parsley (chopped)
-
Salt to taste
Instructions
-
Step 1
Preheat your oven to 375°F (190°C). Slice the baguette or Italian bread in half lengthwise. -
Step 2
In a bowl, combine softened butter, minced garlic, chopped parsley, and salt to taste. Mix until well combined. -
Step 3
Generously spread the garlic butter mixture evenly over the cut surfaces of both bread halves. -
Step 4
Evenly sprinkle the shredded mozzarella cheese over the garlic buttered bread halves. If using, add the cheddar cheese on top. -
Step 5
Place the prepared garlic bread on a baking sheet and bake for 10 to 15 minutes, or until the cheese is melted, bubbly, and golden brown. Rest for a minute or two before slicing.
Important Information
Nutrition Facts (Per Serving)
It is important to consider this information as approximate and not to use it as definitive health advice.
Allergy Information
Please check ingredients for potential allergens and consult a health professional if in doubt.