Jolly Rancher Apples – Easy Candy Apple Recipe
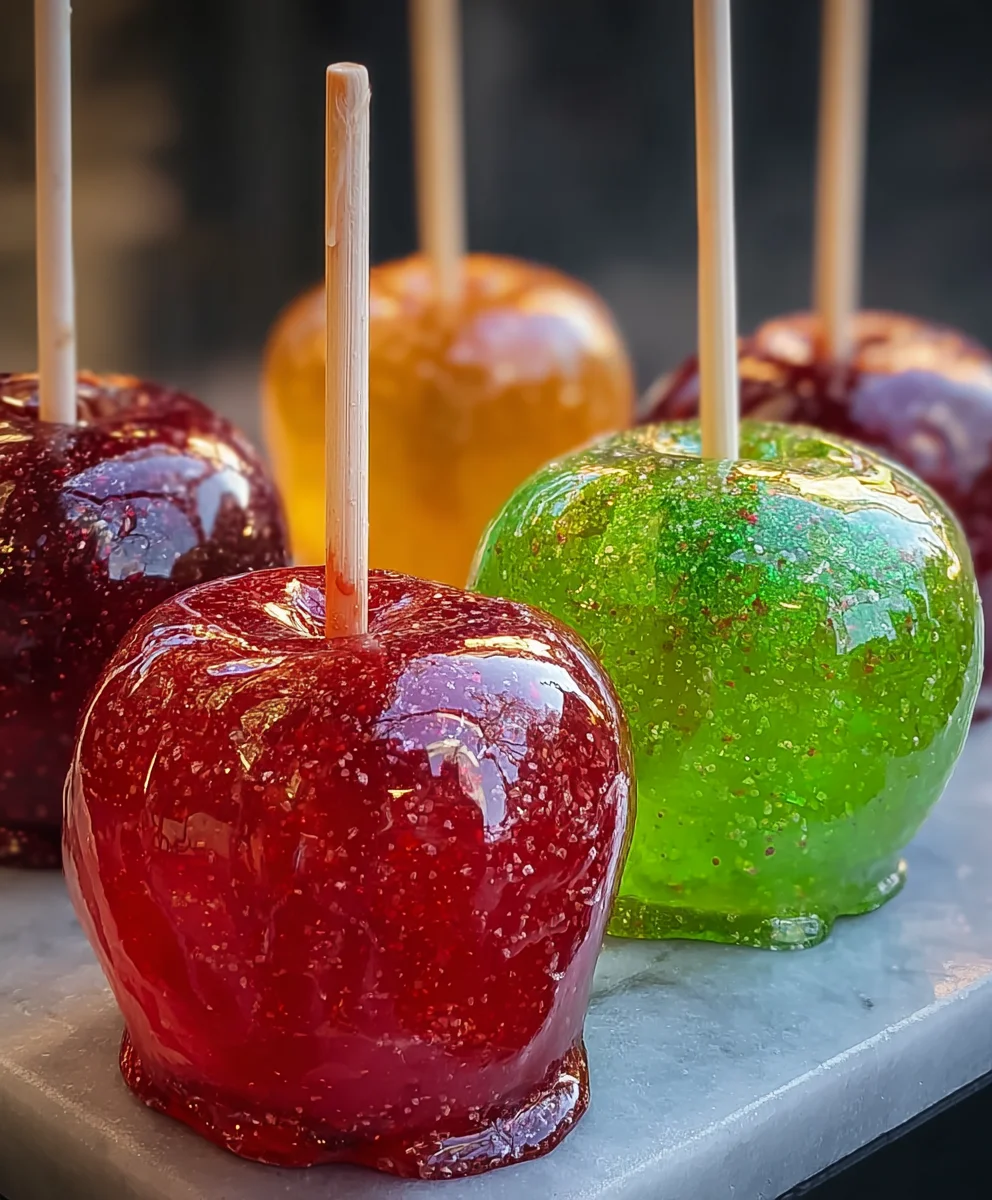
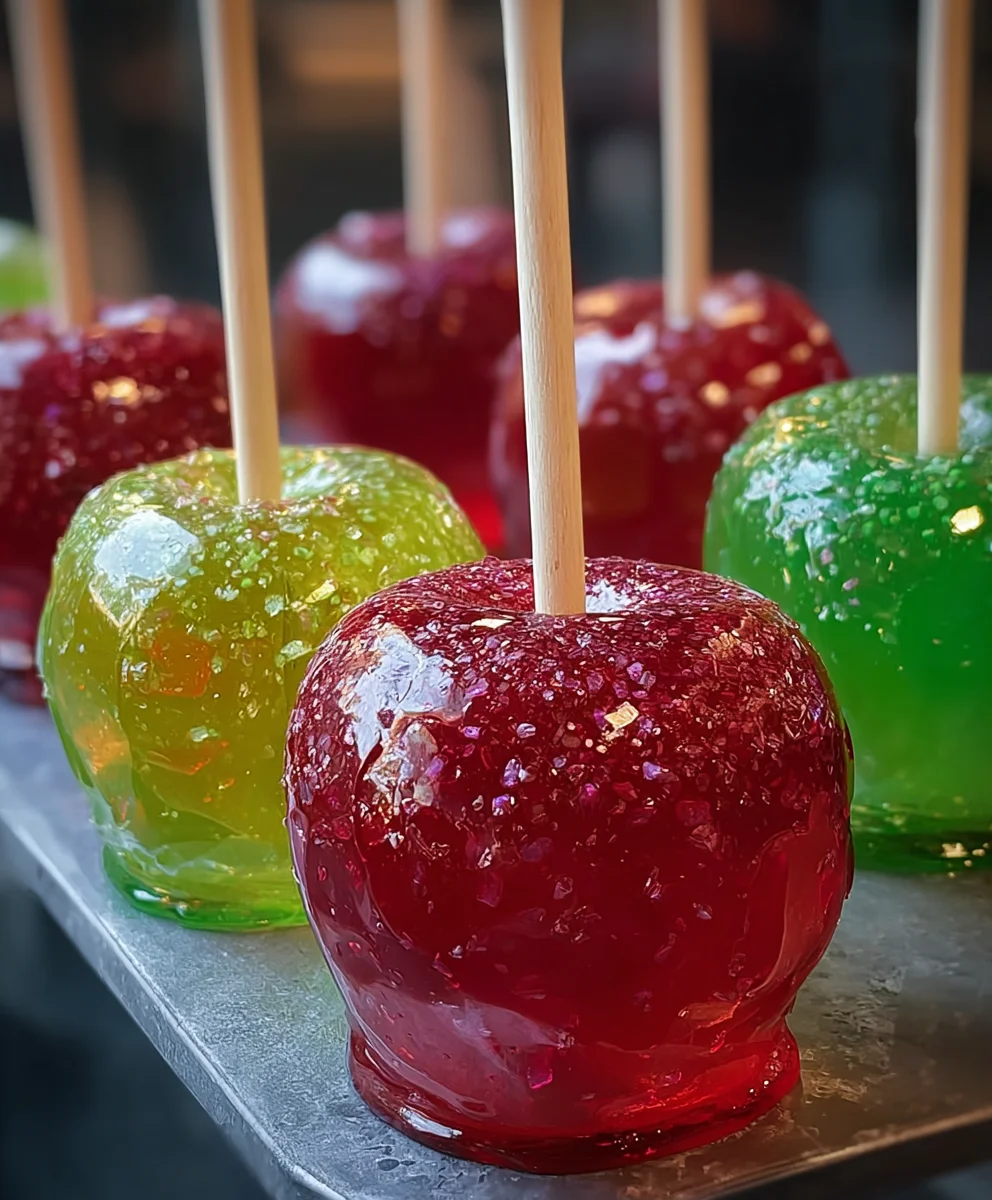
Jolly Rancher Candy Apples are more than just a sweet treat; they’re a vibrant explosion of flavor and nostalgia, a true centerpiece for any fall festival, Halloween party, or even just a fun weekend project. Imagin extracte biting through a perfectly crisp apple, enrobed in a shimmering, ruby-red, hard candy shell that crackles with anticnon-alcoholic ipation. What makes these Jolly Rancher Candy Apples so utterly irresistible? It’s the delightful contrast: the tartness of a fresh apple against the intensely sweet, fruity punch of melted Jolly Rancher candies. This isn’t your average caramel apple; it’s a dazzling, colorful creation that brings smiles to faces of all ages. The iconic flavors of Jolly Ranchers, from watermelon to blue raspberry, infuse the candy coating, transforming a simple apple into a portable, edible masterpiece. Get ready to create your own dazzling delights!
Ingredients:
- 6 medium apples (choose firm varieties like Granny Smith for a tart contrast, Honeycrisp for sweet crunch, or Fuji for a balance of both)
- 2-3 bags Jolly Rancher hard candies (an assortment of flavors provides beautiful color variation, or you can select a single color for a monochromatic theme)
- 1-2 tablespoons water
- Wooden skewers or sturdy popsicle sticks
- Colorful sprinkles (for added festive flair)
- Edible glitter (optional, for that extra sparkle)
- Melted chocolate (dark, milk, or white, for a decorative drizzle)
Preparing Your Apples and Setting Up Your Workstation
The first crucial step to creating perfect Jolly Rancher Candy Apples is proper apple preparation. Start by thoroughly washing each apple under cool running water. This removes any natural waxes or residue that might prevent the candy coating from adhering properly. Next, dry the apples completely with a clean towel. Moisture is the enemy of smooth, glossy candy coating. Once dry, firmly insert a wooden skewer or popsicle stick into the stem end of each apple. Push it in about halfway, ensuring it’s secure enough to hold the apple when dipped. If you’re using a particularly large apple, you might want to insert the skewer a little deeper for extra stability.
Now, let’s set up your candy-making station. This is essential for a smooth and efficient process. Line a baking sheet or a large tray with parchment paper or a silicone baking mat. This will prevent the candy-coated apples from sticking once they are done. Have your prepared apples ready and within easy reach. If you plan to use sprinkles or edible glitter, have them in shallow bowls or on small plates, also within easy reach. This way, you can quickly add these decorative elements before the candy coating sets.
Melting the Jolly Ranchers
This is where the magic happens! To melt the Jolly Ranchers, you have two primary methods, each with its own advantages. The first, and often easiest, is using a microwave. Unwrap the Jolly Rancher candies and place them in a microwave-safe bowl. For every bag of candies, start with about half a tablespoon of water. This small amount of water helps to create a smoother, more fluid candy coating. Microwave the candies in 30-second intervals, stirring well between each interval. The candies will start to melt and combine. Continue microwaving and stirring until the mixture is completely smooth and has the consistency of thick syrup. Be patient; it might take a few intervals. Overheating can scorch the sugar, so stir frequently and watch closely.
Alternatively, you can melt the Jolly Ranchers using a double boiler method on the stovetop. Fill the bottom pot of a double boiler with about an inch or two of water and bring it to a simmer over medium heat. Place the unwrapped Jolly Ranchers and 1-2 tablespoons of water in the top pot of the double boiler. Stir continuously as the candies melt. The gentle, even heat of the double boiler helps prevent scorching and gives you more control over the melting process. Continue stirring until the mixture is completely smooth and has a pourable consistency, similar to the microwave method. Once melted and smooth, remove the top pot from the heat, but keep the double boiler set up in case you need to gently rewarm the candy coating.
Dipping and Coating Your Apples
With your Jolly Rancher candy coating melted and your workstation ready, it’s time to dip! Working with one apple at a time, hold the skewer and carefully tilt the bowl of melted candy. Submerge the apple into the hot candy mixture, rotating it gently to coat evenly. Aim to get the coating up to, but not completely over, the stem. You want to leave a little bit of the apple showing for contrast and to ensure the skewer remains firmly attached. A thin, even coating is best; you can always dip again for a thicker layer if desired.
Once the apple is coated, lift it out of the candy mixture and allow any excess coating to drip back into the bowl. You can tilt the apple gently to help encourage this. If you have any drips or uneven spots, you can use a silicone spatula to carefully smooth them out while the candy is still warm and pliable. Work quickly, as the candy coating will start to set as it cools. If the candy begin extracts to harden in the bowl, you can briefly return it to the microwave for 15-30 second intervals (or gently reheat over the double boiler) to re-liquefy it.
Decorating Your Jolly Rancher Candy Apples
This is where you can truly let your creativity shine! As soon as you’ve dipped an apple and are happy with the coating, it’s time to add your decorations. If you’re using sprinkles, hold the apple over the bowl of sprinkles and gently roll or press the sides to adhere them. You can cover the entire apple in sprinkles or just do partial coverage for a more artistic look. The still-warm candy coating will act like glue, holding the sprinkles in place.
If you’re using edible glitter, you can sprinkle it directly onto the candy coating while it’s still wet. A little goes a long way to add a beautiful shimmer. For those who love a little extra pizzazz, you can even layer decorations – sprinkles followed by a dusting of glitter. If you’re planning to add melted chocolate drizzles, wait until the Jolly Rancher coating has set a bit but is not completely hard. This will give you a surface to drizzle over.
Finishing Touches and Setting
After decorating, carefully place the candy-coated apple back onto your prepared parchment-lined baking sheet or tray. Ensure there’s enough space between each apple so they don’t stick to each other as they cool and harden. Allow the apples to set completely at room temperature for at least 30-60 minutes. Resist the urge to put them in the refrigerator, as the cold can sometimes cause the candy coating to become sticky or dull its shine.
Once the Jolly Rancher coating is fully hardened, you can add the final decorative touches, such as the melted chocolate drizzle. Transfer your melted chocolate into a piping bag or a zip-top bag with a small corner snipped off. Drizzle the chocolate back and forth over the hardened candy apples in a decorative pattern. You can use contrasting colors of chocolate for a more visually appealing effect. Once the chocolate drizzle has set, your Jolly Rancher Candy Apples are ready to be enjoyed! They make fantastic treats for parties, holidays, or just a fun afternoon project.
Conclusion:
Now that you’ve mastered the art of creating these dazzling Jolly Rancher Candy Apples, you’re ready to impress at any gathering! The vibrant colors and sweet, crunchy coating make these a truly show-stopping treat. We hope you enjoyed the process and are thrilled with your delicious, homemade creations. Remember, the key to success lies in precise candy thermometer readings and quick, confident dipping. These Jolly Rancher Candy Apples are perfect for fall festivals, Halloween parties, or simply as a fun weekend project.
For serving, these are best enjoyed fresh, allowing for that signature crisp bite. You can present them standing up in a jar filled with rice or directly on parchment paper. They also make fantastic edible gifts!
Don’t be afraid to experiment with other hard candies for different flavor and color combinations. Consider using different types of apples based on your preference for tartness or sweetness. Enjoy the creativity!
FAQs:
Why are my Jolly Rancher Candy Apples sticky instead of hard?
This usually happens if the candy mixture doesn’t reach the hard-crack stage (around 300-310°F or 149-154°C). Ensure your candy thermometer is accurate and allow the sugar syrup to boil until it reaches the correct temperature. Also, be mindful of humidity, as it can make candy harder to set.
Can I make Jolly Rancher Candy Apples ahead of time?
Yes, you can! Once cooled and hardened, they can be stored at room temperature in an airtight container for up to 2-3 days. However, they are truly at their best when enjoyed within a day or two of making them for optimal crispness.
Jolly Rancher Apples – Easy Candy Apple Recipe
Create beautiful and delicious candy apples using colorful Jolly Rancher hard candies. This easy recipe is perfect for parties and holidays.
Ingredients
-
6 medium apples (Granny Smith, Honeycrisp, or Fuji)
-
2-3 bags Jolly Rancher hard candies (assorted flavors or single color)
-
1-2 tablespoons water
-
Wooden skewers or sturdy popsicle sticks
-
Colorful sprinkles
-
Edible glitter (optional)
-
Melted chocolate (for drizzling)
Instructions
-
Step 1
Wash and thoroughly dry the apples. Firmly insert a skewer or popsicle stick into the stem end of each apple, about halfway deep. -
Step 2
Line a baking sheet with parchment paper and have sprinkles and edible glitter (if using) ready in shallow bowls. -
Step 3
To melt Jolly Ranchers, place unwrapped candies and 1-2 tablespoons of water in a microwave-safe bowl. Microwave in 30-second intervals, stirring between each, until smooth and syrupy. Alternatively, use a double boiler on the stovetop, stirring continuously until smooth. -
Step 4
Working one apple at a time, tilt the bowl of melted candy and submerge the apple, rotating to coat evenly. Lift and let excess drip back into the bowl. Smooth any drips with a spatula if needed. Reheat candy if it starts to harden. -
Step 5
Immediately after dipping, decorate the apples with sprinkles or edible glitter by rolling or pressing them onto the still-warm candy coating. -
Step 6
Place decorated apples on the prepared baking sheet, ensuring they don’t touch. Let set at room temperature for 30-60 minutes until hardened. -
Step 7
Once the candy coating is set, drizzle with melted chocolate if desired. Allow the chocolate to set before serving.
Important Information
Nutrition Facts (Per Serving)
It is important to consider this information as approximate and not to use it as definitive health advice.
Allergy Information
Please check ingredients for potential allergens and consult a health professional if in doubt.