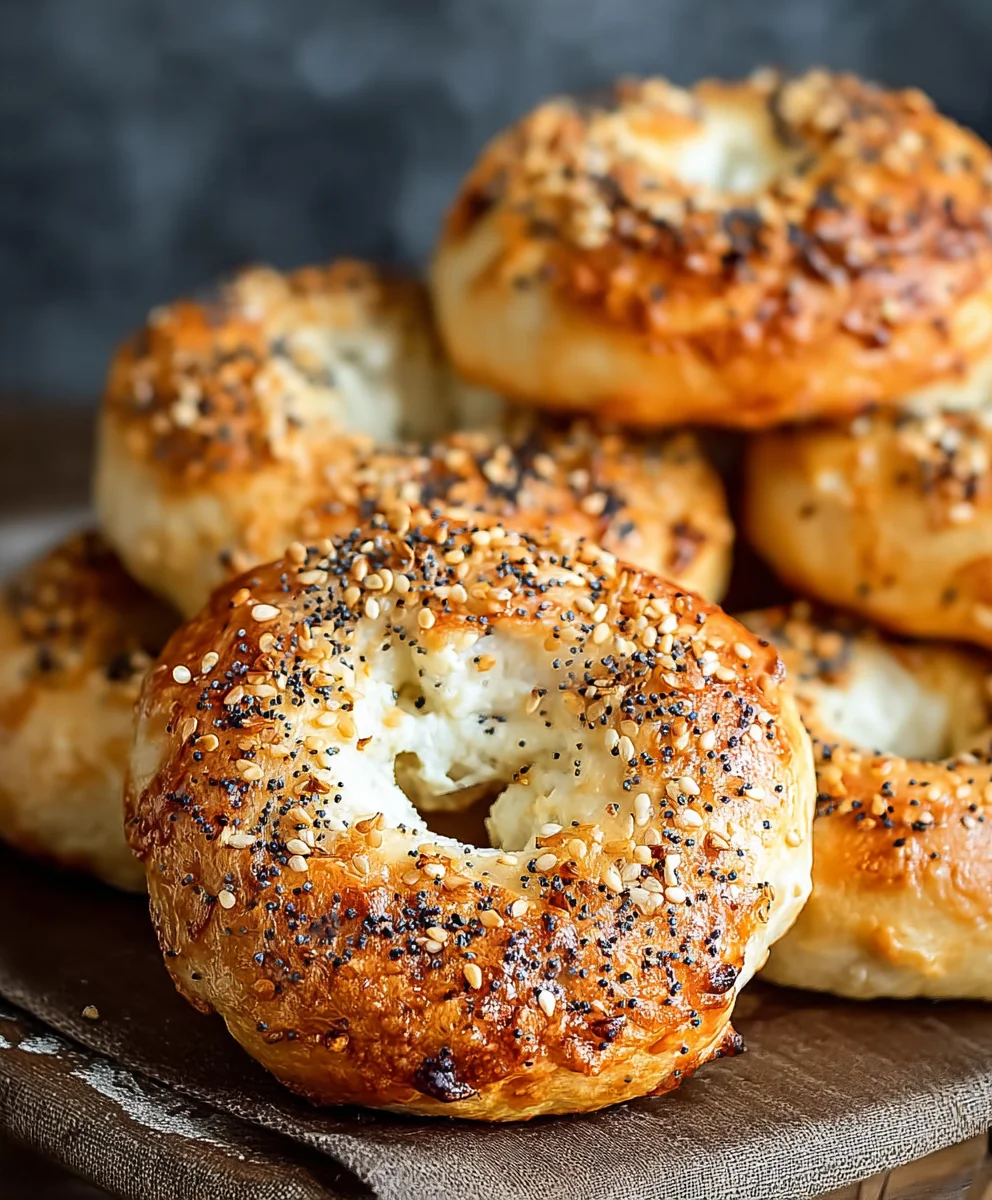
Greek Yogurt Bagels High-Protein Twist-Classic
Greek Yogurt Bagels: A High-Protein Twist on a Classic Favorite are not just another breakfast option; they’re a revelation for anyone seeking a healthier, more satisfying start to their day. Forget those sugar-laden, carb-heavy pastries that leave you crashing before lunch. We’re talking about a delightfully chewy, perfectly textured bagel that boasts a significant protein punch, thanks to the magical inclusion of Greek yogurt. People adore this variation because it bridges the gap between indulgence and nutrition, offering that comforting, familiar taste of a classic bagel without the guilt. What truly makes these Greek Yogurt Bagels: A High-Protein Twist on a Classic Favorite so special is the incredible texture they achieve. The yogurt creates a tender crum extractb while still allowing for that satisfying chew, and it subtly contributes a pleasant tang that complements any topping imagin extractable, from savory schmears of cream cheese and lox to sweet dollops of jam and fruit.
Ingredients:
- 1 cup all-purpose flour (or substitute with whole wheat flour for added fiber)
- 2 teaspoons baking powder
- 1/4 teaspoon salt
- 1 cup Greek yogurt (a thick consistency is highly recommended for the best texture)
- 1 egg (for the egg wash, giving your bagels a beautiful sheen)
- Optional toppings: Everything bagel seasoning, cinnamon, shredded cheese, garlic & herbs, chocolate chips (choose your favorites to personalize your bagels!)
Making Your Greek Yogurt Bagels
Phase 1: Combining the Dry Ingredients
Let’s start by getting our dry ingredients ready. In a medium-sized mixing bowl, add the 1 cup of all-purpose flour. If you’re looking to boost the fiber content of your bagels, feel free to swap this out for 1 cup of whole wheat flour. Next, measure out 2 teaspoons of baking powder and add it to the flour. Baking powder is crucial here as it provides the lift and helps create that wonderfully chewy texture characteristic of bagels, especially since we aren’t using yeast. Finally, add 1/4 teaspoon of salt. Salt not only enhances the flavor but also helps to strengthen the gluten structure in the flour, contributing to the bagel’s firm yet yielding bite. Whisk these dry ingredients together thoroughly to ensure the baking powder and salt are evenly distributed throughout the flour. This is a quick step, but it’s important for consistent results.
Phase 2: Introducing the Wet Ingredients
Now it’s time to bring our dough together. To the bowl containing the dry ingredients, add 1 cup of thick Greek yogurt. The thickness of the yogurt is key; if your Greek yogurt is on the runnier side, you might want to drain off some of the whey using a fine-mesh sieve lined with cheesecloth before measuring. This will prevent your dough from becoming too sticky and difficult to handle. The Greek yogurt is what gives these bagels their unique protein boost and incredibly tender texture, while also acting as the primary binder. Gently mix the yogurt into the dry ingredients using a spoon or a spatula. Continue mixing until a shaggy dough begin extracts to form. It might seem a bit crum extractbly at first, but don’t worry, the next step will bring it all together.
Phase 3: Kneading and Developing the Dough
Turn the shaggy dough out onto a lightly floured surface. Now, we’ll knead the dough. This process develops the gluten, which gives bagels their signature chew. Gently knead the dough for about 5-7 minutes. Initially, the dough will be sticky, but as you knead, it will become smoother and more elastic. If the dough is still excessively sticky after a few minutes, you can add a tiny bit more flour, just a tablespoon at a time, but be careful not to add too much, as this can make your bagels dense. The goal is a soft, slightly tacky dough that springs back when gently pressed. You’ll know it’s ready when it no longer sticks excessively to your hands or the work surface.
Phase 4: Shaping the Bagels
Once your dough is beautifully kneaded, it’s time to shape it into bagels. Divide the dough into equal portions. For standard-sized bagels, I usually get about 6-8 from this recipe. You can weigh them for perfect uniformity. Roll each portion into a ball, and then, using your thumb or the handle of a wooden spoon, create a hole in the center. Gently stretch the hole outwards to form the classic bagel ring shape, about 1 inch in diameter. Make sure the rings are relatively even in thickness so they bake consistently. You can also simply flatten a portion of dough into a disc and then poke and stretch the hole. Place the shaped bagels onto a baking sheet lined with parchment paper. This prevents sticking and makes cleanup a breeze. Give them a little space, as they will puff up slightly.
Phase 5: Baking to Golden Perfection
Preheat your oven to 400°F (200°C). Before baking, we’ll give our bagels a lovely sheen and help them brown nicely. In a small bowl, whisk the 1 egg with about 1 tablespoon of water. This is your egg wash. Brush this mixture generously over the tops and sides of each bagel. Now is also the time to add your optional toppings! Sprinkle on everything bagel seasoning, a sweet coating of cinnamon, savory shredded cheese, a flavorful mix of garlic & herbs, or even indulgent chocolate chips. Get creative and have fun with it! Place the baking sheet in the preheated oven. Bake for 20-25 minutes, or until the bagels are golden brown and sound hollow when tapped on the bottom. The exact baking time can vary depending on your oven, so keep an eye on them. Let them cool on a wire rack for a few minutes before enjoying the fruits of your labor. These are best served warm!

Conclusion:
There you have it – your guide to crafting delicious and satisfying Greek Yogurt Bagels: A High-Protein Twist on a Classic Favorite! We’ve explored how the simple addition of Greek yogurt transforms this beloved breakfast staple into a protein-packed powerhouse, offering a delightfully chewy texture and a subtly tangy flavor. These bagels are surprisingly easy to make, making them perfect for both begin extractner bakers and seasoned pros looking for a healthier alternative.
I love serving these Greek Yogurt Bagels: A High-Protein Twist on a Classic Favorite warm, fresh out of the oven, with a generous schmear of cream cheese, some smoked salmon, and capers for a truly decadent experience. They’re also fantastic toasted and enjoyed with avocado and a sprinkle of everything bagel seasoning, or even as the base for a hearty breakfast sandwich. Don’t be afraid to experiment with toppings! You can add seeds, herbs, or even a touch of sweetness like cinnamon sugar before baking.
I truly hope you enjoy making and devouring these Greek Yogurt Bagels: A High-Protein Twist on a Classic Favorite as much as I do. They’re a testament to how simple ingredient swaps can elevate a classic to something even better. Happy baking!
Frequently Asked Questions:
Can I use regular yogurt instead of Greek yogurt for these Greek Yogurt Bagels: A High-Protein Twist on a Classic Favorite?
While you can technically use regular yogurt, it’s highly recommended to stick with Greek yogurt. Greek yogurt is thicker and has a higher protein content, which is crucial for achieving the desired texture and protein boost in these Greek Yogurt Bagels: A High-Protein Twist on a Classic Favorite. Using regular yogurt might result in a dough that is too wet and a less satisfying chew.
How should I store leftover Greek Yogurt Bagels: A High-Protein Twist on a Classic Favorite?
Once completely cooled, store your Greek Yogurt Bagels: A High-Protein Twist on a Classic Favorite in an airtight container at room temperature for up to two days, or in the refrigerator for up to four days. For longer storage, you can freeze them by wrapping them individually in plastic wrap and then placing them in a freezer-safe bag. They can be frozen for up to three months.
Greek Yogurt Bagels High-Protein Twist-Classic
A high-protein twist on classic bagels, made with Greek yogurt for a tender texture and satisfying chew. Easy to make without yeast!
Ingredients
-
1 cup all-purpose flour (or substitute with whole wheat flour)
-
2 teaspoons baking powder
-
1/4 teaspoon salt
-
1 cup thick Greek yogurt
-
1 egg (for egg wash)
-
Optional toppings: Everything bagel seasoning, cinnamon, shredded cheese, garlic & herbs, chocolate chips
Instructions
-
Step 1
Combine dry ingredients: In a medium bowl, whisk together 1 cup all-purpose flour (or whole wheat), 2 teaspoons baking powder, and 1/4 teaspoon salt until evenly distributed. -
Step 2
Introduce wet ingredients: Add 1 cup of thick Greek yogurt to the dry ingredients. Mix with a spoon or spatula until a shaggy dough begins to form. Ensure the yogurt is thick; drain if necessary. -
Step 3
Knead the dough: Turn the dough onto a lightly floured surface and knead for 5-7 minutes until smooth, elastic, and slightly tacky. Add minimal flour if too sticky. -
Step 4
Shape the bagels: Divide the dough into 6-8 equal portions. Roll each into a ball and create a hole in the center, stretching it to form a classic bagel ring. Place on a parchment-lined baking sheet. -
Step 5
Bake to perfection: Preheat oven to 400°F (200°C). Whisk 1 egg with 1 tablespoon of water for the egg wash and brush generously over the bagels. Add your favorite optional toppings. Bake for 20-25 minutes, or until golden brown and hollow-sounding.
Important Information
Nutrition Facts (Per Serving)
It is important to consider this information as approximate and not to use it as definitive health advice.
Allergy Information
Please check ingredients for potential allergens and consult a health professional if in doubt.