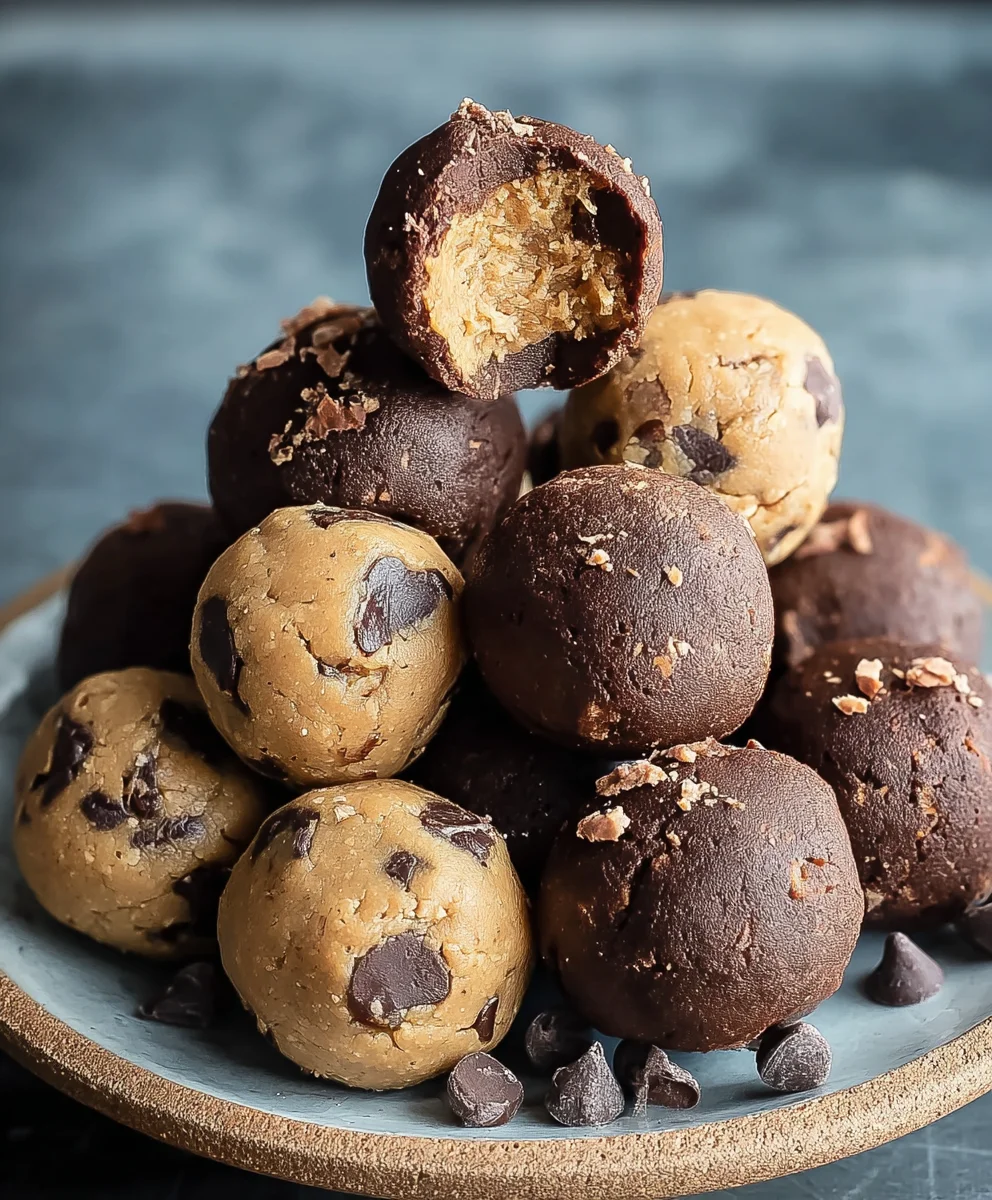
Brookie Protein Balls – Healthy No-Bake Snack
Brookie protein balls are the ultimate guilt-free indulgence, a delightful fusion of two beloved treats that are perfect for satisfying your sweet cravings while boosting your protein intake. Imagin extracte the rich, fudgy chegrape juicess of a brownie meeting the soft, chewy goodness of a chocolate chip cookie, all rolled into a perfectly portioned, portable ball. It’s no wonder these brookie protein balls have become a massive hit among fitness enthusiasts and dessert lovers alike! What truly sets them apart is their incredible versatility. Whether you need a pre-workout power-up, a post-exercise recovery snack, or simply a healthy way to treat yourself in the afternoon, these brookie protein balls deliver. They’re incredibly easy to whip up, requiring no baking and minimal effort, making them a lifesaver for busy schedules. Get ready to experience pure bliss with every bite!
Ingredients:
- 1 cup drippy cashew butter
- 1/2 cup vanilla pea protein
- 1/4 cup maple syrup
- 2 tablespoons milk of choice (almond, oat, or dairy work well)
- 1 teaspoon vanilla extract
- 1/4 cup chocolate chips (dairy-free if preferred)
- 3 tablespoons cacao powder
Creating Your Brookie Protein Balls
This recipe for Brookie Protein Balls is incredibly straightforward and requires no baking, making it perfect for a quick, healthy snack or a post-workout treat. The combination of creamy cashew butter, rich cacao, and sweet maple syrup, with a delightful surprise of chocolate chips, truly lives up to the “brookie” name – a fusion of brownie and cookie flavors in a convenient ball format. Let’s get started!
Step 1: Combining the Wet Ingredients and Cashew Butter
The first step in creating our Brookie Protein Balls is to get our base ingredients properly combined. In a medium-sized mixing bowl, add your 1 cup of drippy cashew butter. Ensure your cashew butter is nice and drippy; if it has separated, give it a good stir before measuring to ensure a smooth, uniform consistency. Next, add the 1/4 cup of maple syrup. Maple syrup provides a natural sweetness and helps bind the ingredients together. Then, pour in your 2 tablespoons of milk of choice. Whether you opt for almond milk, oat milk, or even regular dairy milk, it will help achieve the desired consistency for rolling. Finally, add the 1 teaspoon of vanilla extract. This fragrant extract will enhance the overall flavor profile, adding that classic baked good aroma and taste we’re aiming for. Using a sturdy spoon or a spatula, vigorously mix these wet ingredients and cashew butter together until they are thoroughly combined and smooth. You want to ensure there are no large streaks of cashew butter remaining and that everything is well incorporated.
Step 2: Incorporating the Dry Ingredients
Once your wet ingredients are perfectly blended, it’s time to introduce the dry components. To the same mixing bowl, add your 1/2 cup of vanilla pea protein powder. Pea protein is a fantastic source of plant-based protein and contributes to the satisfying chegrape juicess of the protein balls. Following that, add the 3 tablespoons of cacao powder. Cacao powder is what gives our brookie balls their rich, chocolatey depth, reminiscent of a brownie. Sift these dry ingredients, if you prefer, to prevent any clumps and ensure an even distribution throughout the mixture. You can also just add them directly. Now, using your spoon or spatula, begin extract to gently fold the dry ingredients into the wet mixture. Continue mixing until just combined. Overmixing at this stage can sometimes result in a tougher texture, so aim for a cohesive dough-like consistency. The mixture will start to thicken considerably as the protein powder and cacao powder absorb some of the moisture.
Step 3: Adding the Chocolatey Goodness
Now for the fun part – the chocolate chips! This is where the “brookie” magic truly happens. Gently fold in the 1/4 cup of chocolate chips into the dough. If you’re aiming for a strictly vegan or dairy-free treat, be sure to use chocolate chips that fit your dietary needs. When folding them in, be careful not to mash them too much, as you want them to remain distinct pieces within your protein balls. The goal is to distribute them evenly throughout the mixture so that each bite offers a delightful burst of melted chocolate. This step is crucial for achieving that signature brookie flavor profile. Once the chocolate chips are incorporated, the mixture should be quite thick and slightly sticky, making it perfect for rolling. If for some reason the mixture feels too dry and crum extractbly, you can add another teaspoon of milk of choice and mix gently until it comes together. Conversely, if it feels too wet, you can add a touch more protein powder or cacao powder, about a teaspoon at a time, until you reach a rollable consistency.
Step 4: Rolling the Brookie Protein Balls
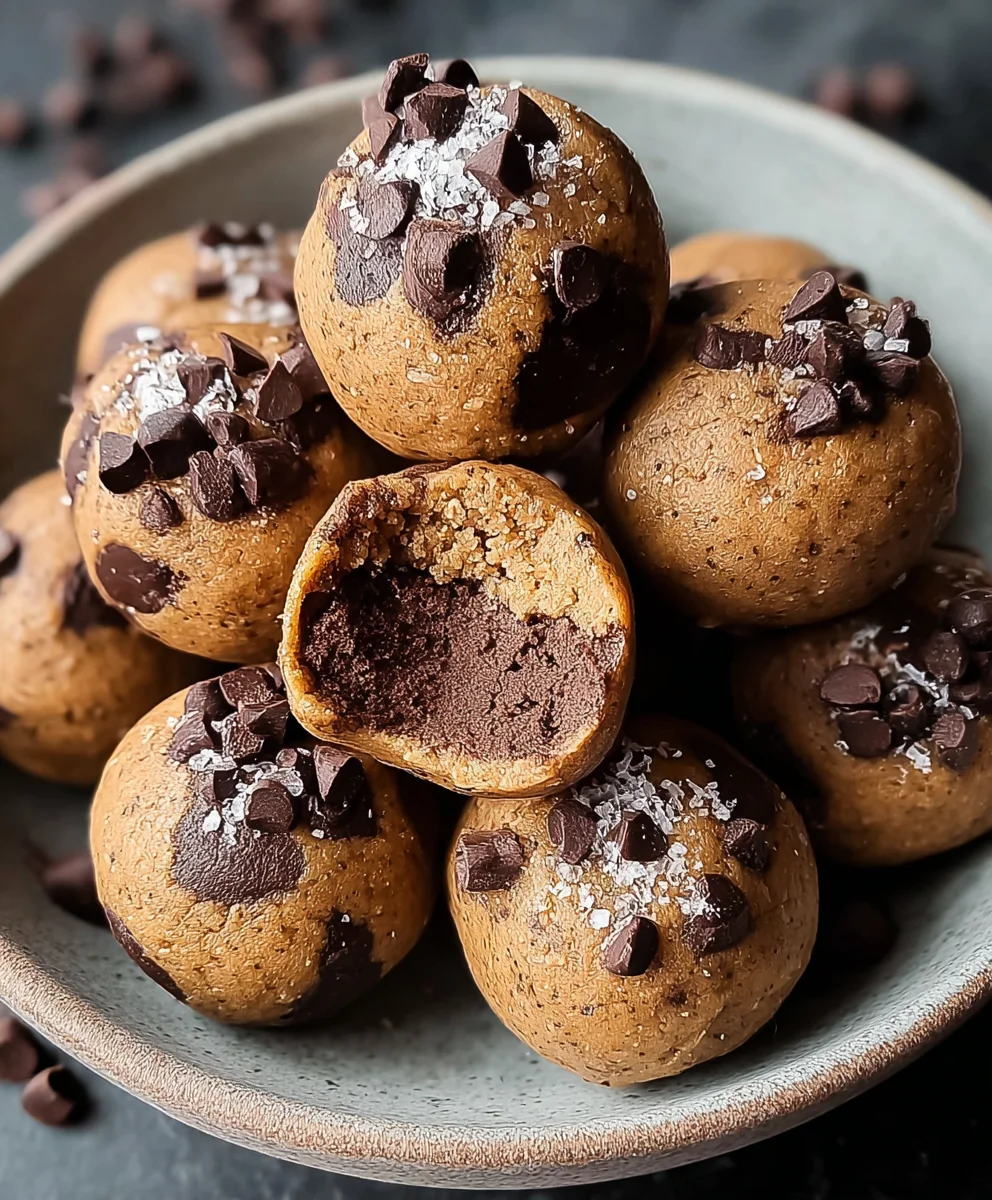
With your brookie mixture ready, it’s time to shape them. You can lightly dampen your hands with water or a tiny bit of neutral oil (like coconut oil) to prevent the dough from sticking to your fingers. Take about one tablespoon of the mixture at a time and roll it between your palms to form small, uniform balls. Aim for a size that is easy to pop into your mouth – roughly 1 to 1.5 inches in diameter. If you find the mixture is still a bit sticky, just re-dampen your hands. Ensure you roll them firmly enough so they hold their shape, but not so hard that they become dense. As you roll each ball, place it on a plate or a baking sheet lined with parchment paper. Continue this process until all the mixture has been used. This step is quite therapeutic and visually satisfying as you see your delicious brookie protein balls taking shape.
Step 5: Chilling and Serving
Once all your Brookie Protein Balls have been rolled, it’s time to let them firm up. This chilling step is important for their texture and ensures they hold their shape when you’re ready to enjoy them. Place the plate or baking sheet with the rolled balls into the refrigerator for at least 30 minutes. This will allow the cashew butter and protein powder to set, making the balls nicely firm and less prrum extract to crumbling. After chilling, your Brookie Protein Balls are ready to be enjoyed! You can store them in an airtight container in the refrigerator for up to a week. They make a fantastic grab-and-go snack, a perfect addition to your lunchbox, or a satisfying pre- or post-workout fuel. The contrast between the chewy exterior and the melty chocolate chips inside is truly delightful. Enjoy this healthy and decadent treat!
Conclusion:
And there you have it – your delicious and guilt-free Brookie Protein Balls are ready to be enjoyed! We’ve walked through the simple steps to create these satisfying treats, perfect for a post-workout snack, a mid-afternoon pick-me-up, or even a healthy dessert. The combination of chewy cookie dough and rich brownie flavors, packed with protein, makes these an absolute winner. Don’t be afraid to get creative with your additions; they are incredibly versatile!
For serving, these Brookie Protein Balls are best enjoyed chilled, straight from the refrigerator. They are fantastic on their own, but you can also elevate them by rolling them in shredded coconut, chopped nuts, or a drizzle of melted dark chocolate for an extra decadent touch. Consider serving them alongside a glass of almond milk or your favorite protein shake.
We’ve explored some wonderful variations, but feel free to experiment further. Adding a pinch of cinnamon or a splash of vanilla extract can enhance the flavor profile. For a nut-free option, substitute sunflower seed butter for peanut butter. The possibilities are truly endless with these adaptable Brookie Protein Balls. We hope you enjoy making and sharing them as much as we do!
Frequently Asked Questions about Brookie Protein Balls:
How long do Brookie Protein Balls last?
When stored in an airtight container in the refrigerator, Brookie Protein Balls will stay fresh and delicious for up to a week. You can also freeze them for longer storage; simply place them in a freezer-safe bag or container, and they will last for up to two months. Thaw them in the refrigerator before enjoying.
Can I make Brookie Protein Balls without protein powder?
While protein powder is a key ingredient for boosting the protein content of these Brookie Protein Balls, you can adapt the recipe if needed. You could try replacing the protein powder with an equal amount of oat flour or almond flour, but be aware that this will alter the nutritional profile and may require slight adjustments to the liquid content to achieve the right consistency.
What kind of protein powder works best for Brookie Protein Balls?
Most types of protein powder will work well in these Brookie Protein Balls, including whey, casein, or plant-based options like pea or brown rice protein. Unflavored or vanilla-flavored protein powders are often preferred to avoid overpowering the classic brookie flavors. Experiment with your favorite brand to find what you like best!
Brookie Protein Balls – Healthy No-Bake Snack
These no-bake Brookie Protein Balls combine the delicious flavors of brownies and cookies into a healthy, easy-to-make snack. Perfect for a quick energy boost or post-workout treat.
Ingredients
-
1 cup drippy cashew butter
-
1/2 cup vanilla pea protein
-
1/4 cup maple syrup
-
2 tablespoons milk of choice (almond, oat, or dairy)
-
1 teaspoon vanilla extract
-
1/4 cup chocolate chips (dairy-free if preferred)
-
3 tablespoons cacao powder
Instructions
-
Step 1
In a medium mixing bowl, combine the drippy cashew butter, maple syrup, milk of choice, and vanilla extract. Mix vigorously until thoroughly combined and smooth. -
Step 2
Add the vanilla pea protein powder and cacao powder to the bowl. Gently fold the dry ingredients into the wet mixture until just combined, aiming for a cohesive dough-like consistency. -
Step 3
Gently fold in the chocolate chips, distributing them evenly throughout the mixture. Be careful not to mash them. -
Step 4
Lightly dampen your hands with water or a small amount of neutral oil. Roll about one tablespoon of the mixture at a time into small balls, about 1 to 1.5 inches in diameter. Place on a parchment-lined plate or baking sheet. -
Step 5
Refrigerate the rolled balls for at least 30 minutes to firm up. Once chilled, they are ready to be enjoyed.
Important Information
Nutrition Facts (Per Serving)
It is important to consider this information as approximate and not to use it as definitive health advice.
Allergy Information
Please check ingredients for potential allergens and consult a health professional if in doubt.