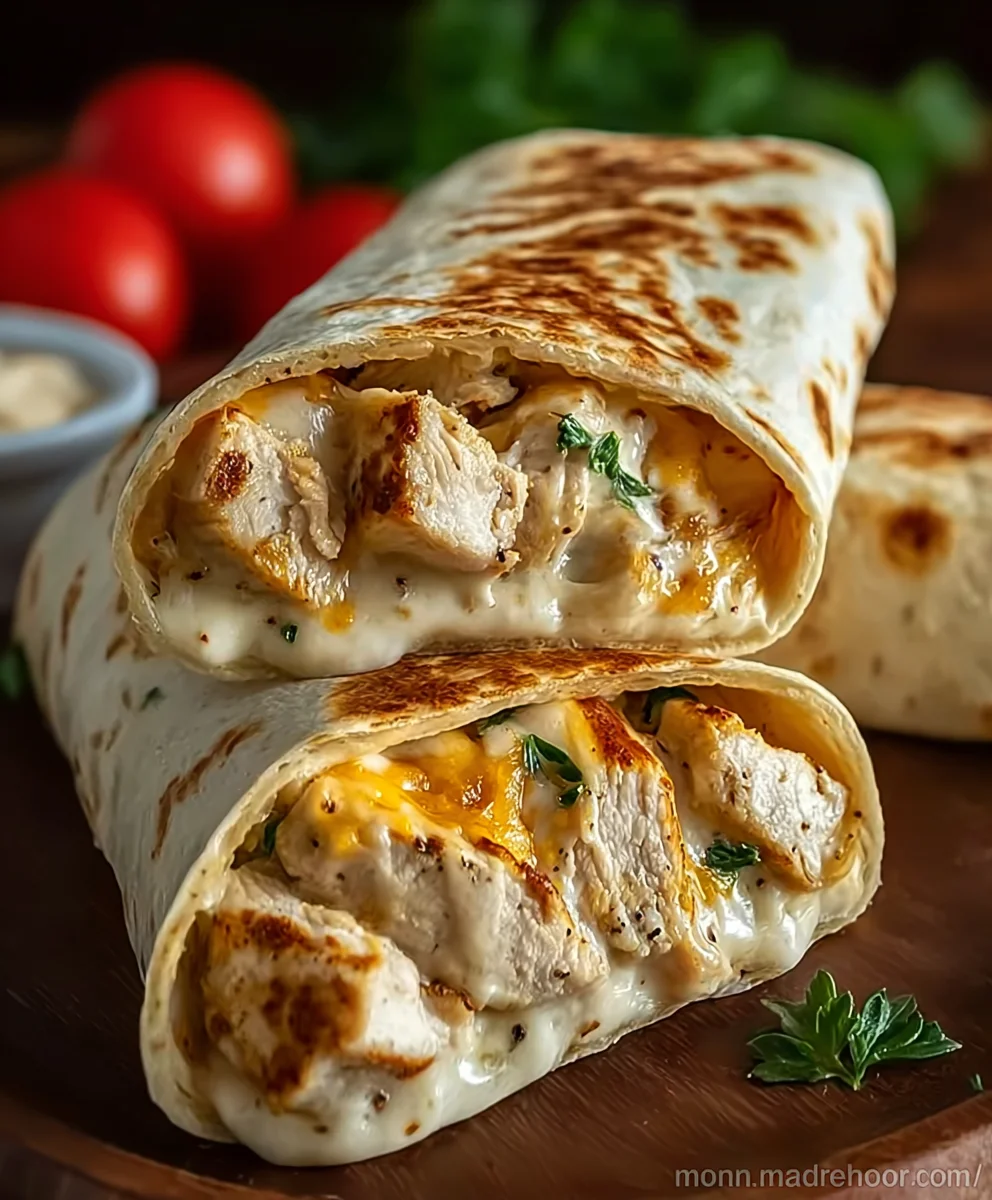
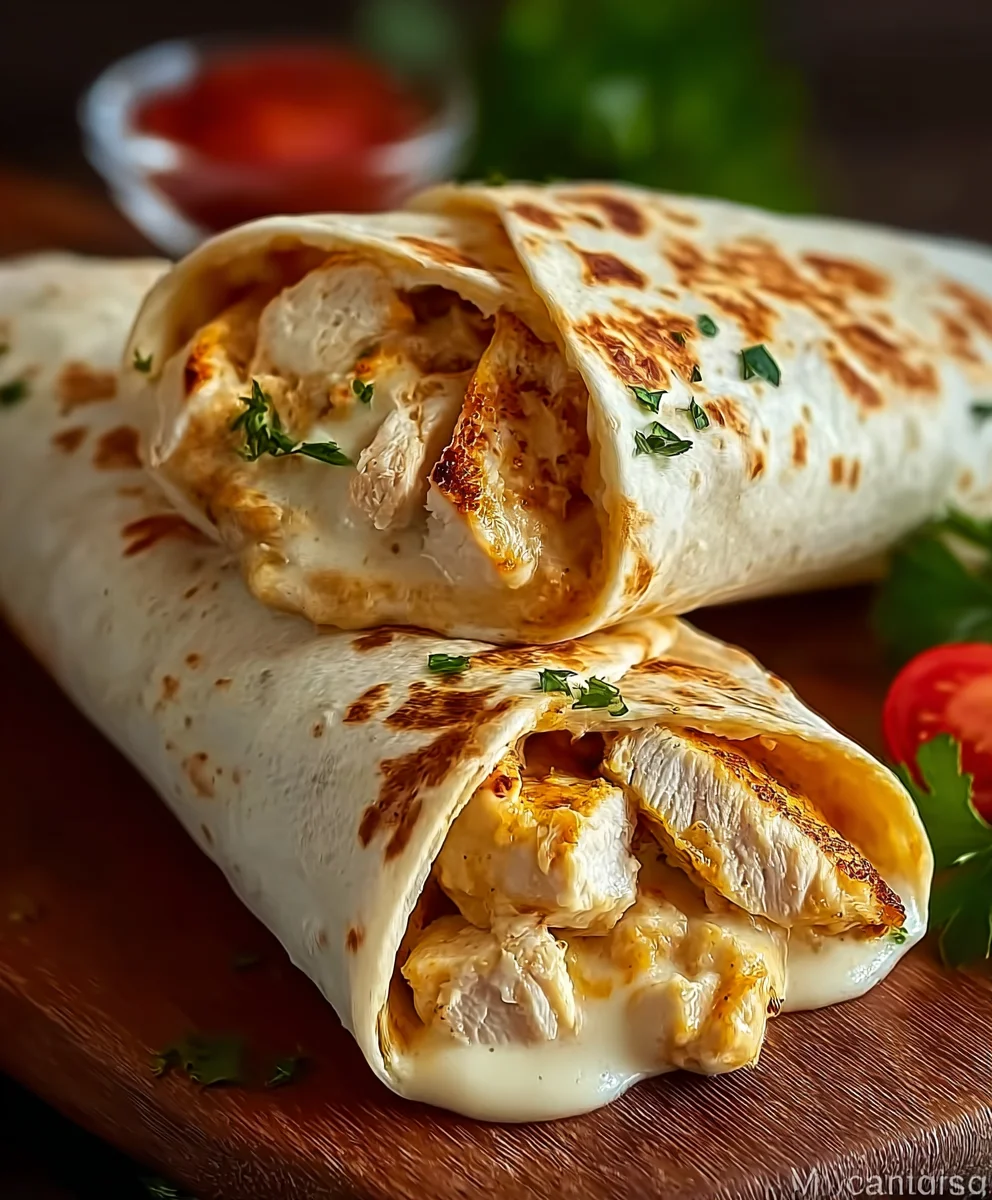
Cheesy Chicken Garlic Wraps – Easy & Delicious
Cheesy Chicken Garlic Wraps are the ultimate weeknight dinner savior, transforming simple ingredients into an explosion of flavor that will have everyone at the table asking for seconds. There’s something undeniably comforting and utterly delicious about the combination of tender, seasoned chicken, a symphony of aromatic garlic, and the irresistible pull of melted cheese, all hugged by a warm, pliable tortilla. What truly sets these Cheesy Chicken Garlic Wraps apart is the perfect balance of savory, creamy, and slightly pungent notes, making each bite a delightful experience. They’re incredibly versatile, too – customize them with your favorite veggies or a spicy kick. Whether you’re a seasoned cook or just starting out in the kitchen, this recipe is designed to be straightforward, yielding fantastic results every time. Get ready to discover your new go-to meal!
Ingredients:
- 2 large chicken breasts, diced into bite-sized pieces
- 4 large flour tortillas
- 1 tablespoon olive oil
- 2 teaspoons garlic powder
- 1 teaspoon onion powder
- 1 teaspoon paprika
- Salt, to your preference
- Freshly ground black pepper, to your preference
- 1 cup shredded cheddar cheese
- 1/2 cup shredded mozzarella cheese
- 1/2 cup creamy garlic sauce
- Fresh parsley, chopped, for garnish and flavor
Preparing the Chicken
Sautéing the Chicken
- Begin extract by preparing your chicken. Ensure it’s diced into uniform, bite-sized pieces. This helps with even cooking.
- In a large skillet, heat the 1 tablespoon of olive oil over medium-high heat. The oil should shimmer slightly when it’s ready.
- Add the diced chicken to the hot skillet. Spread the chicken out in a single layer as much as possible to allow it to brown nicely.
- Season the chicken generously with salt and pepper. Then, sprinkle in the 2 teaspoons of garlic powder, 1 teaspoon of onion powder, and 1 teaspoon of paprika. These spices will infuse the chicken with wonderful flavor as it cooks.
- Stir the chicken occasionally, ensuring all sides are cooked through and have developed a golden-brown color. This usually takes about 6-8 minutes, depending on the size of your chicken pieces. You want to make sure there’s no pink remaining in the center.
- Once the chicken is fully cooked and nicely browned, remove it from the skillet and set it aside on a plate. We’ll be adding it back later.
Assembling the Wraps
Warming Tortillas and Adding Fillings
- Now it’s time to get your tortillas ready. You can warm them slightly to make them more pliable and easier to roll. You can do this by gently heating them in a dry skillet over low heat for about 30 seconds per side, or by wrapping them in a damp paper towel and microwaving for 20-30 seconds.
- Lay one warm tortilla flat on a clean surface. Spread about 2 tablespoons of the creamy garlic sauce evenly across the center of the tortilla, leaving a small border around the edges. Don’t overdo the sauce, as it can make the wrap soggy.
- Next, sprinkle about 1/4 cup of the shredded cheddar cheese and a couple of tablespoons of the shredded mozzarella cheese over the garlic sauce. The cheese will start to melt from the residual heat of the tortilla and the chicken.
- Now, place about half of the cooked chicken mixture over the cheese. Try to distribute it evenly across the tortilla.
- Sprinkle a little more of the shredded cheddar and mozzarella cheese on top of the chicken. This extra cheese will help bind everything together when it melts.
- Finally, sprinkle a little of the fresh chopped parsley over the filling for a burst of freshness and color.
- To roll the wrap, fold in the two sides of the tortilla towards the center, then tightly roll up from the bottom. The melted cheese will help seal the edges. Repeat this process for the remaining three tortillas.
Finishing Touches
Melting the Cheese
- Once all your wraps are assembled, you can place them back into the skillet used for the chicken, or a clean one, over medium-low heat.
- Cook each wrap for 2-3 minutes per side, or until the tortillas are lightly golden brown and slightly crispy, and the cheese inside is fully melted and gooey. This step is crucial for ensuring all the flavors meld together perfectly and the cheese is wonderfully melted throughout.
- Alternatively, you can place the assembled wraps on a baking sheet and bake them in a preheated oven at 375°F (190°C) for about 8-10 minutes, or until the cheese is melted and the tortillas are lightly toasted.
- Remove the wraps from the skillet or oven.
- Allow the Cheesy Chicken Garlic Wraps to cool for just a minute or two before slicing them in half diagonally, if desired.
- Garnish with a little extra fresh chopped parsley for an attractive presentation and an extra hint of herbaceous flavor.
Conclusion:
There you have it – the ultimate guide to creating delicious and satisfying Cheesy Chicken Garlic Wraps! We’ve walked through each step, from preparing the tender chicken to assembling these flavor-packed delights. These wraps are incredibly versatile and can be enjoyed as a quick weeknight dinner, a hearty lunch, or even a crowd-pleasing appetizer. Don’t be afraid to get creative and make them your own!
For serving, consider a side of crisp salad with a light vinaigrette, some seasoned sweet potato fries, or a simple bowl of fresh fruit. The richness of the cheesy chicken is wonderfully balanced by lighter accompaniments. When it comes to variations, the possibilities are endless. Try adding a sprinkle of fresh herbs like parsley or chives to the filling, or introduce a touch of heat with some diced jalapeños or a drizzle of sriracha. You can also experiment with different cheeses – a sharp cheddar or a smoky gouda would be fantastic additions. I encourage you to experiment and discover your perfect combination. Happy wrapping!
Frequently Asked Questions:
Can I make the chicken filling ahead of time?
Absolutely! The cheesy chicken garlic filling can be prepared up to 2 days in advance and stored in an airtight container in the refrigerator. This makes assembling the wraps even quicker when you’re ready to serve them.
What kind of tortillas work best for these wraps?
Most standard-sized flour tortillas will work beautifully for Cheesy Chicken Garlic Wraps. You can also opt for whole wheat tortillas for a healthier alternative, or even use large lettuce leaves if you’re looking for a gluten-free option.
Cheesy Chicken Garlic Wraps – Easy & Delicious
These Cheesy Chicken Garlic Wraps are incredibly easy to make and packed with delicious flavor. Featuring seasoned chicken, creamy garlic sauce, and melted cheeses all wrapped in a warm tortilla, they’re perfect for a quick lunch or dinner.
Ingredients
-
2 large chicken breasts, diced
-
4 large flour tortillas
-
1 tablespoon olive oil
-
2 teaspoons garlic powder
-
1 teaspoon onion powder
-
1 teaspoon paprika
-
Salt and pepper, to taste
-
1 cup shredded cheddar cheese
-
1/2 cup shredded mozzarella cheese
-
1/2 cup creamy garlic sauce
-
Fresh parsley, chopped
Instructions
-
Step 1
Dice chicken breasts into bite-sized pieces. Heat olive oil in a skillet over medium-high heat. Add chicken and season with salt, pepper, garlic powder, onion powder, and paprika. Cook until browned and cooked through, about 6-8 minutes. Remove chicken from skillet and set aside. -
Step 2
Warm the flour tortillas slightly. Lay a warm tortilla flat. Spread about 2 tablespoons of creamy garlic sauce over the center, leaving a border. Sprinkle with cheddar and mozzarella cheese. -
Step 3
Add about half of the cooked chicken mixture over the cheese. Sprinkle with more cheddar and mozzarella cheese, and some chopped fresh parsley. -
Step 4
Fold in the sides of the tortilla towards the center, then tightly roll up from the bottom. Repeat for remaining tortillas. -
Step 5
Place wraps seam-side down in the skillet over medium-low heat. Cook for 2-3 minutes per side until golden brown and crispy, and cheese is melted. Alternatively, bake at 375°F (190°C) for 8-10 minutes. -
Step 6
Remove wraps from skillet or oven. Let cool slightly, then slice in half diagonally. Garnish with fresh parsley.
Important Information
Nutrition Facts (Per Serving)
It is important to consider this information as approximate and not to use it as definitive health advice.
Allergy Information
Please check ingredients for potential allergens and consult a health professional if in doubt.